2013 Chalk the Walk Festival

201305-53w


Every year the small town of Mount Vernon, about 10 miles east of Cedar Rapids, has an art festival called “Chalk the Walk”. Over the weekend of the fest the City of Mount Vernon closes off two blocks of the main street. Artists decorate an 8×10 foot area of the pavement with a subject of their own choosing in the Madonnari style. There is also a communal piece of art that everyday people can help produce. It is larger than the others. Because of its size, I could not get a picture of it.

When we first started to go to the fest, we went the first day. What we discovered was that practically none of the pictures were done then. They were only just started. I recommend you go in the last couple of hours of the show on Sunday afternoon. Only the ones that people gave up on aren’t done by then.

I took as many pictures of the artwork as I could. If you take a look at the last photo in this blog entry, you will get an idea of how the artworks in this exhibition look from normal eye level. When I got home from the fest, I cropped the photos and expanded them to 8×10 proportions in Photoshop.

So, in no particular order, here is what we saw…

z2013CTW-01w
z2013CTW-07w z2013CTW-06w z2013CTW-05w z2013CTW-04w z2013CTW-03w z2013CTW-02wz2013CTW-08w


Posted in Daily life | 2 Comments

So this is Geezerville!

Hearing-aid

I have been hurtling down this highway for some time now, but yesterday I officially arrived in Geezerville. Late in the morning I took possession of a couple of hearing aids. I have had hearing loss for quite a while which I attributed to an exploding bicycle tire many years ago. But the audiologist thought it was just old age that was to blame.

I have fairly normal hearing in the low frequencies, up to about 1000Hz. Then it falls off sharply and plateaus in the higher frequencies at about 60dB.

In the picture above you can see that the hearing aids are practically invisible, just a tiny wire that runs around the top front of my ear. The main circuitry is hidden behind my ear and the speaker is hidden inside my ear. They thoughtfully ordered a color that more or less matches my hair, grey.

When she first put them in I thought they sounded kind of ringy and tinny, but she said that was normal and that I wouldn’t notice it after a little while. She was right. I also felt like I was in some sort of bubble. That went away too. All those sensations come back when I have had them out for a while, like when I am asleep, but quickly disappear after a minute or two.

When I arrived home I got out of the van and was amazed by the sound of a leaf skittering across the drive way. I can easily hear people talking in the next room, which would have been impossible before. Last night we went to a restaurant which has always been a very difficult place for me to hear. It wasn’t perfect. I was still fairly challenged to hear things, but it was better I’ll have to admit.

I can get a couple of really neat techno-gadgets, but the audiologist suggested I wait a couple of weeks because she thought I may not even need them. One was a lapel mic that links up to my smartphone and turns the hearing aids into a bluetooth receiver. Another is for doing the same thing with the TV. I can control the volume independent of how loud others are listening. The last do-dah is a mic that transmits directly to my earpieces. Presumably it is to be worn by Karen. That device is a non-starter.


Posted in Autobiography, Daily life | 6 Comments

Another Dick Pinney Mural

Rachel came to stay with us this weekend. On the way home from picking her up we stopped at the Herbert Hoover Presidential Library in West Branch. We thought they had a Laura Ingalls Wilder display that Rachel would like. But it turns out they are just the repository of her collection. Never-the-less, we had a look around the museum anyway. To our surprise, there was a Dick Pinney mural in the lobby. Longtime readers of this blog know that Rachel and I have been visiting and documenting Dick Pinney murals since 2008. I don’t think I knew about this one.

The lobby was narrow and the mural was wide so I had to take it in sections. Sorry for the obvious splice.

Dick Pinney mural at the Herbert Hoover Presidential Library, 2012

Later that afternoon we went to see the movie ParaNorman. It was ok but not great.

On Sunday we went to the Czech Museum to see the Alphonse Mucha exhibit. This is the largest one of its kind in the word. Even bigger than the one in Prague. This was my third time to see it so far. We get in for free, now that we are members of the museum. While Karen and Rachel were looking at the pictures, I went to a couple of the other galleries they had on display. One was Children’s book illustrations and the other was how they restored many of the Czech folk costumes that were damaged in the flood of 2008. I caught up with them in the Mucha gallery since the things I saw were only small displays.

After the museum we took Rachel home. She was greeted by their new puppy, Lola. I’m sure there will be more about her in the future.

Posted in Family | 2 Comments

Kitchen Remodel – 7

Our kitchen is finally done!

I know it has been a long time since I posted an update, but there was not a lot of progress for a while and I wanted to have everything finished before I wrote this. The last week or so before we finished, we were waiting for some parts and the electricians to have time to break away from a much bigger job to finish our small project up.

We had planned a trip to visit Wendy and I suggested to our contractor, Tom, that it would be great to have it finished before we left. It ended up, the last work was done in the morning of the day we left for California.

We were gone a week and one thing has led to another since then so it is only now that I can show you how the final project looks.

So here it is…

The sink side

The sink side looking north

The stove side looking north

The stove side looking south

All in all, we are very happy with it. There is so much more room to walk and there is a ton of new counter space to prepare things. The stove and microwave have so many fancy gadgets in them, we are having to learn to cook  all over again.

Karen: This is the first time we have had a full-sized microwave. The rest of you are probably used to this stuff but I love the soften/melt feature that lets you soften butter, cheese and ice cream perfectly without a runny mess. Also love that we can thaw frozen meat without cooking it. It differentiates between chicken, meat, and fish and does the thawing just right. The microwave has a vent fan and light that is perfect for cooking on the stovetop but what I really love is this sexy moody light that is “night mode.” It doesn’t take much to please me!

Our stove came with a griddle/grill across the bridge burner which I have found many uses for it – sandwiches, French toast, and grilled meats. It also has a convection oven that adjusts recipes for the right amount of time. It has bread making features which I have not used (a rising drawer and other things) and a temperature probe which is hooked to the oven for roasts and big birds. I have tried to read up but we don’t cook big pieces of meat that often!

The new stove

The sink is nice too. When we bought it, it only had three holes to put in the faucet and other controls. The electrician and plumber were tossing responsiblity for drilling the other two holes back and forth between themselves and neither of them was willing to commit to it. Finally, the carpenter said he would do it and presto-chango it was done. You can see a small button to the left of the faucet. That is an on/off switch for the garbage disposal. We didn’t know such things exitsted till we went shopping for sinks. When we saw it, we knew it was just the ticket because we had no place to put a normal switch anywhere. We bought all new counter top appliances too so they would present a uniform brushed steel theme.

The new sink

One of the problems on the window side was the counter came right up to the bottom of the windows. That left no room for any wall plugs. The building code does not allow you to mount your plugs flat on the counter because water could run into them if you had a spill. In the old house I had used some plug molding in our bathroom and I knew that would be just the ticket. We knew we wanted black so it blended in with the counter, but as we looked around we discovered that getting exactly what we wanted was going to be a trick. There were only certain lengths available but that worked out fine. And we could only get it with plug spacing every 6 inches, not the 12 inch spacing the electrician recommended. So on the stove side we now have 17 plugs and on the sink side we have 30. The electrician said we would get used to having that many real quick. He also warned us that it would not be a good idea to use all 47 of them at the same time!

The plug molding

Another problem was how we were going to light the room. The old lighting was attached to the ceiling boards you can see in the picture below. All the electricity to the fixtures came from the center island that we had removed at the beginning of the project. Since there are no rafters because of the way our house is built, there was no way to string new wiring between the beams. The answer was track lighting. We ran the wires to the new fixtures along the bottom of the beam you can see the fan hanging from. Then we added a hollowed out piece of trim to hide the wires. It turned out just like it was supposed to look that way all along. The track lighting allows us to focus light on the areas we work and there is enough ambient light to brighten up the room. If we need even a little more we can turn on the fan’s light.

The fan turned out to be kind of a quest for us. Karen went on line to see if she could find one to match the fan in our living room. It has a modern look that we like and having the two the same would be a plus. She ended up finding ones on the internet but the style is a few years old and every time she ordered one, they said it would ship but they always ended up cancelling the order. It took her 3 times to find a distributer that actually had one new in stock. The blades did not match the color of the fan in the living room, but they did match our kitchen cabinets almost perfectly. Good things come to those who wait.

The fan and track lighting

Karen: The whole project was 11 weeks from the demolition until the final trim piece was finished. That seems like a long time but we actually could use it after 8 weeks which is not too far off what we had anticipated. It was an adventure to say the least. There were some pretty trying days like when they had to grind the concrete floor for 4 hours straight to make it level enough for the tile, torturing poor Ben; and when they were working on the dry wall with all the dust and mess. Not to mention the week we had a 10 foot and a 6 foot trench in the concrete to leap over until all of the utilities were in.

Overall, the craftsmen who worked in our house did excellent work and were fun to be around.  They told jokes, played fun music, and listened to Butch’s stories. They took the time and care to make our kitchen the way we dreamed it would be. It was all worth it. We hope you all will come see it in person!

Posted in Daily life | 10 Comments

Kitchen Remodel – 6

We had BIG progress this week. Enough that things look almost done, but there is still a long way to go.

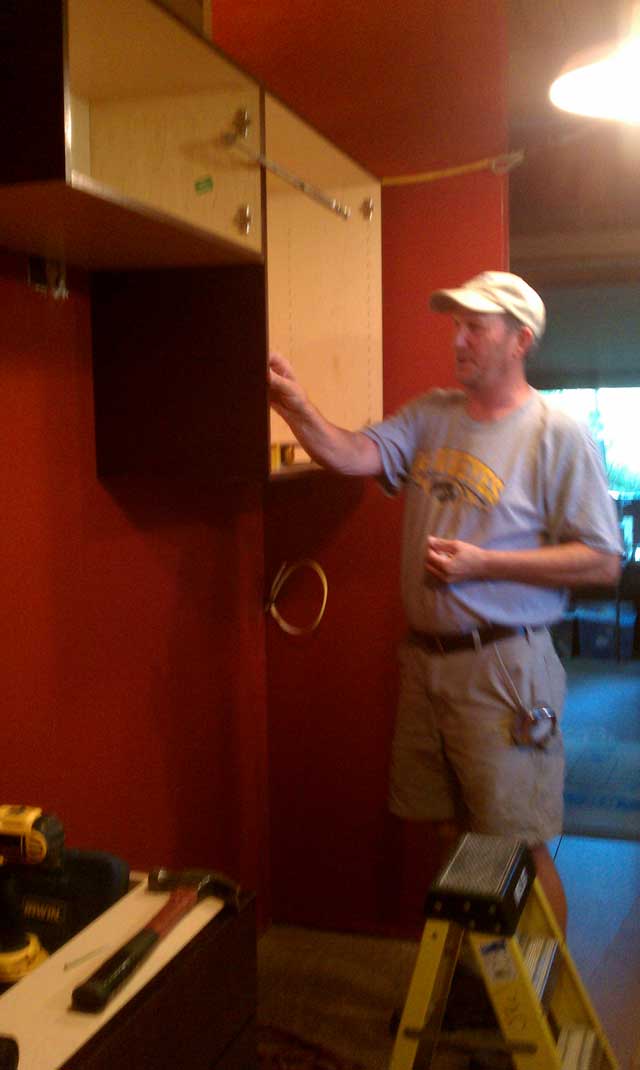
Monday morning the carpenters arrived and started putting in the cupboards and cabinets.

Installing the cupboards

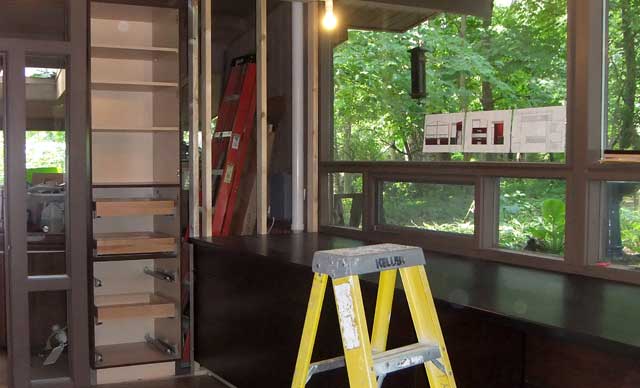
It took them a couple of days to get all of them installed. They also did some rough framing where the pantry is going to be. This will involve some custom work on their part. We decided we could lose a couple of feet of the tub room. The pantry itself which you can see on the left in the photo below is a factory-built item but behind the rough framing they will have to build a cabinet from scratch that will open on the other side. Besides giving us extra storage space, that cabinet will also hide an old electrical switch, a circuit box, and the new sink stack. On the kitchen side there will be drywall painted red as we did the other walls.

Cabinets and counter installed

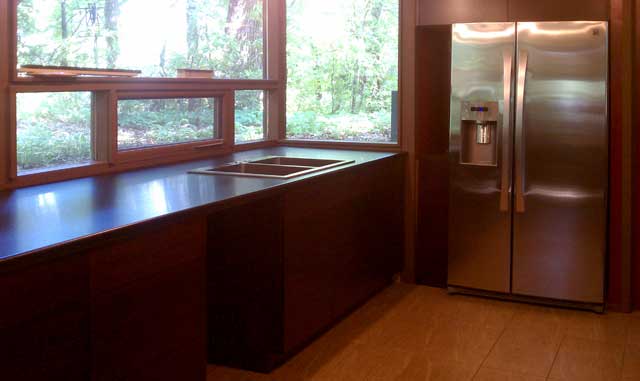
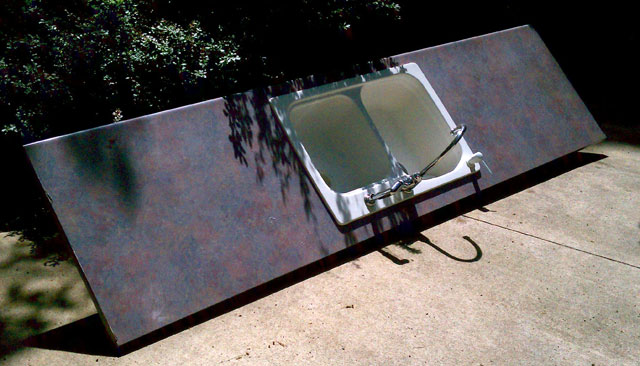
Everyone was off on Wednesday for the Fourth of July, but on Thursday morning the counters arrived. The ones on the stove side were no big deal, but the window side counter was 3 feet wide by 16 feet long. It took 4 men to carry it in and put it in place. The sink, unfortunately, is not really installed but just set in place. We would kill for a working sink about now! It seems like we have a wonderful acre of counters which will be perfect for Gourmet Club dinners. Can’t wait.

In the afternoon the appliances were delivered. The delivery guys could install the refrigerator but not any of the other things. The fridge leans a little to the right and there is no easy way to level it. We are not too happy about that but probably something can be worked out. Other than that, it only had to be plugged in and have the water connected. It is more or less functional now and we have been running it. We have refrained from filling it up because it will still need to have a few final adjustments and we don’t want to make pulling it out any more difficult than it needs to be.

Refrigerator in, sort of

The rest of the day and Friday the counters were screwed down and trim pieces, like the fillers on the ends of the cabinets and the toe kicks, were installed. We anticipated having the dishwasher and stove installed the next Monday, so late in the afternoon the plumber came to install the connections for the dishwasher.

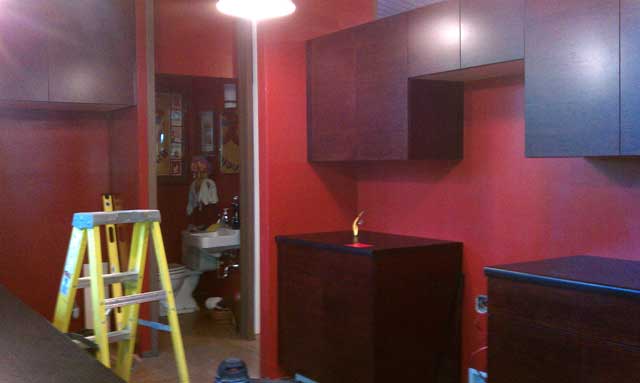
Stoveside cupboards

On the stove side, the cupboards and cabinets are all in, but the counters are not screwed down yet because we want to put in a stainless steel backsplash.

We would like to get the appliances put in as soon as we can. Everything looks so finished that we are ready to have it all work. There is a ton of little stuff left to do though and that will be the topic of the next blog entry.

Posted in Daily life | 3 Comments

Kitchen Remodel – 5

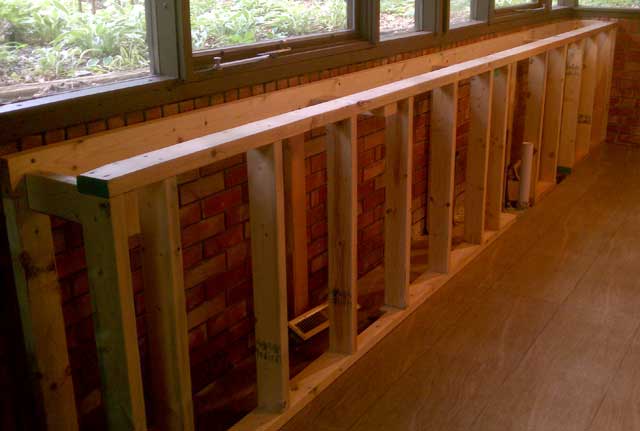
With the new floor in, the first order of business was to install a support wall underneath the windows. This wall serves three purposes; to anchor the cupboards, to move the cupboards out from the wall far enough to hide the brick wall that you can just see in the upper right of the picture below, and to provide a place for running the new plumbing and electricity.

Support wall

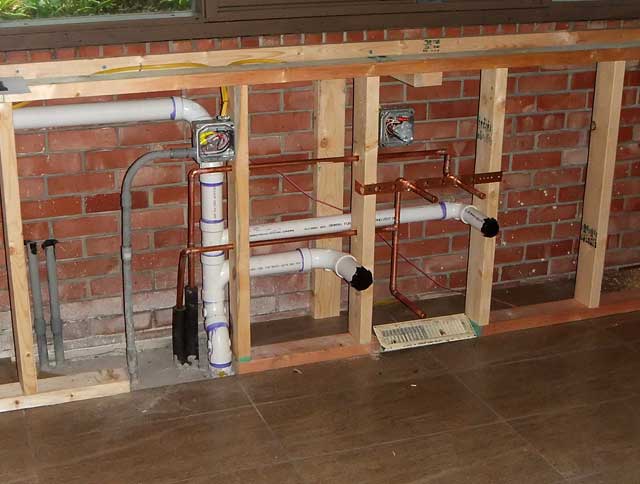
Most of the new utility work is behind where the dishwasher and sink will be located. We had to run the stack for the new drain off to the left so it could come through the roof in the tub room. Otherwise it would have been out in plain view in front of the windows. One of the first things we did when we started this project was to make sure the plumbing inspector would even allow the venting to be done this way.

The building inspector came by to have a look at all the framing and make sure it was up to code. He was the third inspector we have had so far; plumbing, electricity and building.

Plumbing connections

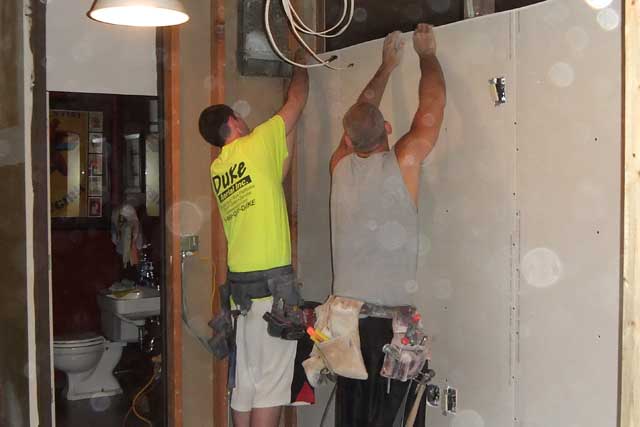
After the inspector gave his approval, the drywallers arrived. They had to cover up all the places where the old sheetrock was removed to allow for the installation of the new utilities. Ironically, the new wall did not have to be plastered because it will be completely hidden by the new counter and cabinets.

Installing the dry wall

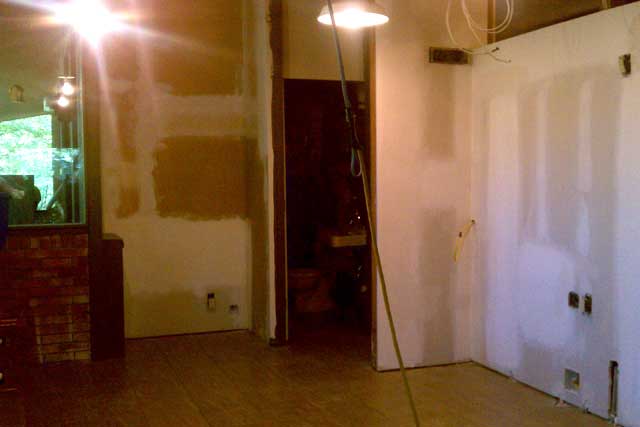
When they were done, the finisher came. He taped all the joints and put on the first coat of spackling. He had to let that dry but he was back the next day to sand the plaster’s edges and apply any touch up work that needed to be done.

The finished drywall

While this was going on the plumber returned and with the roofing contractor they made sure the new openings in the roof were sealed properly. I also had the plumber remove the last bit of the old vent stack. He was able to cut off most of it with a reciprocating saw, but  to get it flush with the ceiling he borrowed my angle grinder with a cut-off blade. You could see a “footprint” of where the the old wall had been. We plan to hide the scars with some trim  that will sort of look like a structural element. That’s why the pipe had to be flush.

When everyone was gone, Karen got to work painting all the new wall surfaces and the old ones that were now exposed. We chose a red color that was the same as the paint in the little power room just off the kitchen. That poor little room has been doing double duty as a source of water and a place to do the dishes. It turned out to be a lot more surface area than we anticipated and Karen was running low on paint by the time she was done.

Cutting the old vent stack and painting the drywall

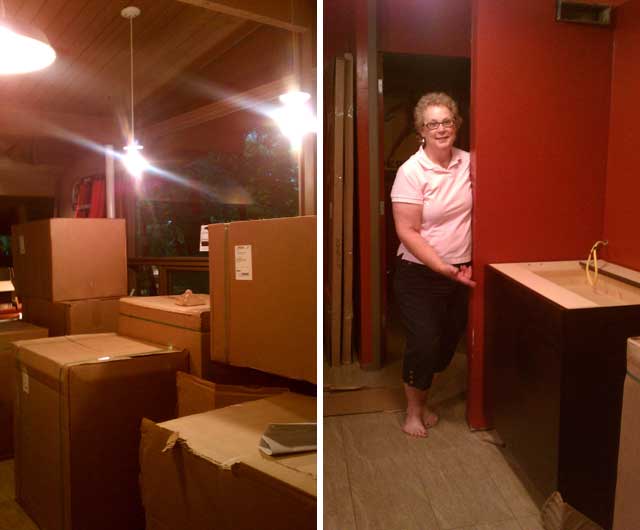
On the Friday, June 29th, the cupboards arrived and when everything had been brought in, the kitchen was chock-a-block full. We asked the contractor if we could open one of the cartons so we could see what things looked like. Karen gives you a preview of things to come.

Cabinets in boxes and Karen shows off the new cupboard

Posted in Daily life | 9 Comments

Kitchen Remodel – 4

Some of you have been curious about how we are making out without a kitchen five weeks into our project.

A few days before the demolition was scheduled to begin, we started boxing up all the things in our cupboards and drawers. We normally drain the hot tub about this time of year so we did that and put as many of the boxes as we could fit, inside the tub. That only amounted to about half of them. We put the cover back on the tub and got a 4’x8′ sheet of plywood from my shop to put over the cover and protect it. Lastly, we got a plastic table cloth out and covered the plywood. So far so good. The last of the boxes were put on the back of the cover and anywhere else they could fit.

We were still packing the last of the things when the demolition crew arrived but we got our part done in short order and didn’t cause them any inconvenience. The first thing we had them do was move the refrigerator into the tub room. While we were content to get rid of all the other appliances, the fridge was going to be necessary for us to prepare food during the time that things were disrupted. We are debating if we will move it to the basement once the project is complete but the jury is still out on that yet.

We thought there would be a few ways that we could still cook conveniently. We have a nice propane camp stove, a couple of crock pots, a toaster oven, and a microwave. The sink would be a problem, but we have a small one in the adjoining powder room so as long as we keep at the washing and drying, the dishwashing shouldn’t be too bad.

The basic configuration looked like this…

The basic kitchen layout

Here is what our “new” range looked like…

The propane stove

And here is the toaster oven…

The toaster oven

The last is the food preparation area, just to the left of the propane stove. As time has gone on, we have had more and more encroachments on this space and it is getting harder and harder to use.

The food preparation area

If we really wanted to make this work, we could do it of course. But sometimes we haven’t remembered to get something out of the freezer or as suppertime arrives and we realize that we haven’t had the meal cooking in the crockpot all day. We often knuckle under and go out and get something to eat. One week we went to two different Indian restaurants. The House of India was more of a formal restaurant than we had expected but their Korma was excellent. The other one was the Taj Mahal. It serves a buffet on Friday, Saturday, Sunday, and Monday nights. We like that because they have about 15 or 20 different things to try and we like most of them. If you have to order off the menu, you either lose out on variety or you spend a fortune to get several selections.

Oftentimes we try to cook more than a couple of servings. That way we can put the extras away for a future meal. We measure out individual portions and put them into baggies. Then we pop them into the freezer. If you want a quick lunch, you just get one out, break it up, put it in a bowl, and 3 minutes later you are having your meal. Easy peasy!

All in all we are starting to suck at this and are more than ready to have the whole thing over with.

Posted in Daily life | 3 Comments

Kitchen Remodel – 3

After all the work was done that was described in the last blog entry, the electrical and plumbing inspectors came and gave all the work their blessings. You have to do this while all the work can still be seen.

Next up, repaving the trench. The concrete man arrived and a few minutes later so did a cement truck. He needed to back up the path to my workshop a little so we had to move our car which had been sitting there unused for a while. Wouldn’t you know, it didn’t start and the guy pulled out his jumper cables and gave us a start.

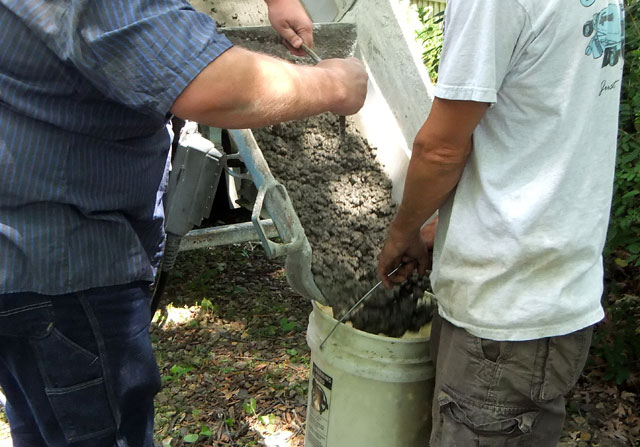
Pouring the cement from the cement truck

I wasn’t sure how he was going to get the cement into the kitchen since the nearest the truck could get was 40 or 50 feet away. Turns out, he had to lug the material in bucket by bucket. I think it probably took him about 40 trips.

Lugging the cement, bucket by bucket

The floor installer asked that the new slab be put in slightly lower than the floor. This was because concrete expands as it cures and can give the surface a bit of a dome by the time it dries. If this happens, the floor people have to grind it flush again. If it’s a little shy, they can put in a finish coat of cement that is thin enough it doesn’t expand and saves a lot of work.

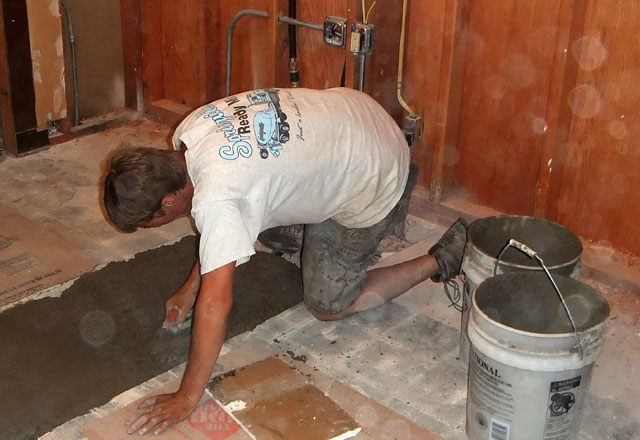
The cement guy would haul about 3 or 4 loads of cement in and pour it in the trench. Then he would trowel it out so it was close to the finished configuration. When he was done bringing everything in, he did the final troweling. And, as requested, he left it about 1/8″ lower than the existing concrete. He said we could walk on it the next morning.

Troweling the cement flat

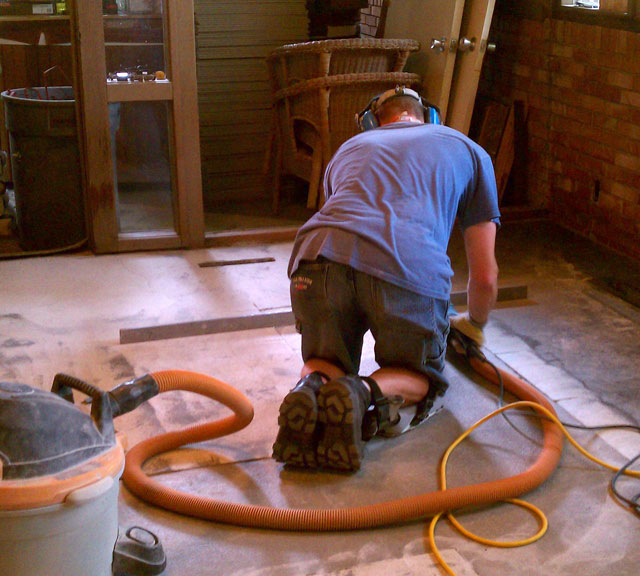
Monday morning the floor installer arrived. His first job was to measure the floor and make sure it was all level. There were two small places where the new cement was just a little high. There were also other places where it was not as level as it could have been. And there was a lot of old grouting and adhesive that had to be removed. Grinding it all level was a terrible job and created a lot of dust which settled all over the house. It also made a lot of noise which drove our grandson Ben frantic. By the end of the day it even made him sick.

Grinding the floor flat

The second day he came back and did the finish cement work and gave the whole floor a coat of some wonder product that needed till the next day to dry too.

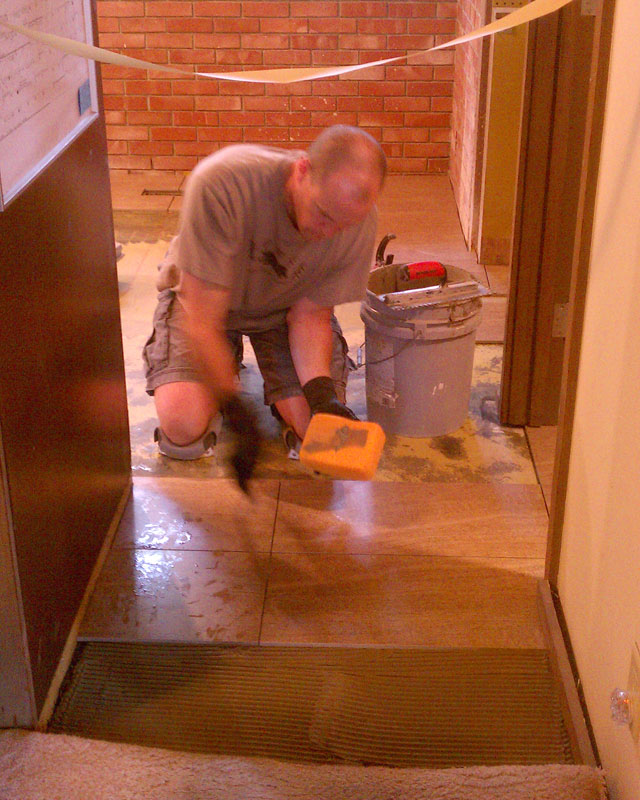
The third day it was time to install the tile. He laid out a grid to keep everything straight and true. He had this nifty laser that kept all the angles exactly 90 degrees.

Squaring the floor with the laser guide

Then he went around and cut all the tiles that had to be a special shape. Ones that had to fit around the end of a wall or around a floor grate. Once he started laying tile, it went pretty fast.

Laying the tile

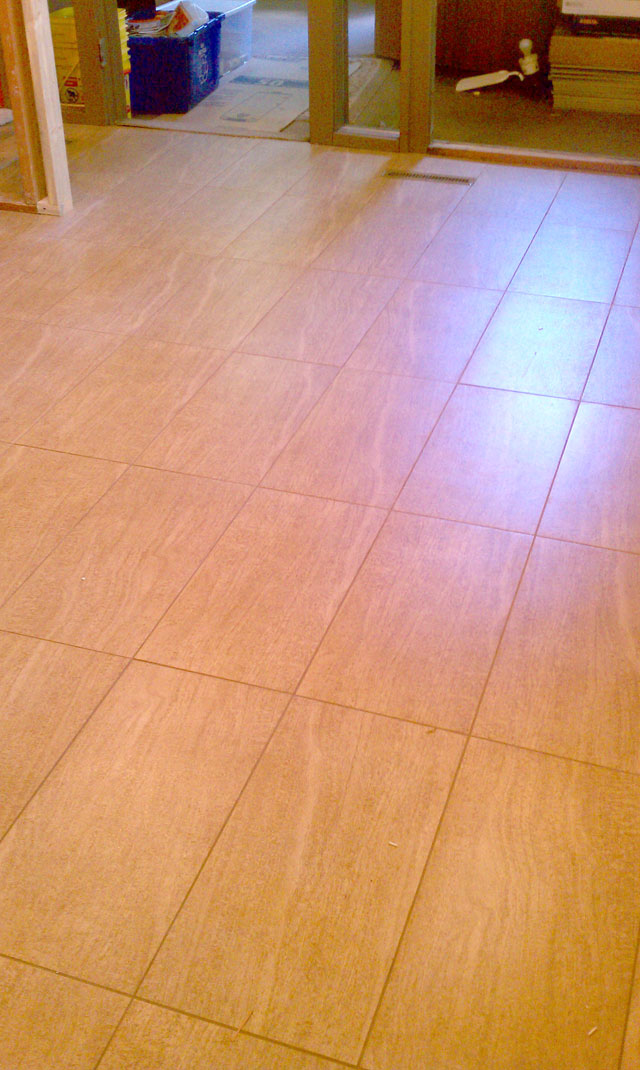
On the last morning he grouted the tile and put a sealer on it. We had our nice new level tile floor.

The finished floor

Posted in Daily life | 7 Comments

Kitchen Remodel – 2

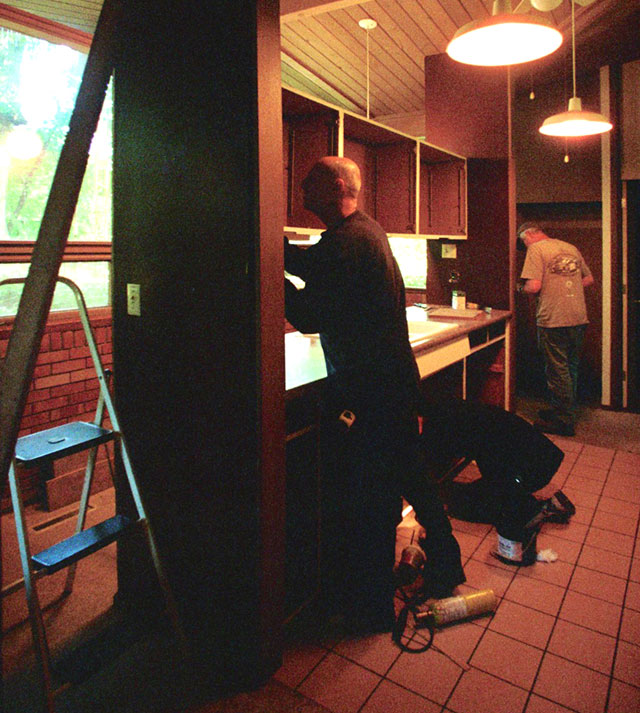
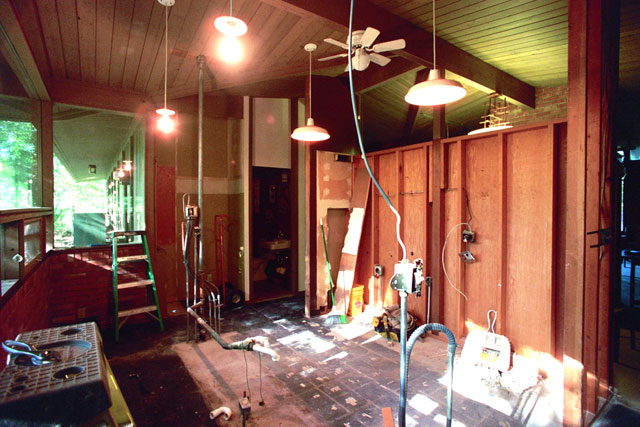
The big day arrives. We thought we might try to do at least some of the demolition ourselves, but as the time grew closer, we asked our contractor for a quote to have the demo done too. The price was reasonable enough so we gave him the go-ahead. We’re glad we did because as the worked progressed, we realized it would have taken us weeks to get the work done. In the end, it only took the workers about 3 hours to do it, and another hour the next day to haul away all the trash.

Demolishing the cupboards

Demolition in progressThe end result

We finally got an idea of how our view out the windows would look.

Looking out our newly revealed windowsWe asked them to try and preserve everything they could so we could donate it to Habitat For Humanity. It turns out that all the original cabinets were custom fit, so none of it could be preserved as salvagable units. They were able to save all the appliances, the “pull-out shelving” from the cupboards and most of the hinge hardware.

When we called Habitat, they said they didn’t want any appliances over 5 years old. I told the lady they were high end models when they were new and that they were in very good shape. She said she would leave it to the driver to decide whether to take them or not. She did want the pull-outs, the hinge hardware, and the counter/sink/faucet combo.

When they guy came, he took all the appliances but said they didn’t have room to store any of the rest of it. Go figure.

As soon as he left, I put the things he didn’t take up on Freecycle. Before I could get the second listing typed up, someone had already responded saying they wanted the pull-outs. Before the day was done, I’ll bet we had 8 or 10 people wanting our stuff. Within 2 days everything was gone and out of here.

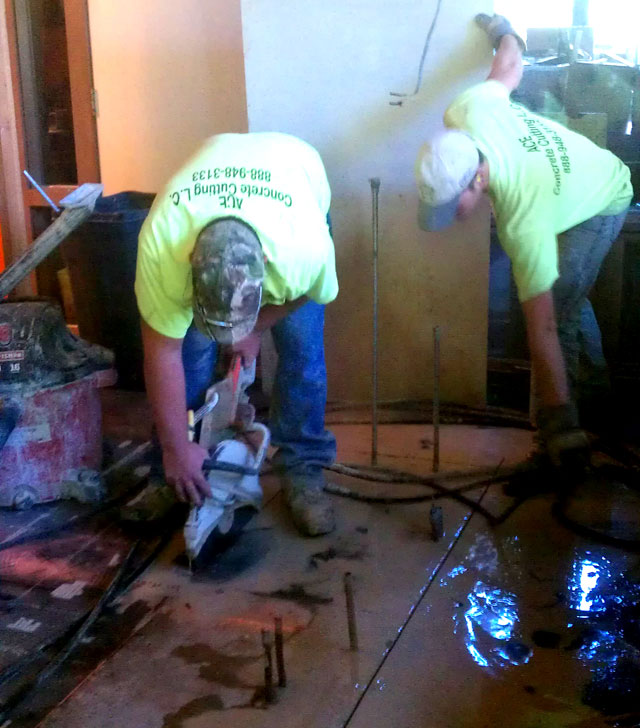
After the floor was completely revealed, the men from the cement cutting company came. The cut a cross-shaped trench that got rid of the old plumbing and electrical lines and opened up the area where the new ones would go.

The saw they used to cut the cement had a hose connected to it that wet the dust that kept the dust down to a more or less reasonable level. Even so, we had a fine layer of dust all over the house. When the outline of the trench was finished, thye cut it into sections so it would be easier to lift the pieces out. Each piece was the width of the trench and about a foot long. They guessed that they weighed about 80 pounds per section. They would carry the pieces on a dolly two at a time and toss them into their truck.

Cutting the floor out

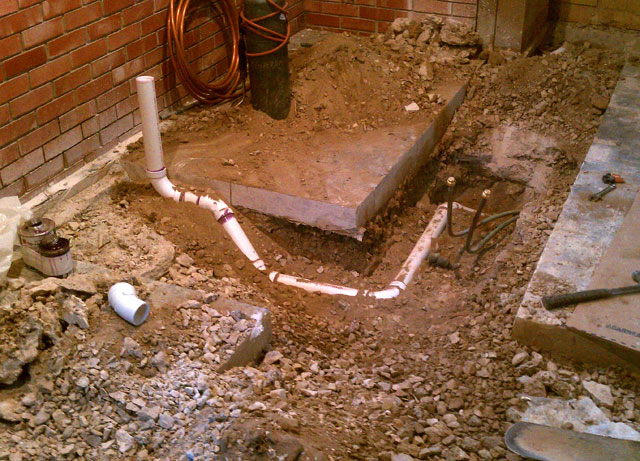
With the trench open, the plumber came and started roughing in the new drain and water line.

The roughed in drain and water

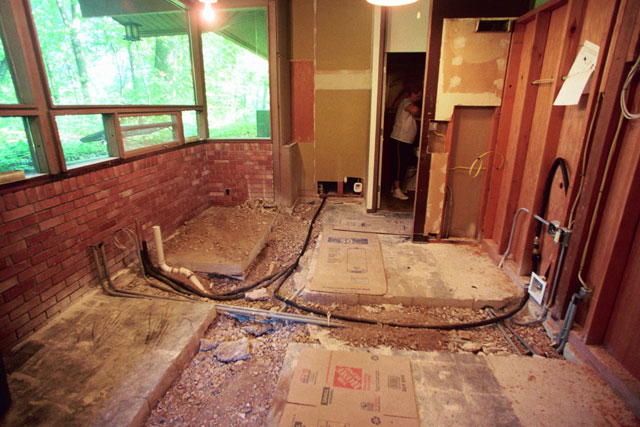
Then the electricians came and installed the wiring. The plumber came once more and put in the new gas line for the stove and extended the water lines to their final locations. We also had the electricians put in two empty conduits in case we ever wanted to add a phone line, computer network, or some future thingamagig we can’t even anticipate at this time. You can see Karen in the background doing dishes in our teeny tiny sink in the powder room.

The final under floor piping

Posted in Daily life | 2 Comments

Kitchen Remodel – 1

We have kicked around remodelling our kitchen for quite a number of years now. This year, we decided to do it. Here is what our kitchen looked like before we started.

The galley workspace

You will notice that the Galley type kitchen is pretty much too narrow. It was never intended for two wide-load toocusses.  And the breakfast bar was never used for that purpose. In fact, it just became a place for us to accumulate stuff we couldn’t decide where to put anywhere else.

Breakfast bar - before

Worst of all, we had this beautiful wall of windows that looked out on our wooded lot that you had to go out of your way behind the breakfast bar to see.

Our friends John and Sue recommended the contractor they used for their kitchen and we contacted him. He recommended others that he normally deals with and over several month’s time, the plan started to emerge. We looked around for new appliances and in the end, we got them from Sears which seemed like the best value and quality that we were going to get.

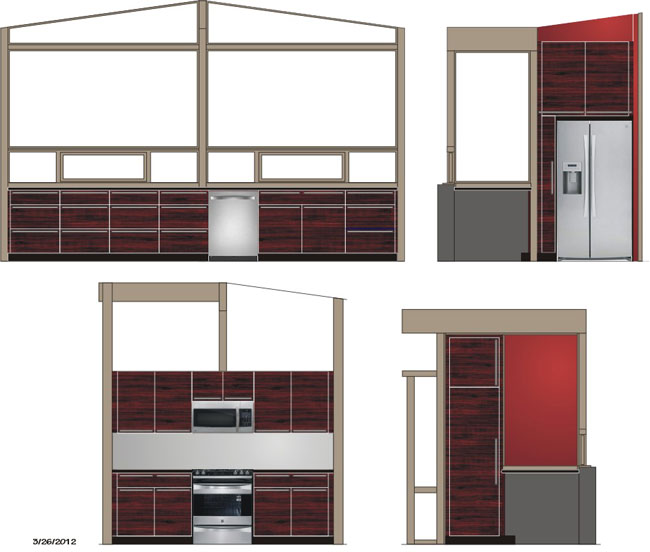
We went to the cabinet store and told them the kind of things we had in mind and our cabinet designer, Jocelyn, came up with a preliminary plan. Even though it pretty much reflected what we told her, it just didn’t seem quite right. And, it cost WAY more that we had in mind. We told her so and she came back with an alternative but it was still too much for us. At that point I broke out my design program and came up with the way we wanted the kitchen to look. You can see the drawings below. Jocelyn recalculated things once again and now had an estimate we could live with.

Posted in Daily life | 2 Comments