
What is the longest project you have ever worked on?
When this topic arrived I sent it to Karen to comment on too. She got Johnny-on-the-Spot and knocked out her story in record time. I put it off however. Her longest project and my longest are actually the same, putting new siding on our house at 3019 Mansfield Ave SE, so I had to come up with another topic for my account. You get two tales for the price of one.
Butch
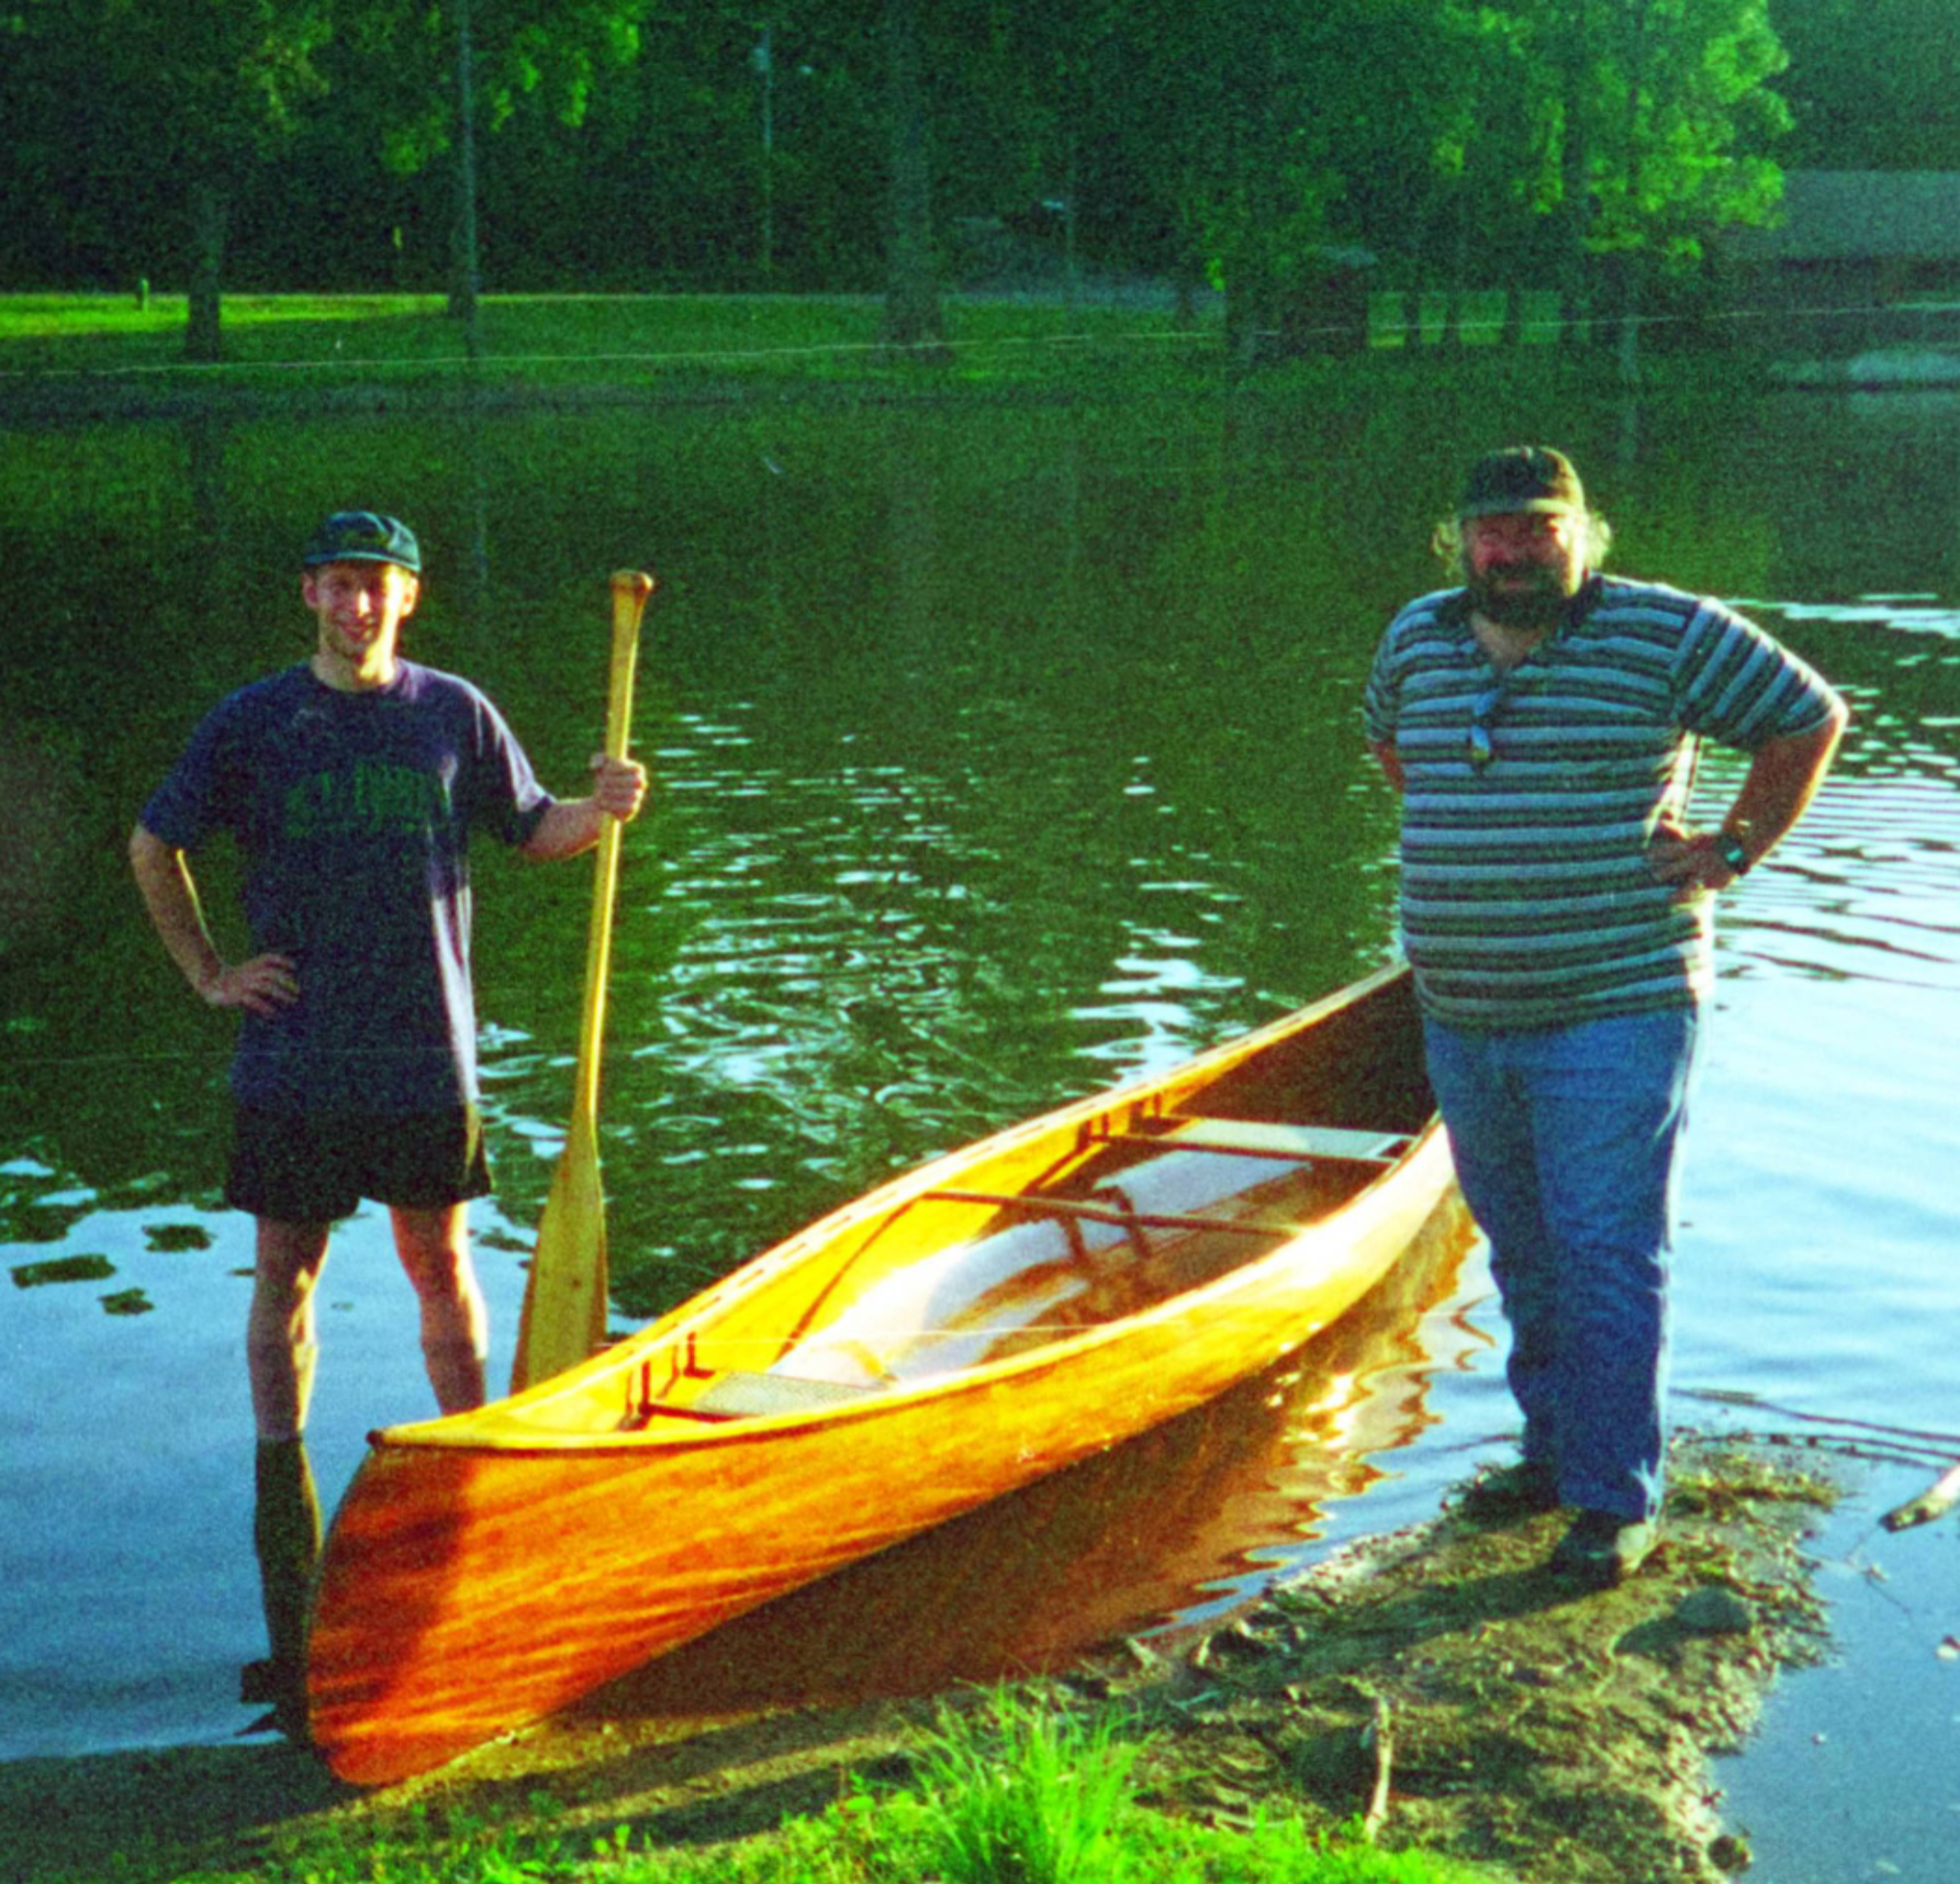
The second longest project I ever worked on was building a stripper canoe with my son, Lance. Our friend John Hawn had already built several of these canoes and we were anxious to try one ourselves. The hull of these canoes is built of thin, narrow strips of light but durable wood, often western red cedar but in our case clear redwood. Then it is covered with clear fiberglass. The fiberglass is what the functional part of the boat actually is. The wood is merely to provide the basic shape and look beautiful.
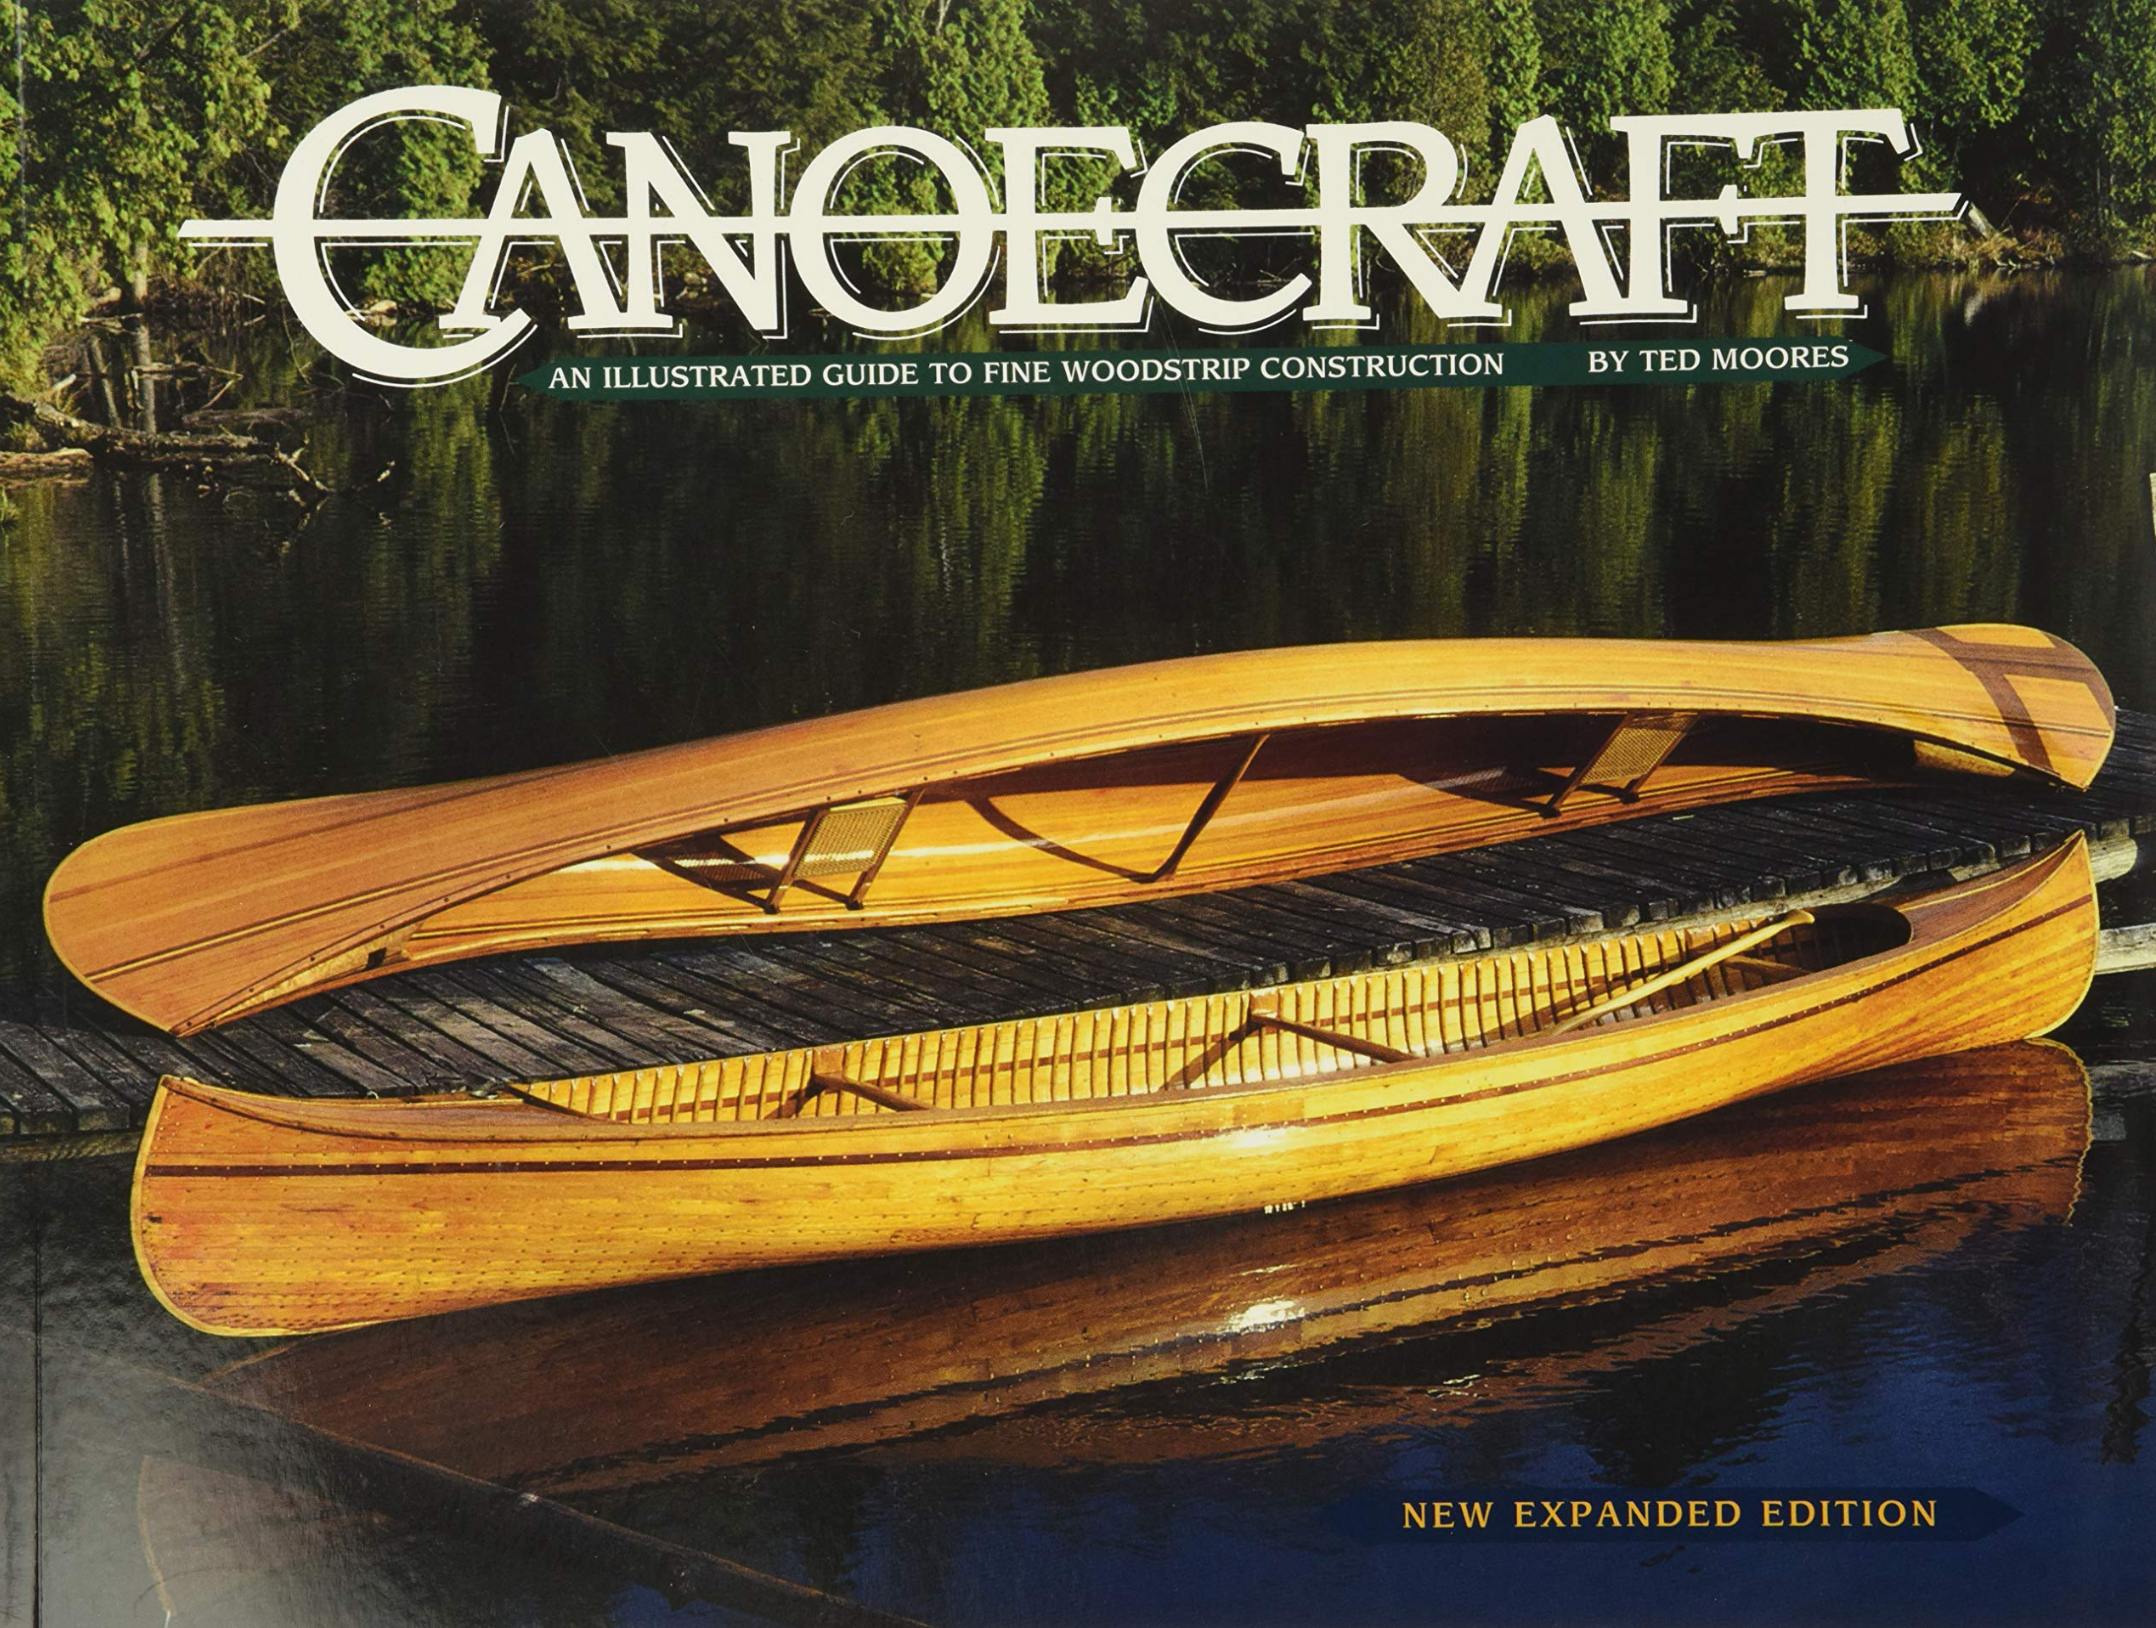
John lent us his copy of a book, Canoecraft, by Ted Moores to help us decide which kind of canoe to build. There are about 20 different designs to choose from in the book. Eventually we got our own copy because it is invaluable in the construction of a project like this. Lance chose the Redbird.
Throughout the book the author has plans and tables to tell you how to make your canoe. Think of the canoe as being cut across every foot from front to back. Each cross section has a chart that tells how wide the canoe is starting at the bottom and then every inch up from there till you get to the highest point in the bow and stern.
You plot these points out on a set of plans. I set up my plans in a computer program called Corel Draw. What I discovered right off is that a chart of numbers can only come so close to actually making the curves of the canoe as they should be. Even a measurement of as little as 1/16” can make a big difference in the lines of the canoe. I corrected each little dip or flaw in the lines. This can cause the creation of a new defect to the adjoining lines, so you have to go back and correct that. Eventually by working back and forth between these measurements you can get the accuracy finer and finer till it is just perfect. Another problem I had with this was that the author was very concerned that things were smooth below the water line where it would affect the flow as the canoe cut through the lake or river. But above the widest part of the canoe he gave little attention to how those lines were drawn. I refined those as well so the final design was a thing of beauty.
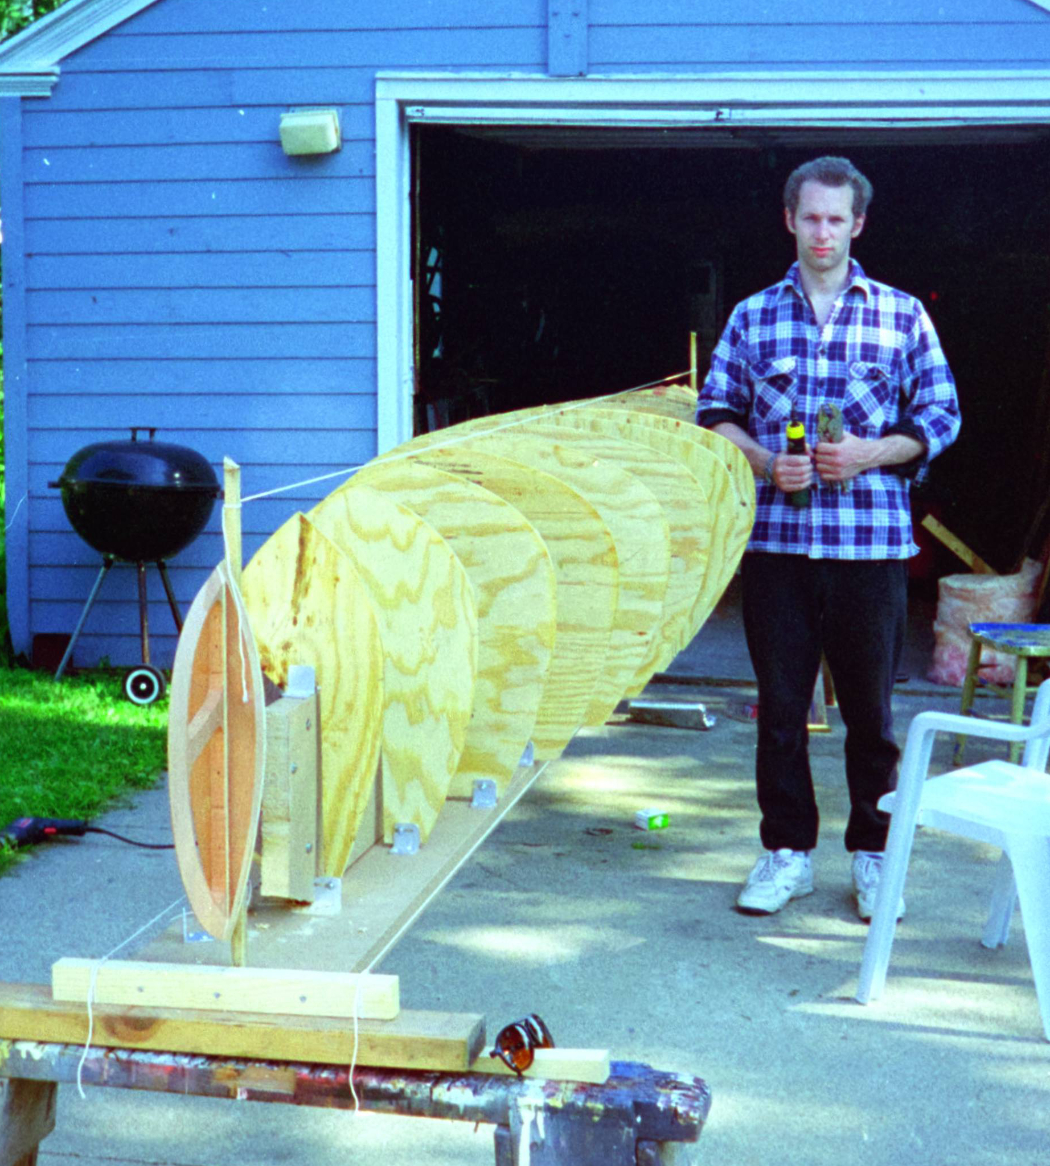
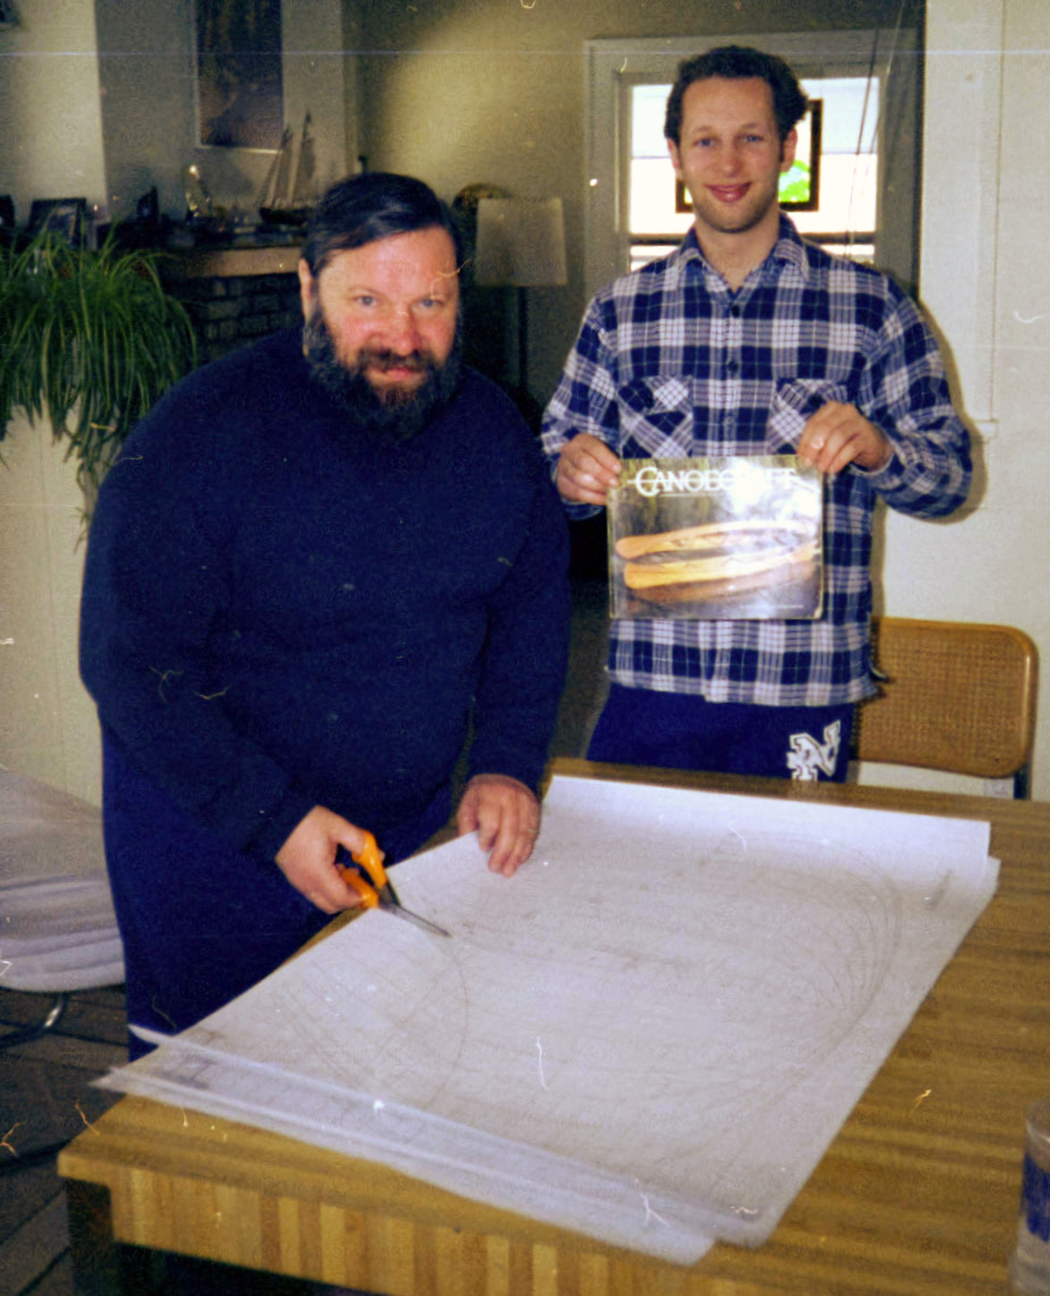
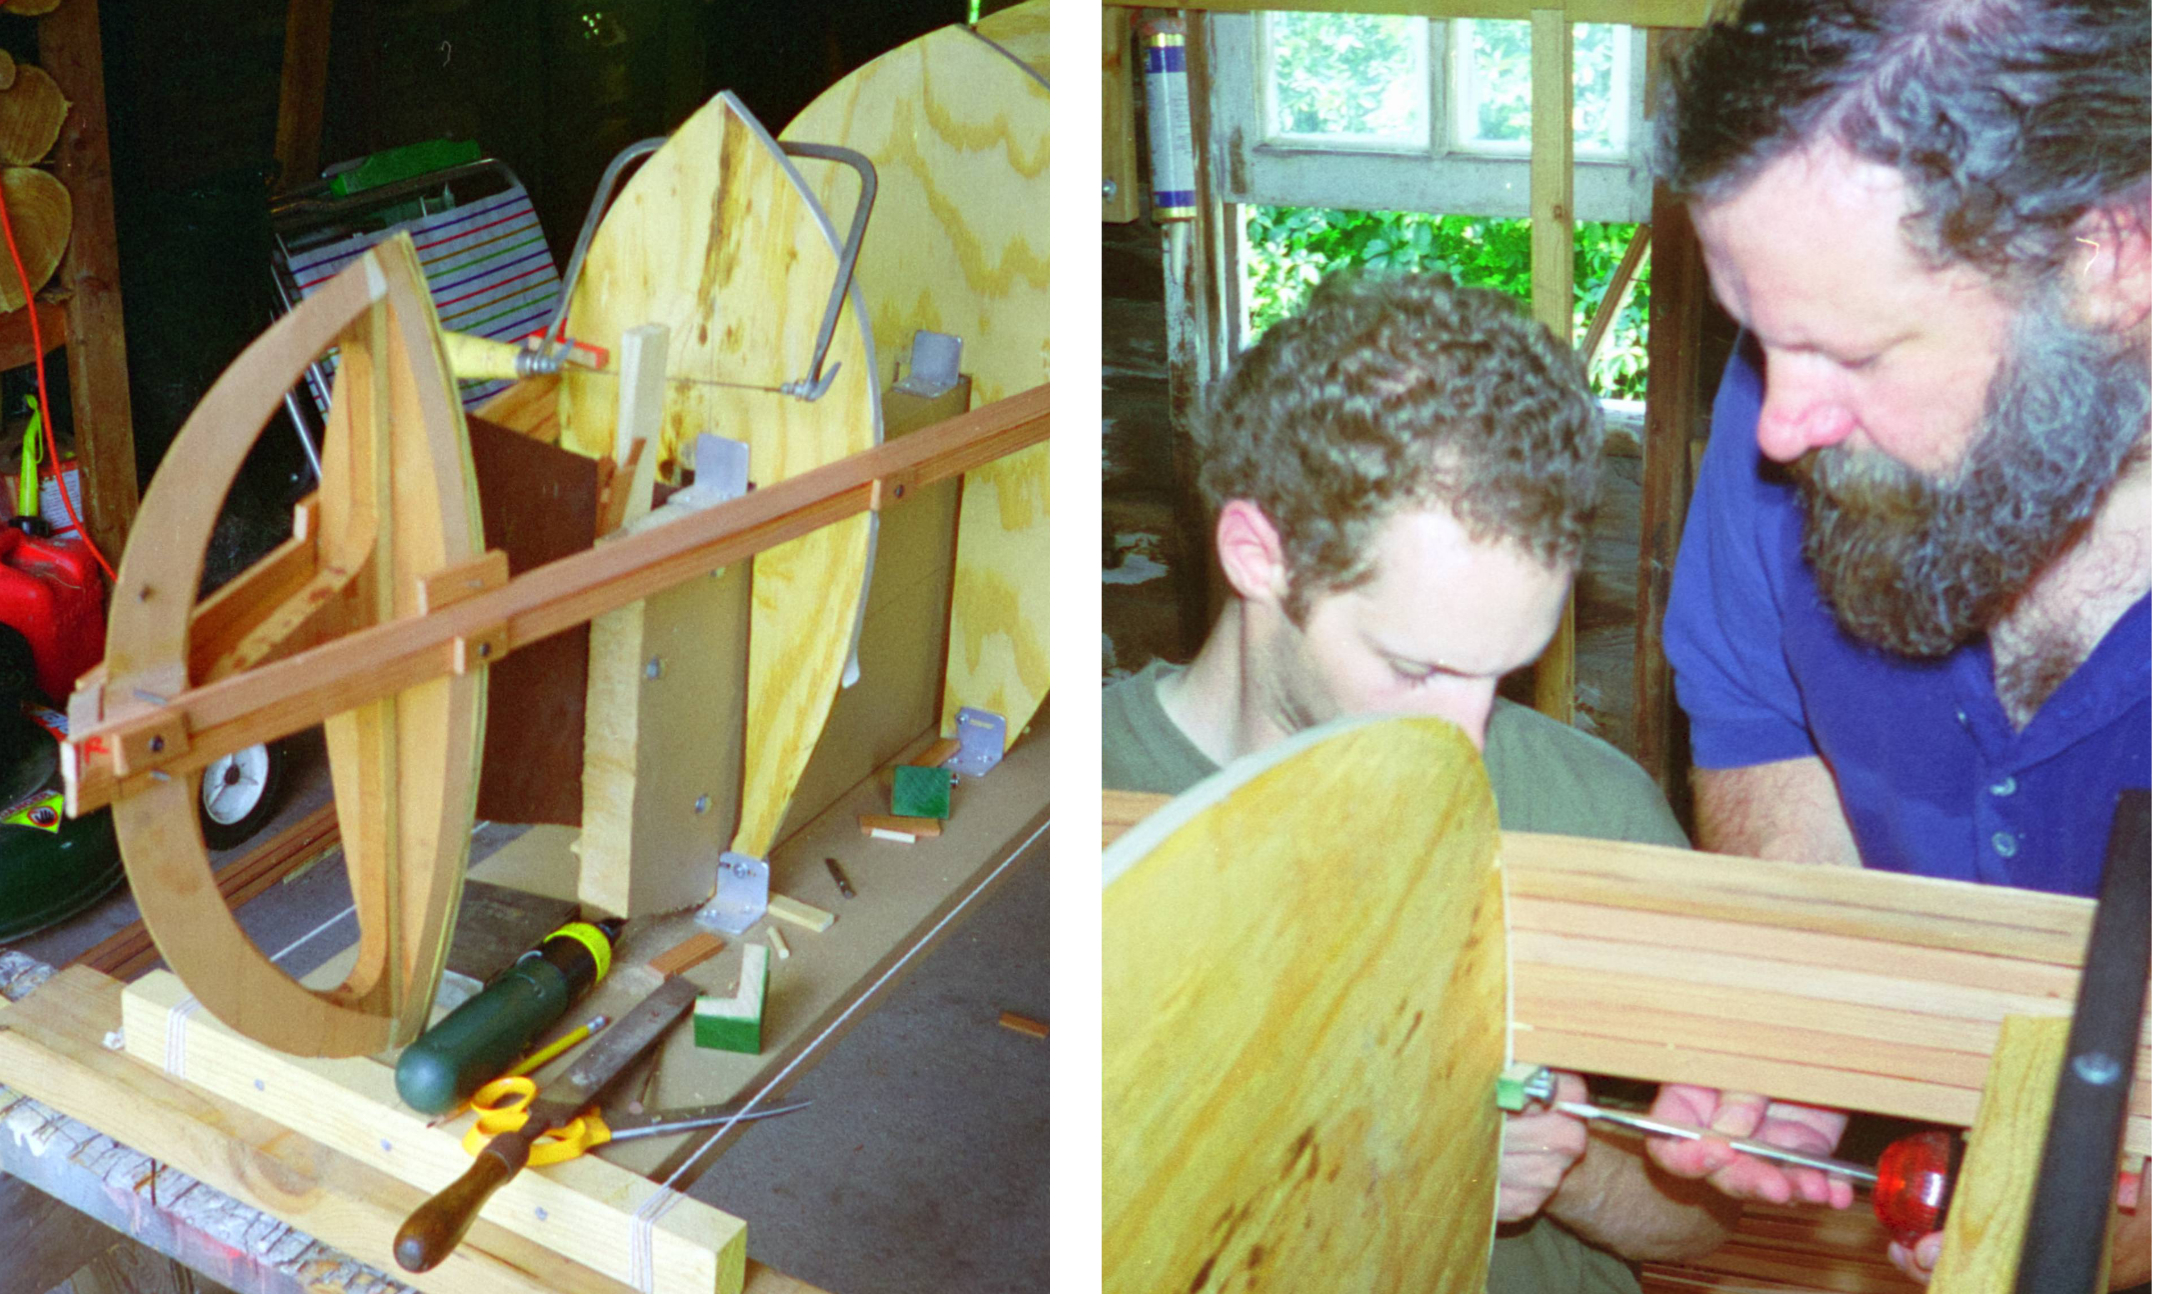
I had the blueprints run out, one for every foot of canoe and the bow and stern pieces as well. We were using half inch plywood for our forms. We glued the blueprints on the wood and cut them out about a 1/16 inch bigger than the final size. Then we used the disk sander to grind in to the exact edge of each form. The total form was put together on a strongback, two sturdy 2×12’s that we very carefully picked out to make sure they were straight and true. I made some aluminum brackets that got screwed to the strongback. The brackets had slots in them so we could make fine adjustments to get the overall shape as perfect as possible. We screwed the cross-sectional forms to the brackets and adjusted them to perfection.
Most stripper canoes are made of Western Red Cedar. This is the strongest wood for the weight that you can buy. Redwood is almost just as good, only adding a pound or two to the entire canoe. While it was hard to come by at the time we built the canoe, you could still buy boards of clear, quartersawn redwood the entire length of the canoe. When we went to the lumberyard to buy it, the owner of the yard, Larry Parks, asked what we were going to use the wood for. We told him that we would use it for a hand built stripper canoe. His father had originally acquired the redwood and Larry got it when his father retired. It was very special to him and he didn’t want it used for something like a deck. Our use for it passed the test. He looked at our plans and the material list and told us before he would sell us the wood we had to go home and figure out just how many 18 foot boards, how many 16 foot ones, and so forth that we needed. The wood was so precious that he was not willing to sell us an 18 foot board that we would cut down to 14 feet. We saw the logic in that and complied with his request.

We were going to trim our strips out of the redwood boards using a band saw because it would make the minimum waste from the saw kerf. Initial attempts to do this taught us that the band saw doesn’t cut a true enough line and had a tendency to wiggle left and right, making a strip of unequal thickness. We decided to use a table saw instead. The waste of the saw dust was 3 or 4 times as much from this wider kerf, but overall it was a better way to do it. We cut the strips to a 5/16” thickness, which gave us 1/16” for planing it smooth. When all the various length pieces were cut and planed, we laid them out by length and arranged them by color. Lance’s friend Jim Groff helped us with cutting the boards.
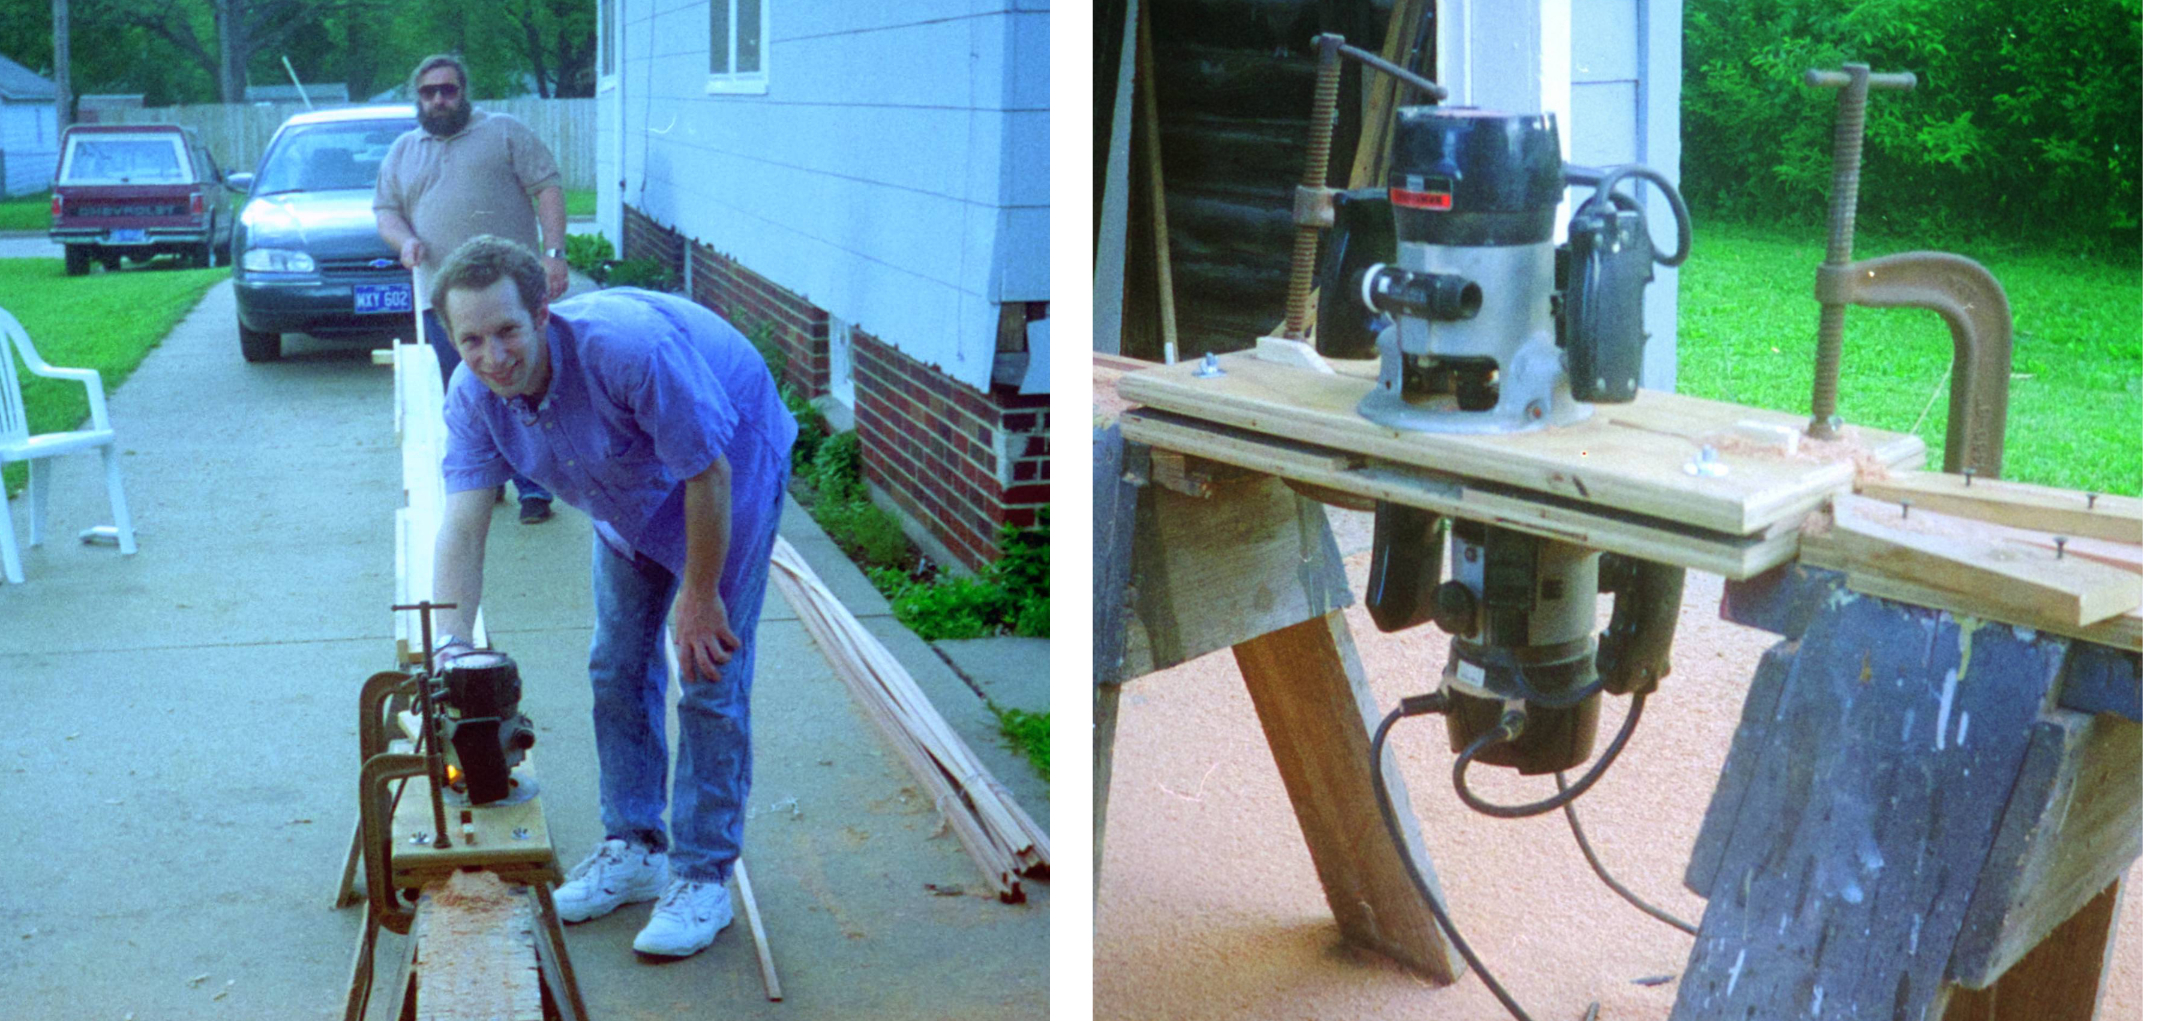
The boards we bought were ¾” thick, so the strips were 5/16” thick by ¾” wide when cut. We planed these down to ¼” thick. If you just attached these to the form in this configuration, you would get V-shaped slots between the strips as they fanned around the form. The last step in preparing the strips was to give them a bead and cove, which was to cut a rounded edge on one side of the strip and a cove shaped edge on the other side. The rounded edge tucks neatly into the cove and prevents any unwanted light from being seen between the two strips.
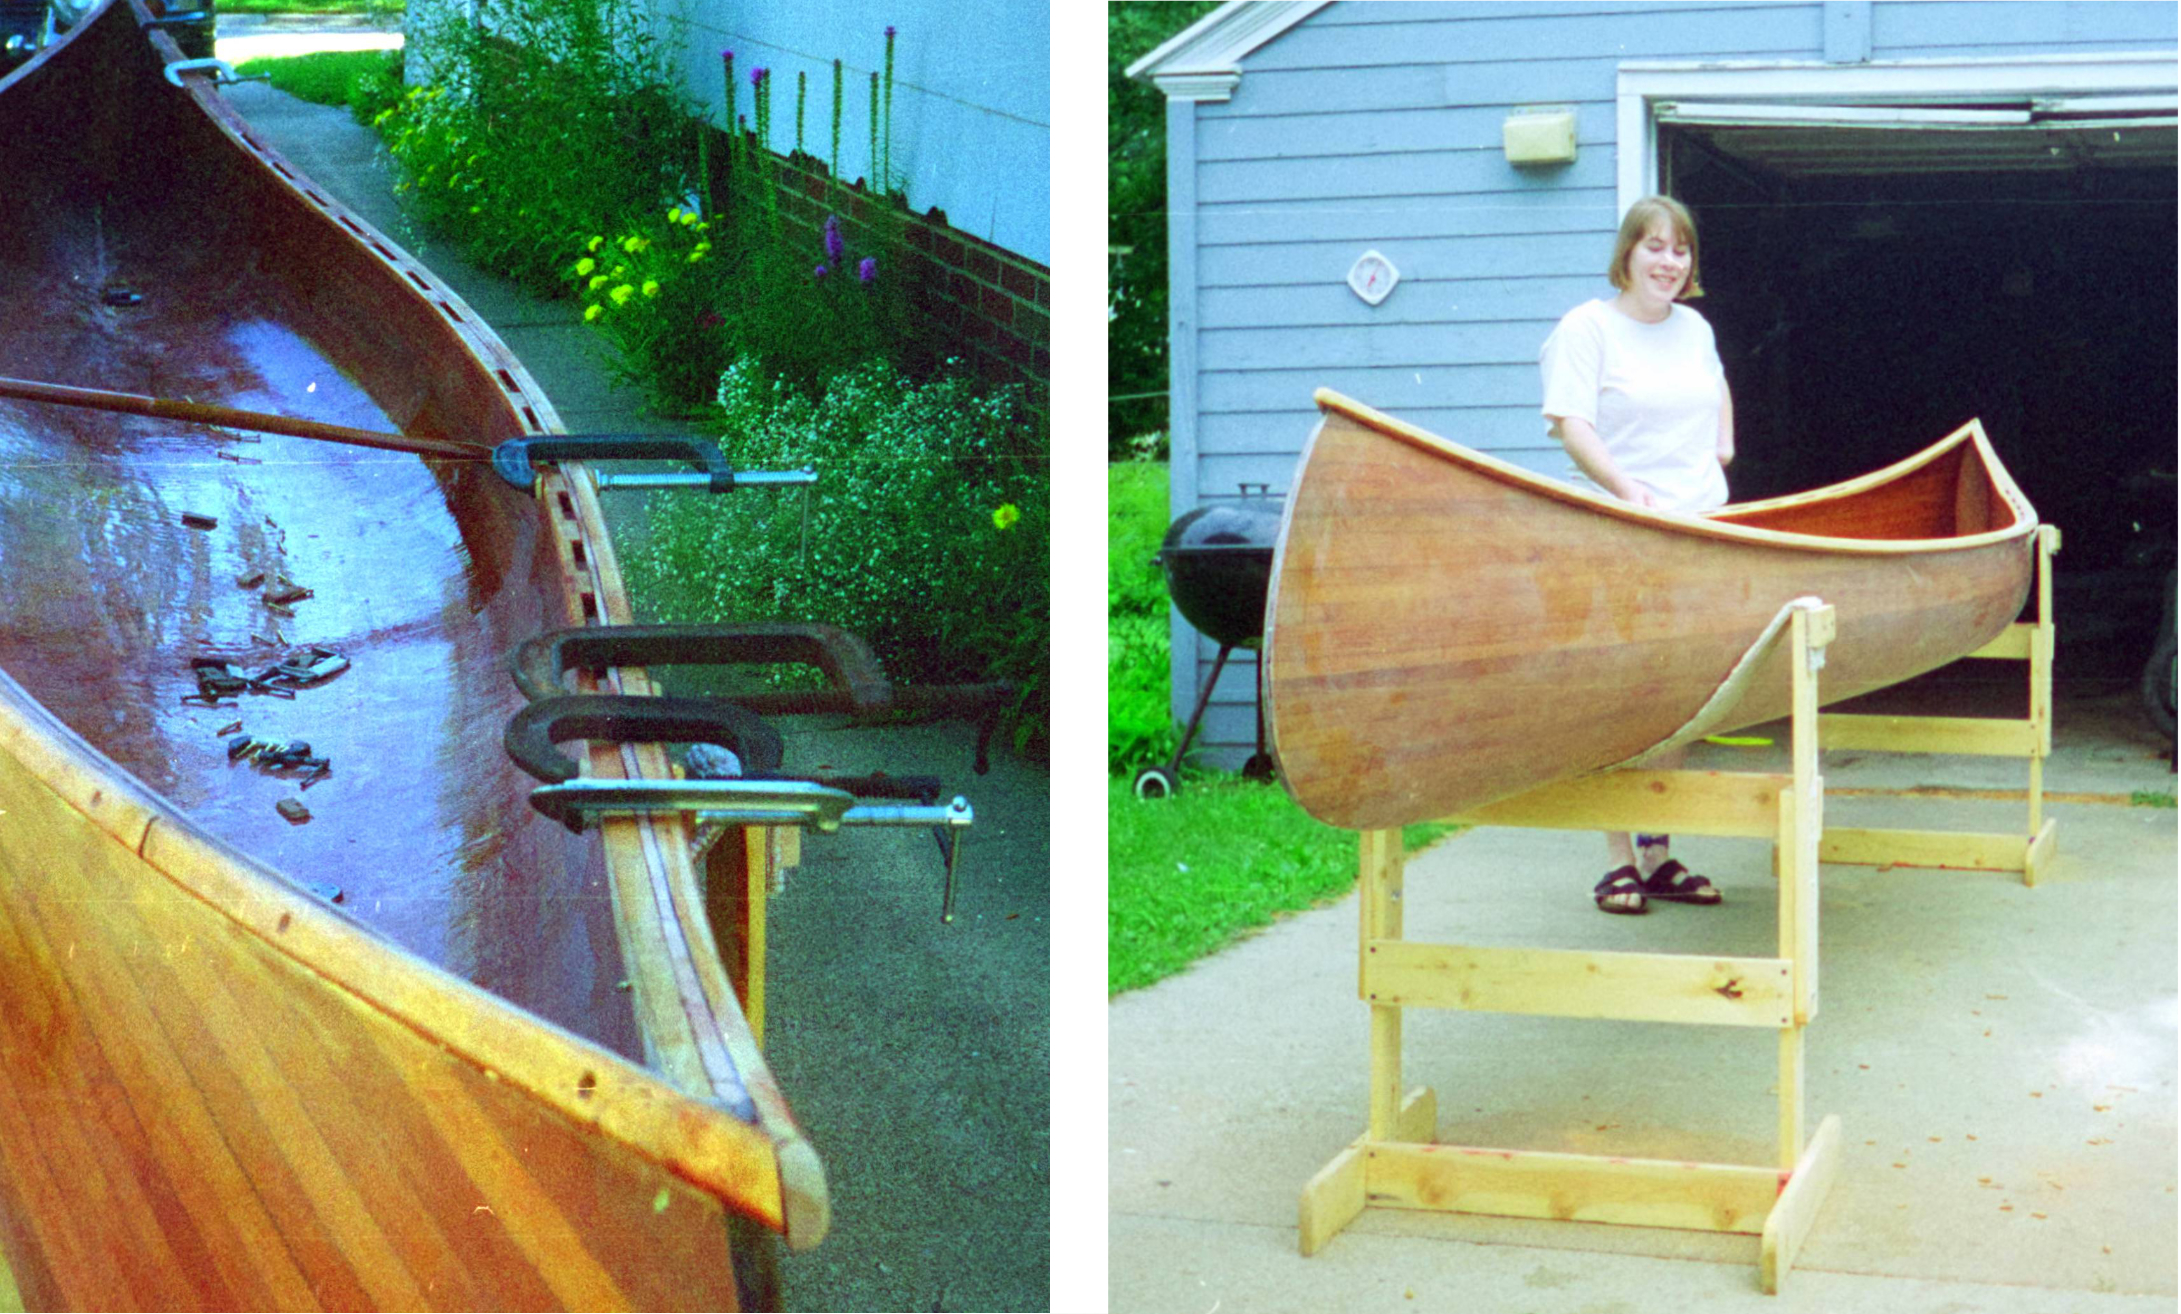
Now we were ready to start putting the strips on the forms. The usual way to do this is to lay a strip onto the form and staple it in place. This makes for pretty fast assembly but leaves an unpleasant looking pin hole where the staple went through the strip. This doesn’t cause any functional problem because the whole canoe is eventually sealed in fiberglass. But when you portage between lakes, you carry the canoe above your head and every one of those pin holes shines like a beacon through your canoe. We didn’t want that so I designed some clips made from maple that you could use to press the strips to the frame with then tighten some screws that held the strips in the right spot till the glue dried. The down side of this was that you could only do two or three strips a day, making the whole process a lot longer. But, we were under no time limit and that extra time was worth it because of how much better our canoe looked.
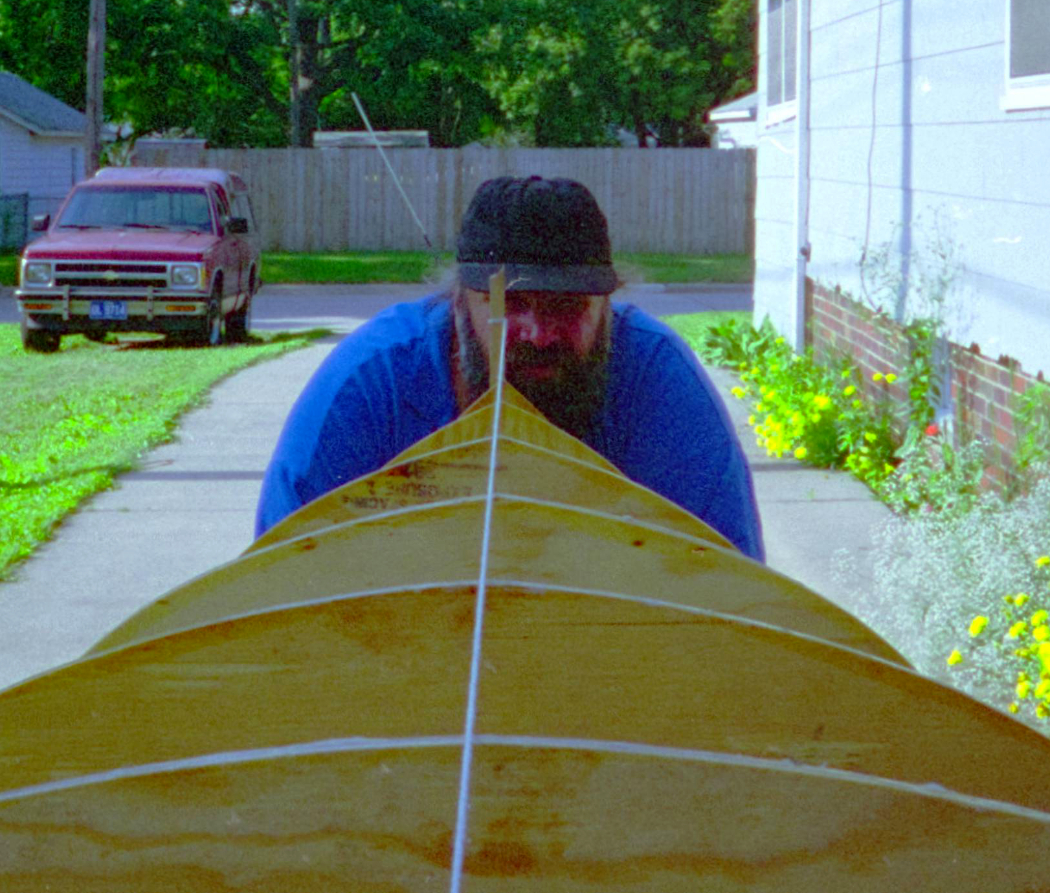
You can start putting strips on the frame wherever you want but we chose to put our first strip at the very widest part of the canoe called the beam. We just used a regular strip, but if you were going to put in any decorative strips of wood in your canoe, this would be a particularly good place to do it. Since this first strip is the foundation and anchor for all the other strips, we decided to actually screw it onto the frame. This meant that there would be a series of holes along the whole length of the canoe, but when we were done putting the strips on we plugged the holes with contrasting dowel so it became a nice decorative touch. You put the first strip on with the cove side up. This provides a neat little channel for putting a line of glue in. We got a special glue syringe for that purpose and it worked great. We added glue to the main strip and put the next strip into it, clamping it down at each bulkhead with one of my special clamps. Then we did the same thing on the other side. We came back to the first strip. Taking off one clamp at a time we added a second strip to one side and then the other.
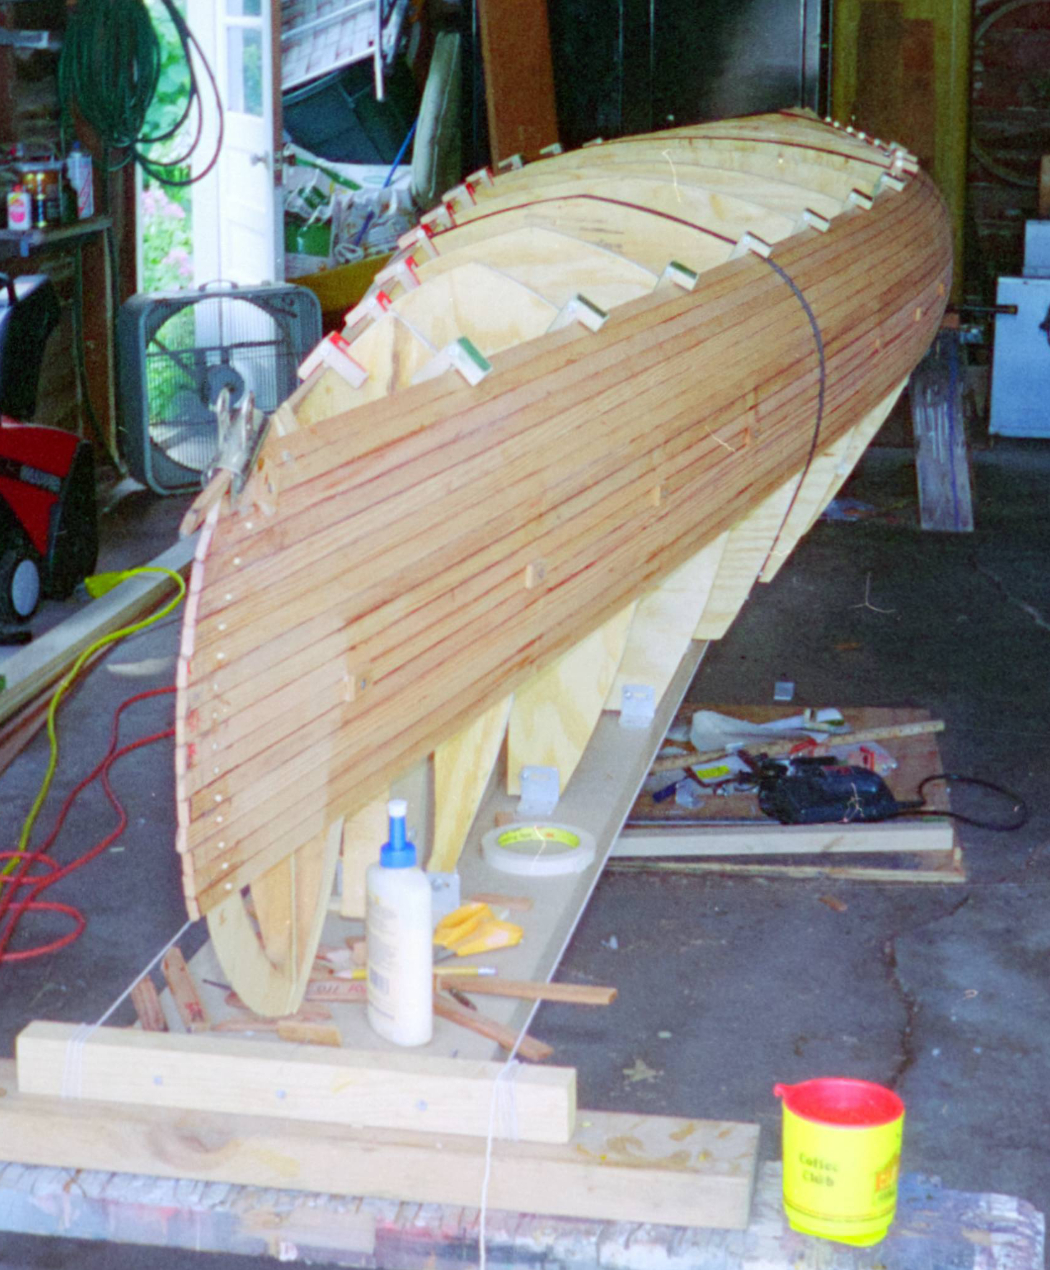
Work progressed like this day to day till we got to the horizontal, flat bottom of the canoe. By this time the strips had been subjected to all sorts of stress, not only wrapping around the frame but being bent the cross direction too. That is much more difficult on the wood. You arrive at a place called the football region where it is considerably harder to get the strips to bend properly. But we persisted slowly and carefully and finally got the strips on. Then you start at the beam strip again only this time you work downward which makes for a little complication applying the glue. We also put a strip of masking tape between the wooden strips and the frame. If a little glue leaked out, it wouldn’t attach the strips to the form forever.
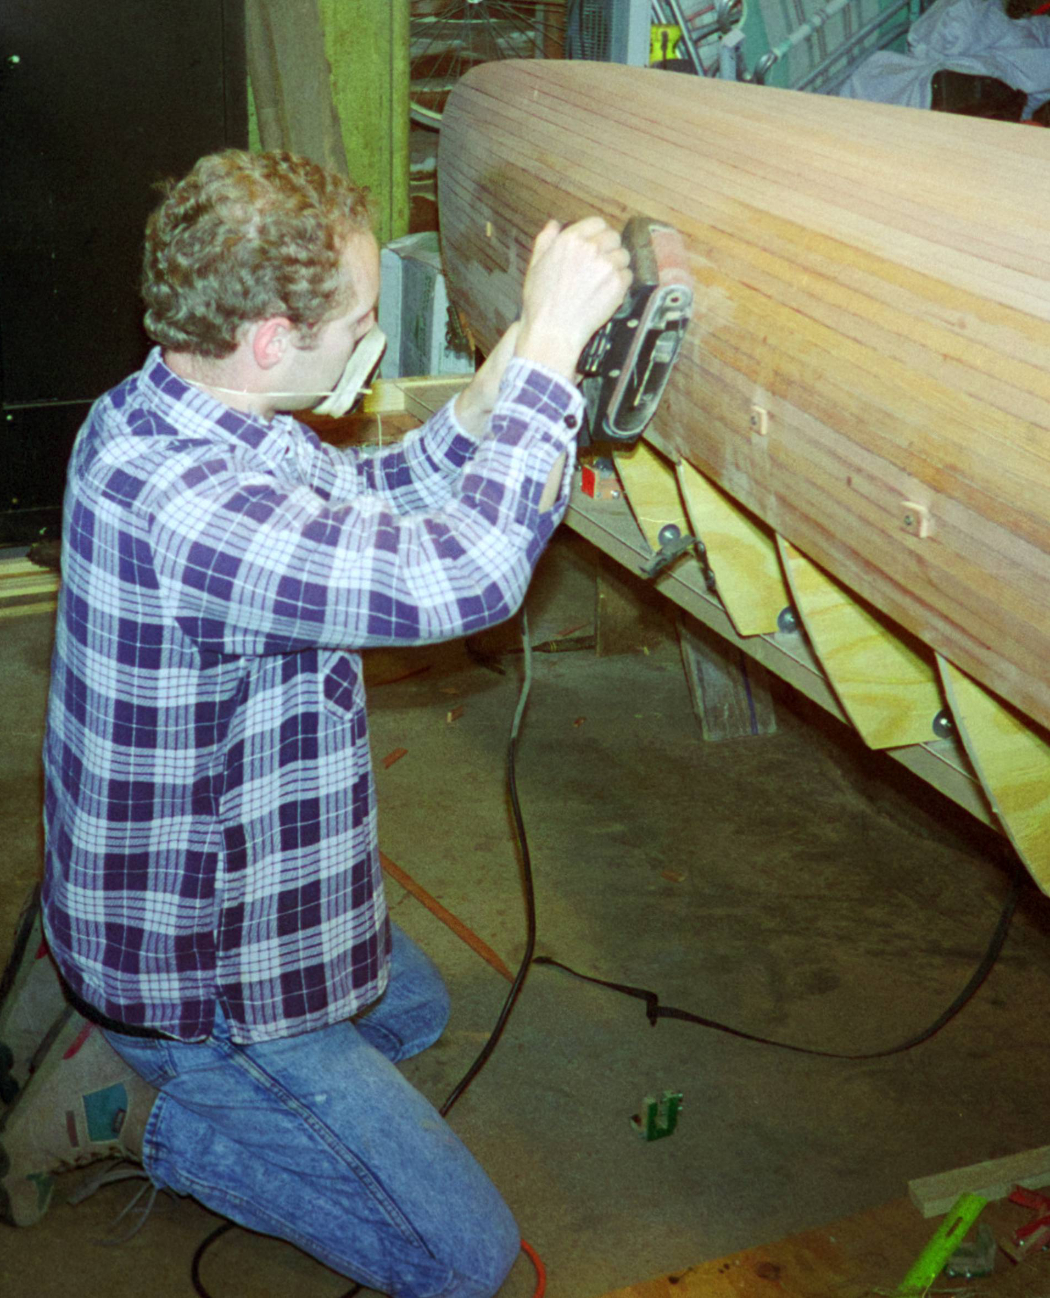
The next step was sanding. With all the strips glued together the outside of the canoe has a faceted surface where the flat parts of the strips didn’t blend perfectly. We had to sand the whole surface smooth to get a perfectly rounded profile. We first used a belt sander perpendicular to the strips. After it was pretty well shaped, we continued with an orbital sander to give the canoe an ultra smooth, polished surface. We had to do this both on the outside and the inside.
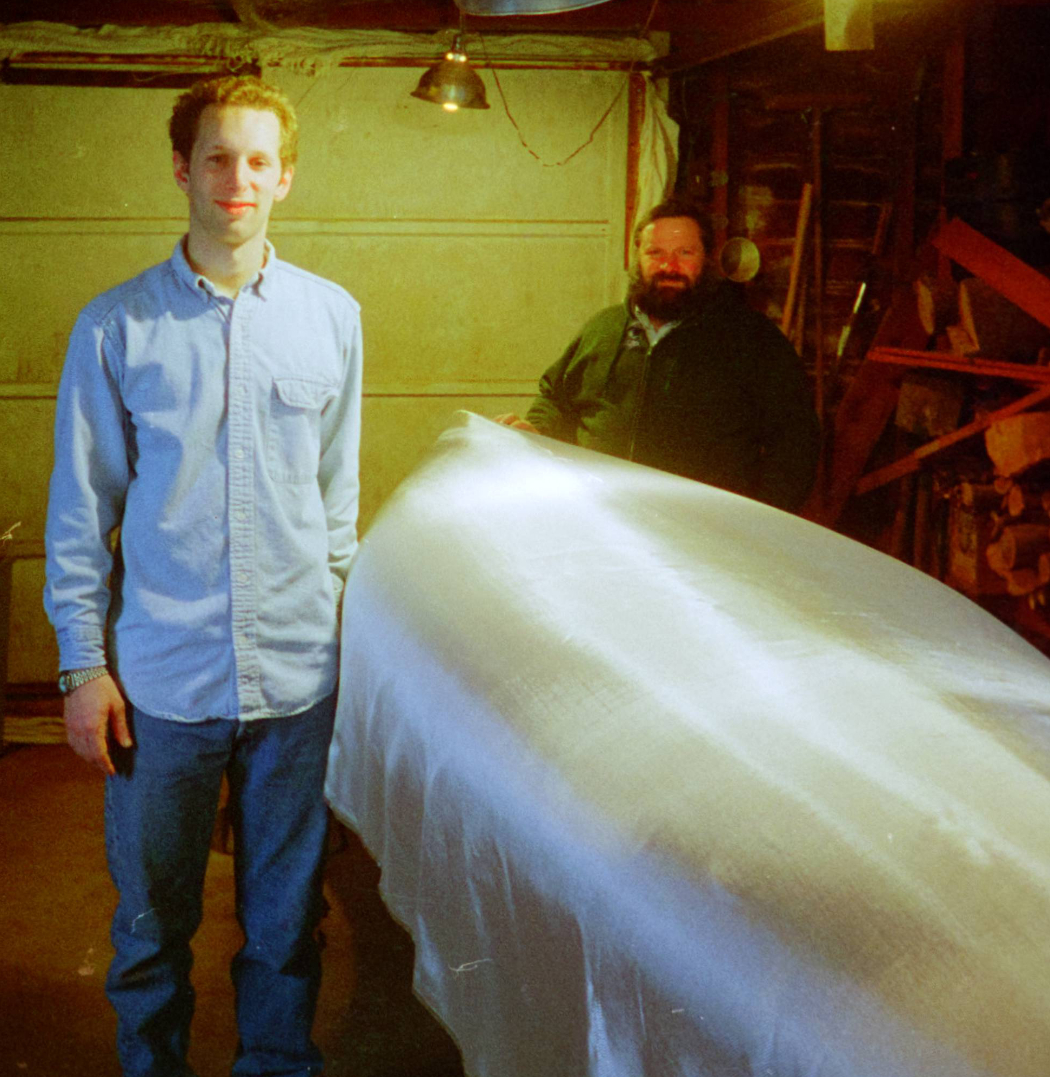
Now that the canoe was pretty much in its final form, the fiberglass needed to be applied. This was a tricky and delicate process. The materials are fairly expensive and the application has to be done just so. The temperature had to be in just the right range, something that was a bit of a problem since we were heading into winter and had an unheated garage. We gathered up all the heaters we could find and stabilized the temperature as best we could. At the last minute when we were ready to begin I had to leave to attend a funeral for a family friend, Ray Scuffham. Lance had to go on with the intricate process all by himself. He did a great job.
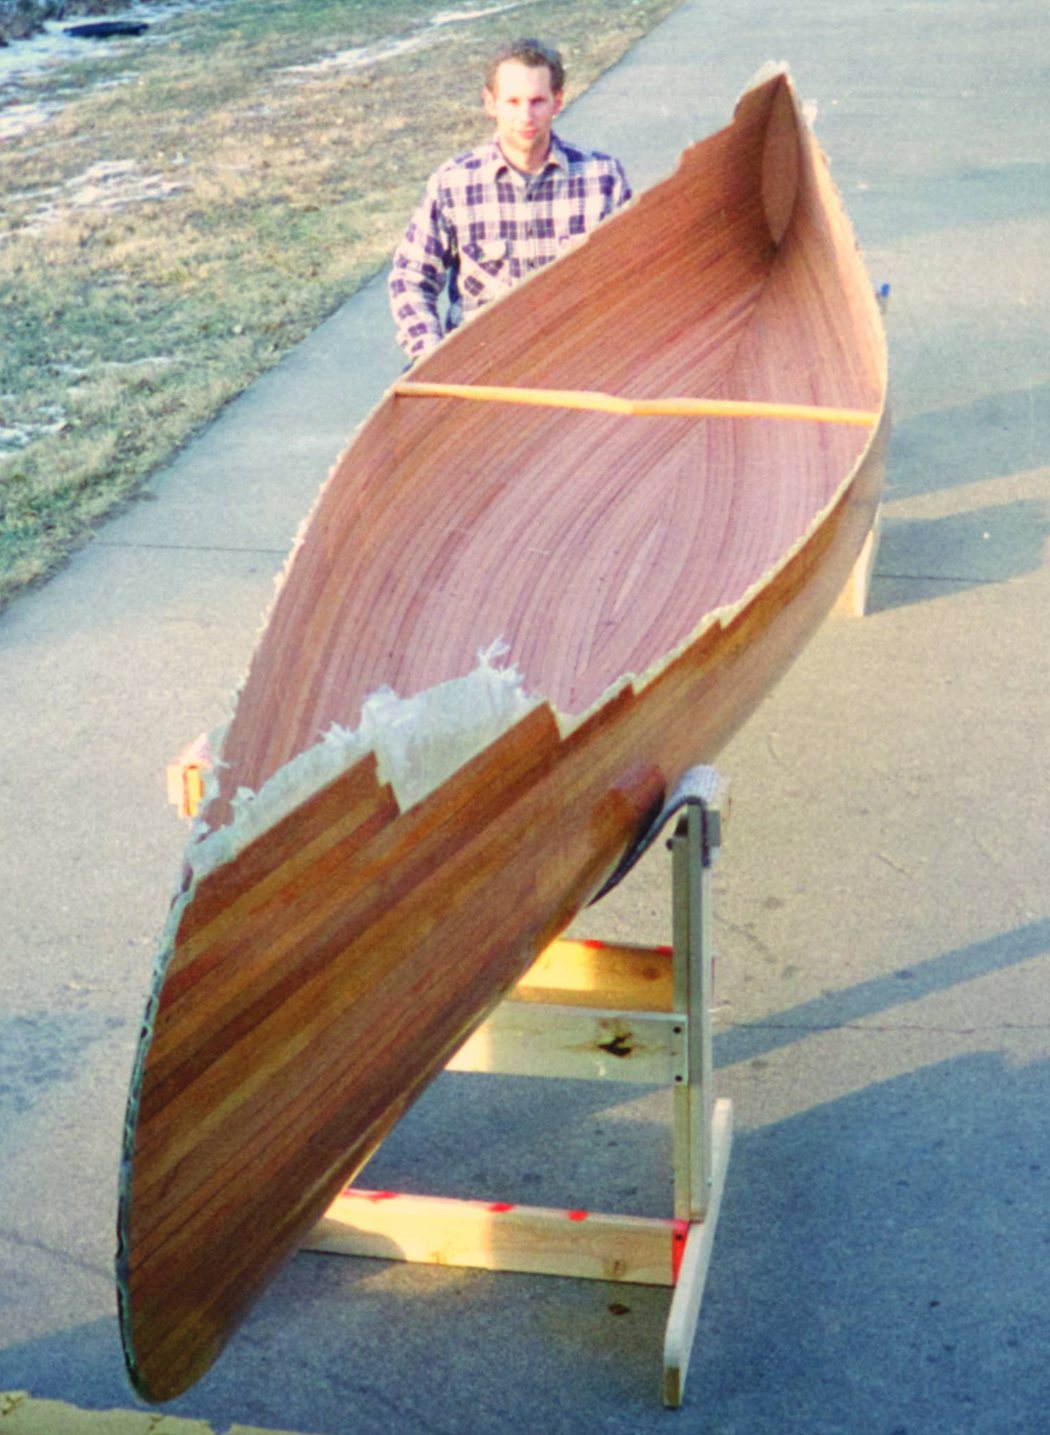
Once the shell was taken off the form it really looked like a boat. Now the gunwales had to be added. These are what stiffen and stabilize the top edge of the canoe. Otherwise, the top edge would roll down and the boat would flatten out amidships. It was a tricky business to locate the gunwales up and down. Their location was clearly marked on the forms. I think we marked the spot with pencil lines while the two were still together. The gunwales were two squarish strips, one running on the outside edge of the canoe and the other running just opposite it on the inside. The two are the same except the inside one has the addition of scuppers. These are small rectangular slots that allow any water that the canoe has taken on during use to be drained out when the canoe is lifted up and tipped on its side. We made them out of clear mahogany. The center thwart and seat frames were also made of mahogany.
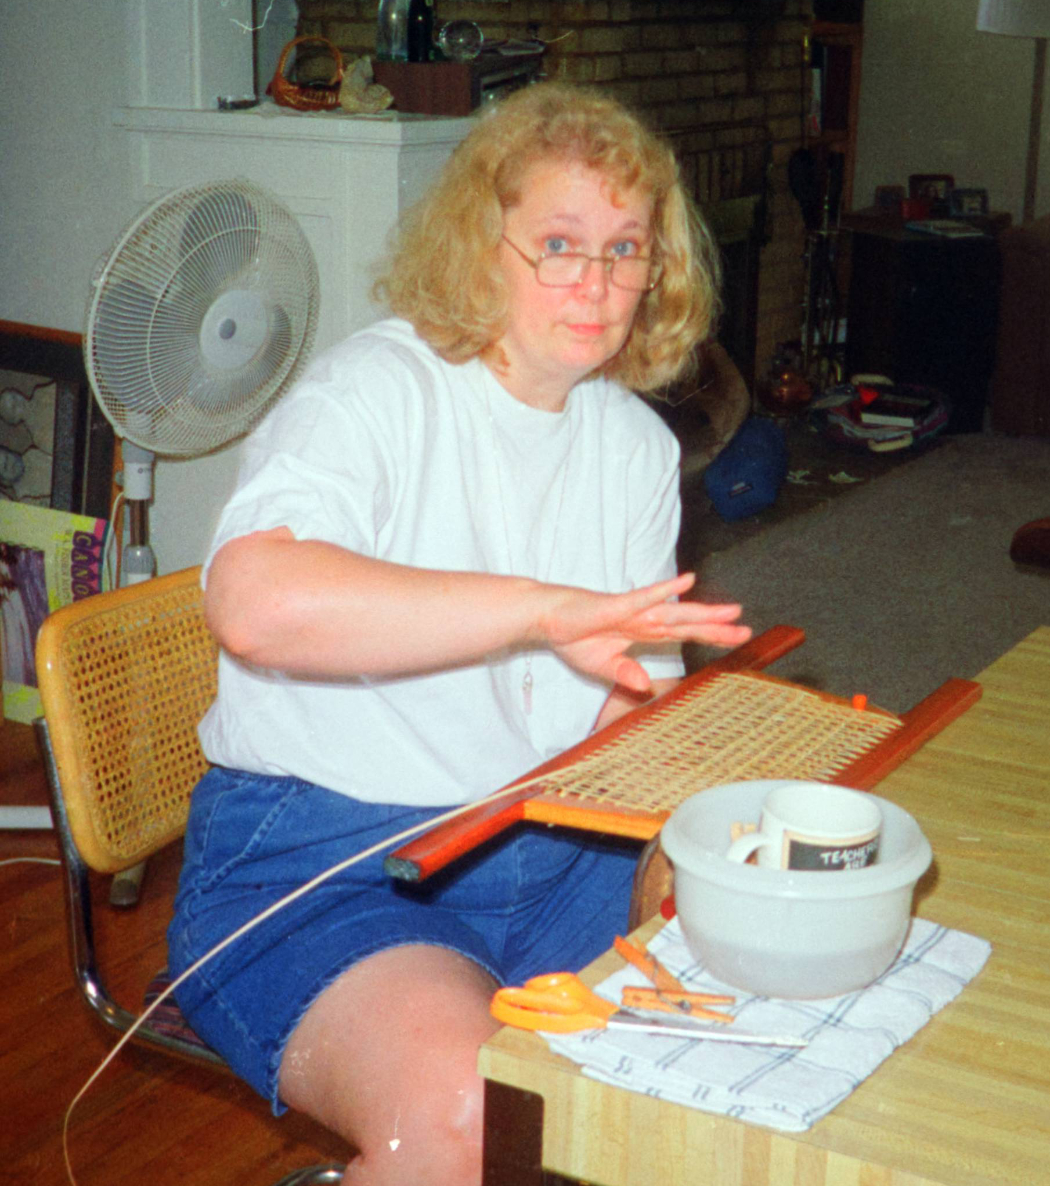
With the gunwales installed and stiffening up the canoe, there were just a few final steps to completing the work. Karen had been busy caning the seats. They were all done by hand by the traditional method of weaving individual bamboo strips into an octagonal pattern. The seats stabilize the the gunwales front and back and the middle is strengthened by a custom carved thwart. This included a cutout notch for nesting your neck in while portaging, The last touch was adding the decks fore and aft. This really strengthened the bow and stern.
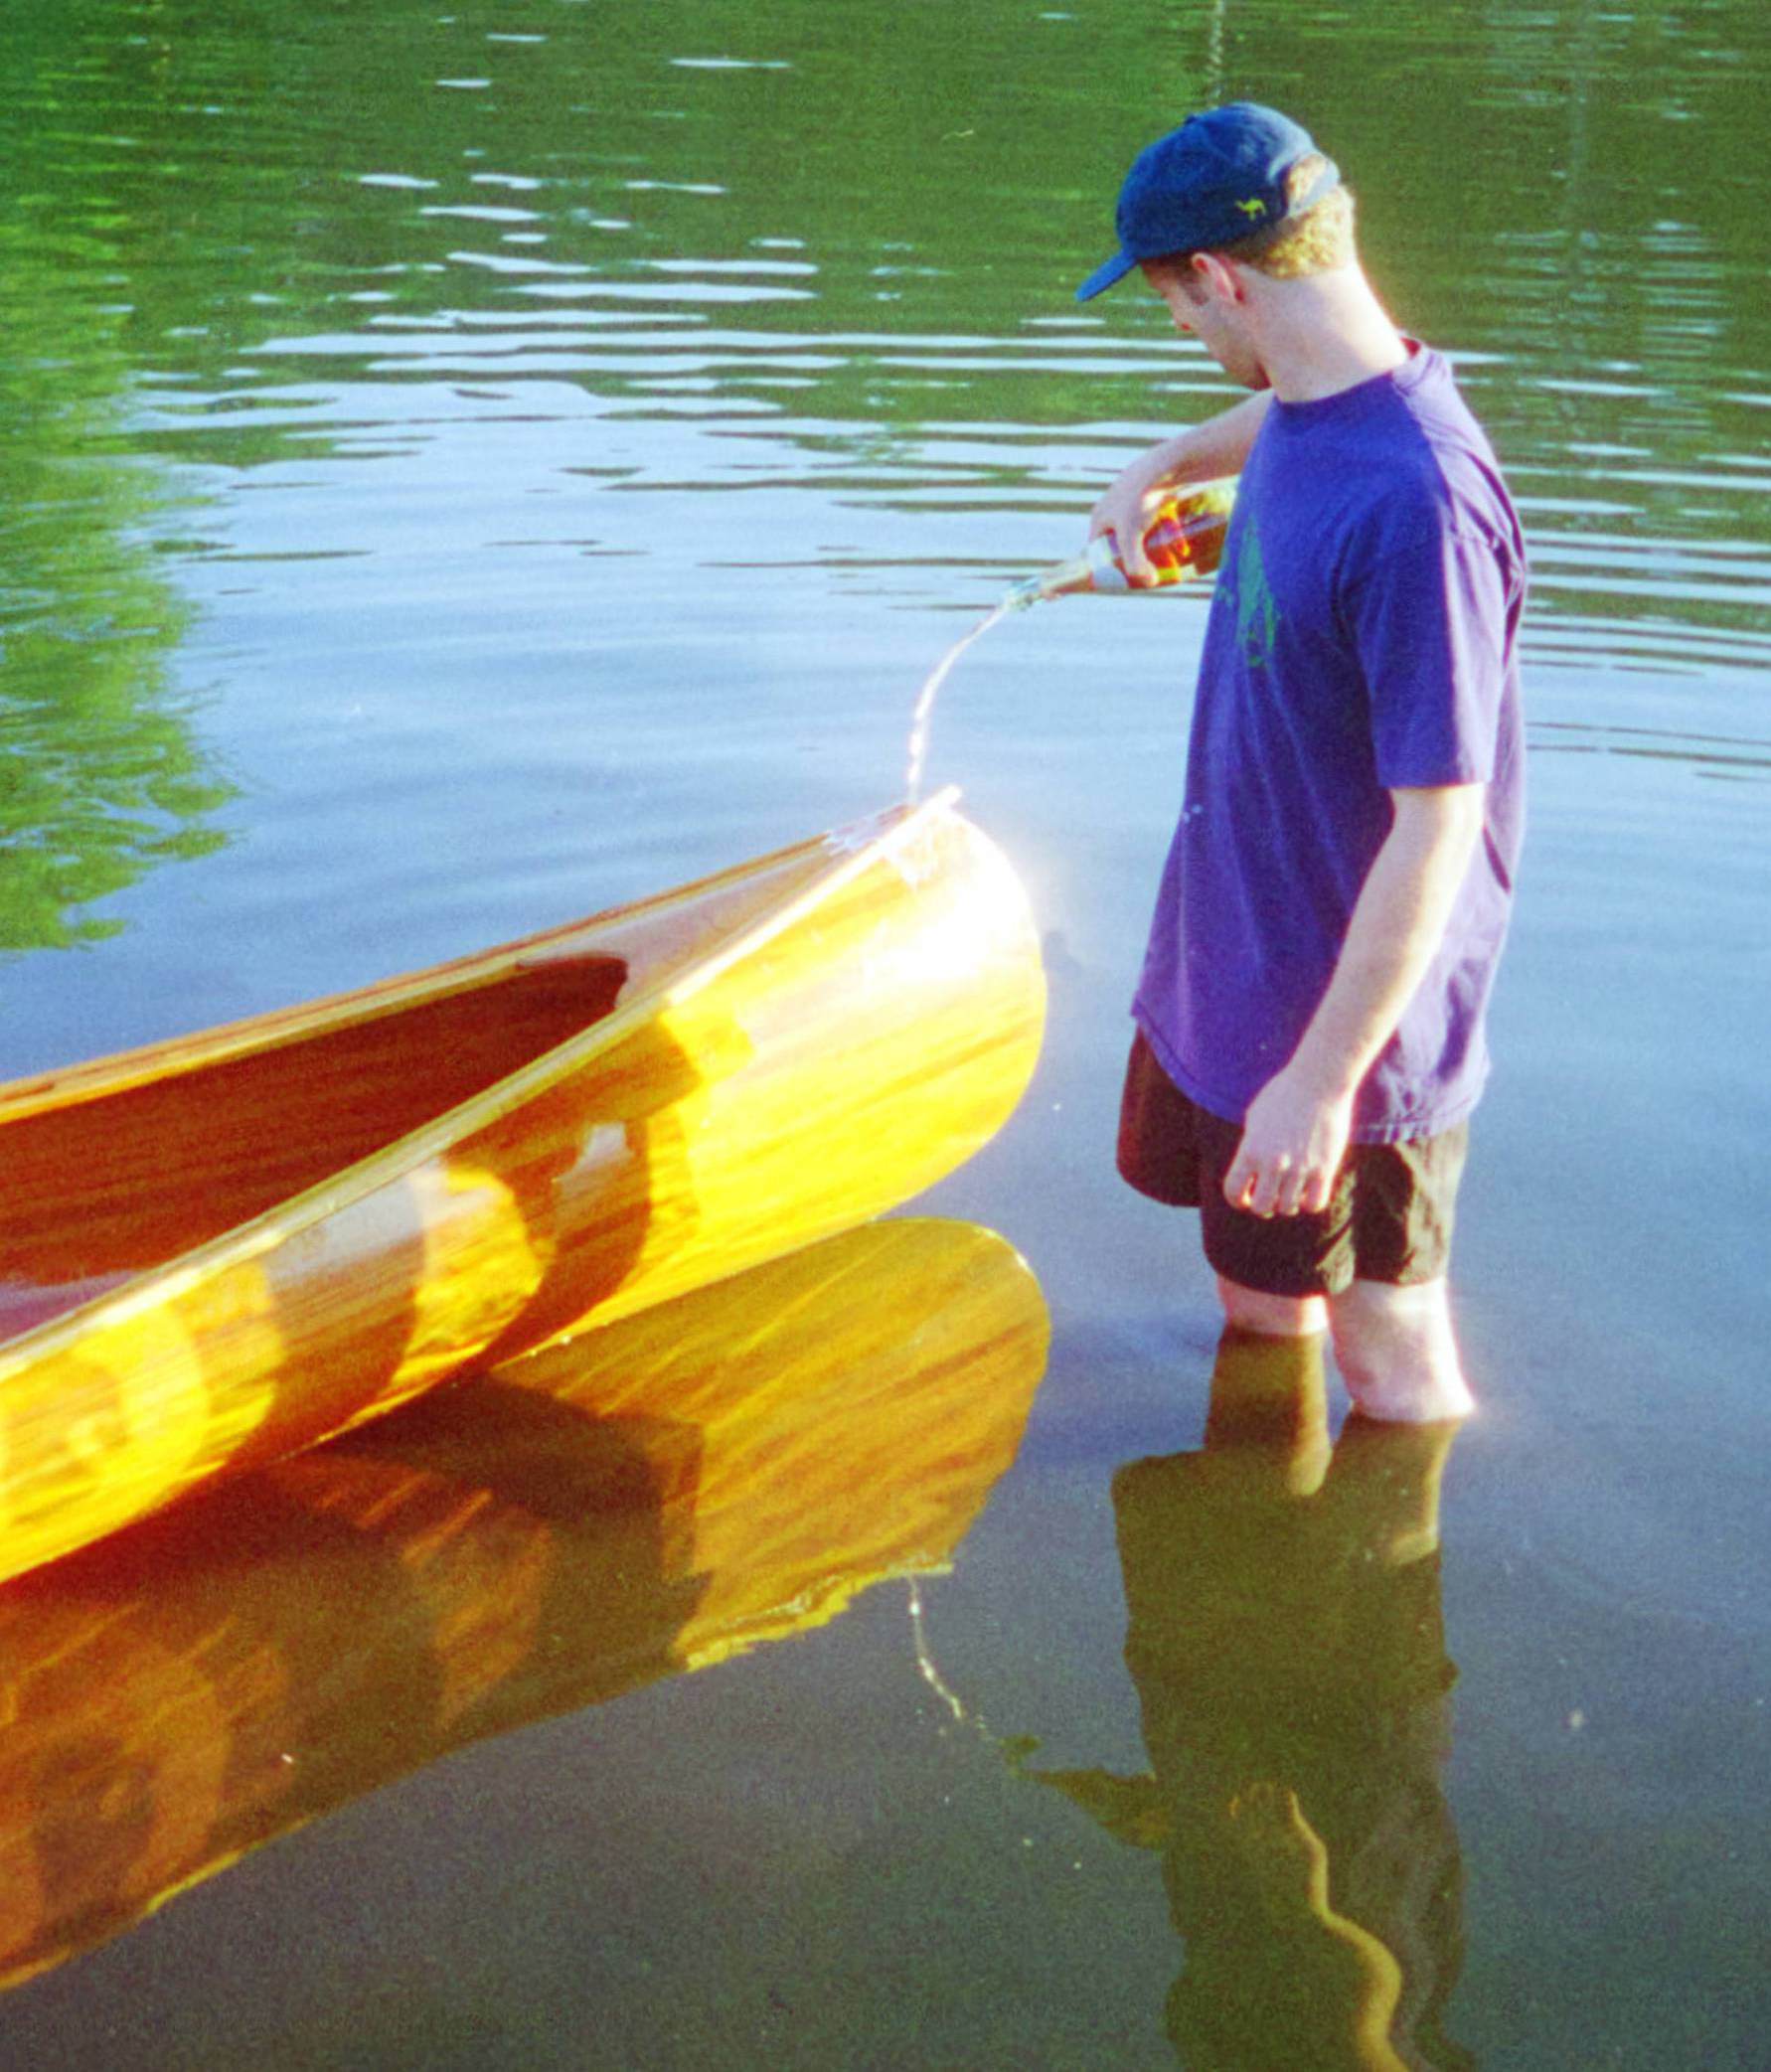
The big day arrived. It was time to launch the canoe. We took it to a small backwater lake by Ellis Park. Putting the canoe in the water and having it float properly was the first test. We passed with flying colors. Lance christened it traditionally by pouring champagne on the bow. Then he and Cherise pushed off and headed out into the lake. A few minutes of paddling showed them how stable the canoe really was.

Next stop, the Quetico, the Canadian equivalent of our Boundary Waters Canoe Area.
This account took me a long time to get recorded. I realized that it really needed pictures and that all the ones I had printed when we were building the canoe had been misplaced. I had to go find the original negatives which were in a strange format and not easy to get copies from nowadays. I had to learn how to process them myself. That was a time-consuming and difficult task. It took me almost a whole week to get them all processed for the few that appear in this account.
I think this story is one of my very favorites.
Karen
In 1976 Butch and I bought our first house which was a little bungalow at 3019 Mansfield Ave SE. Our realtor showed us many houses of all sorts and we actually bid on several of them. Finally he talked to the owners of this house and convinced them it was time for them to sell. When we bought it, we thought that we would probably live there for five or so years and then move on. Instead we lived there for twenty-seven years. Lance and Wendy grew up there, and fondly consider it their family home.
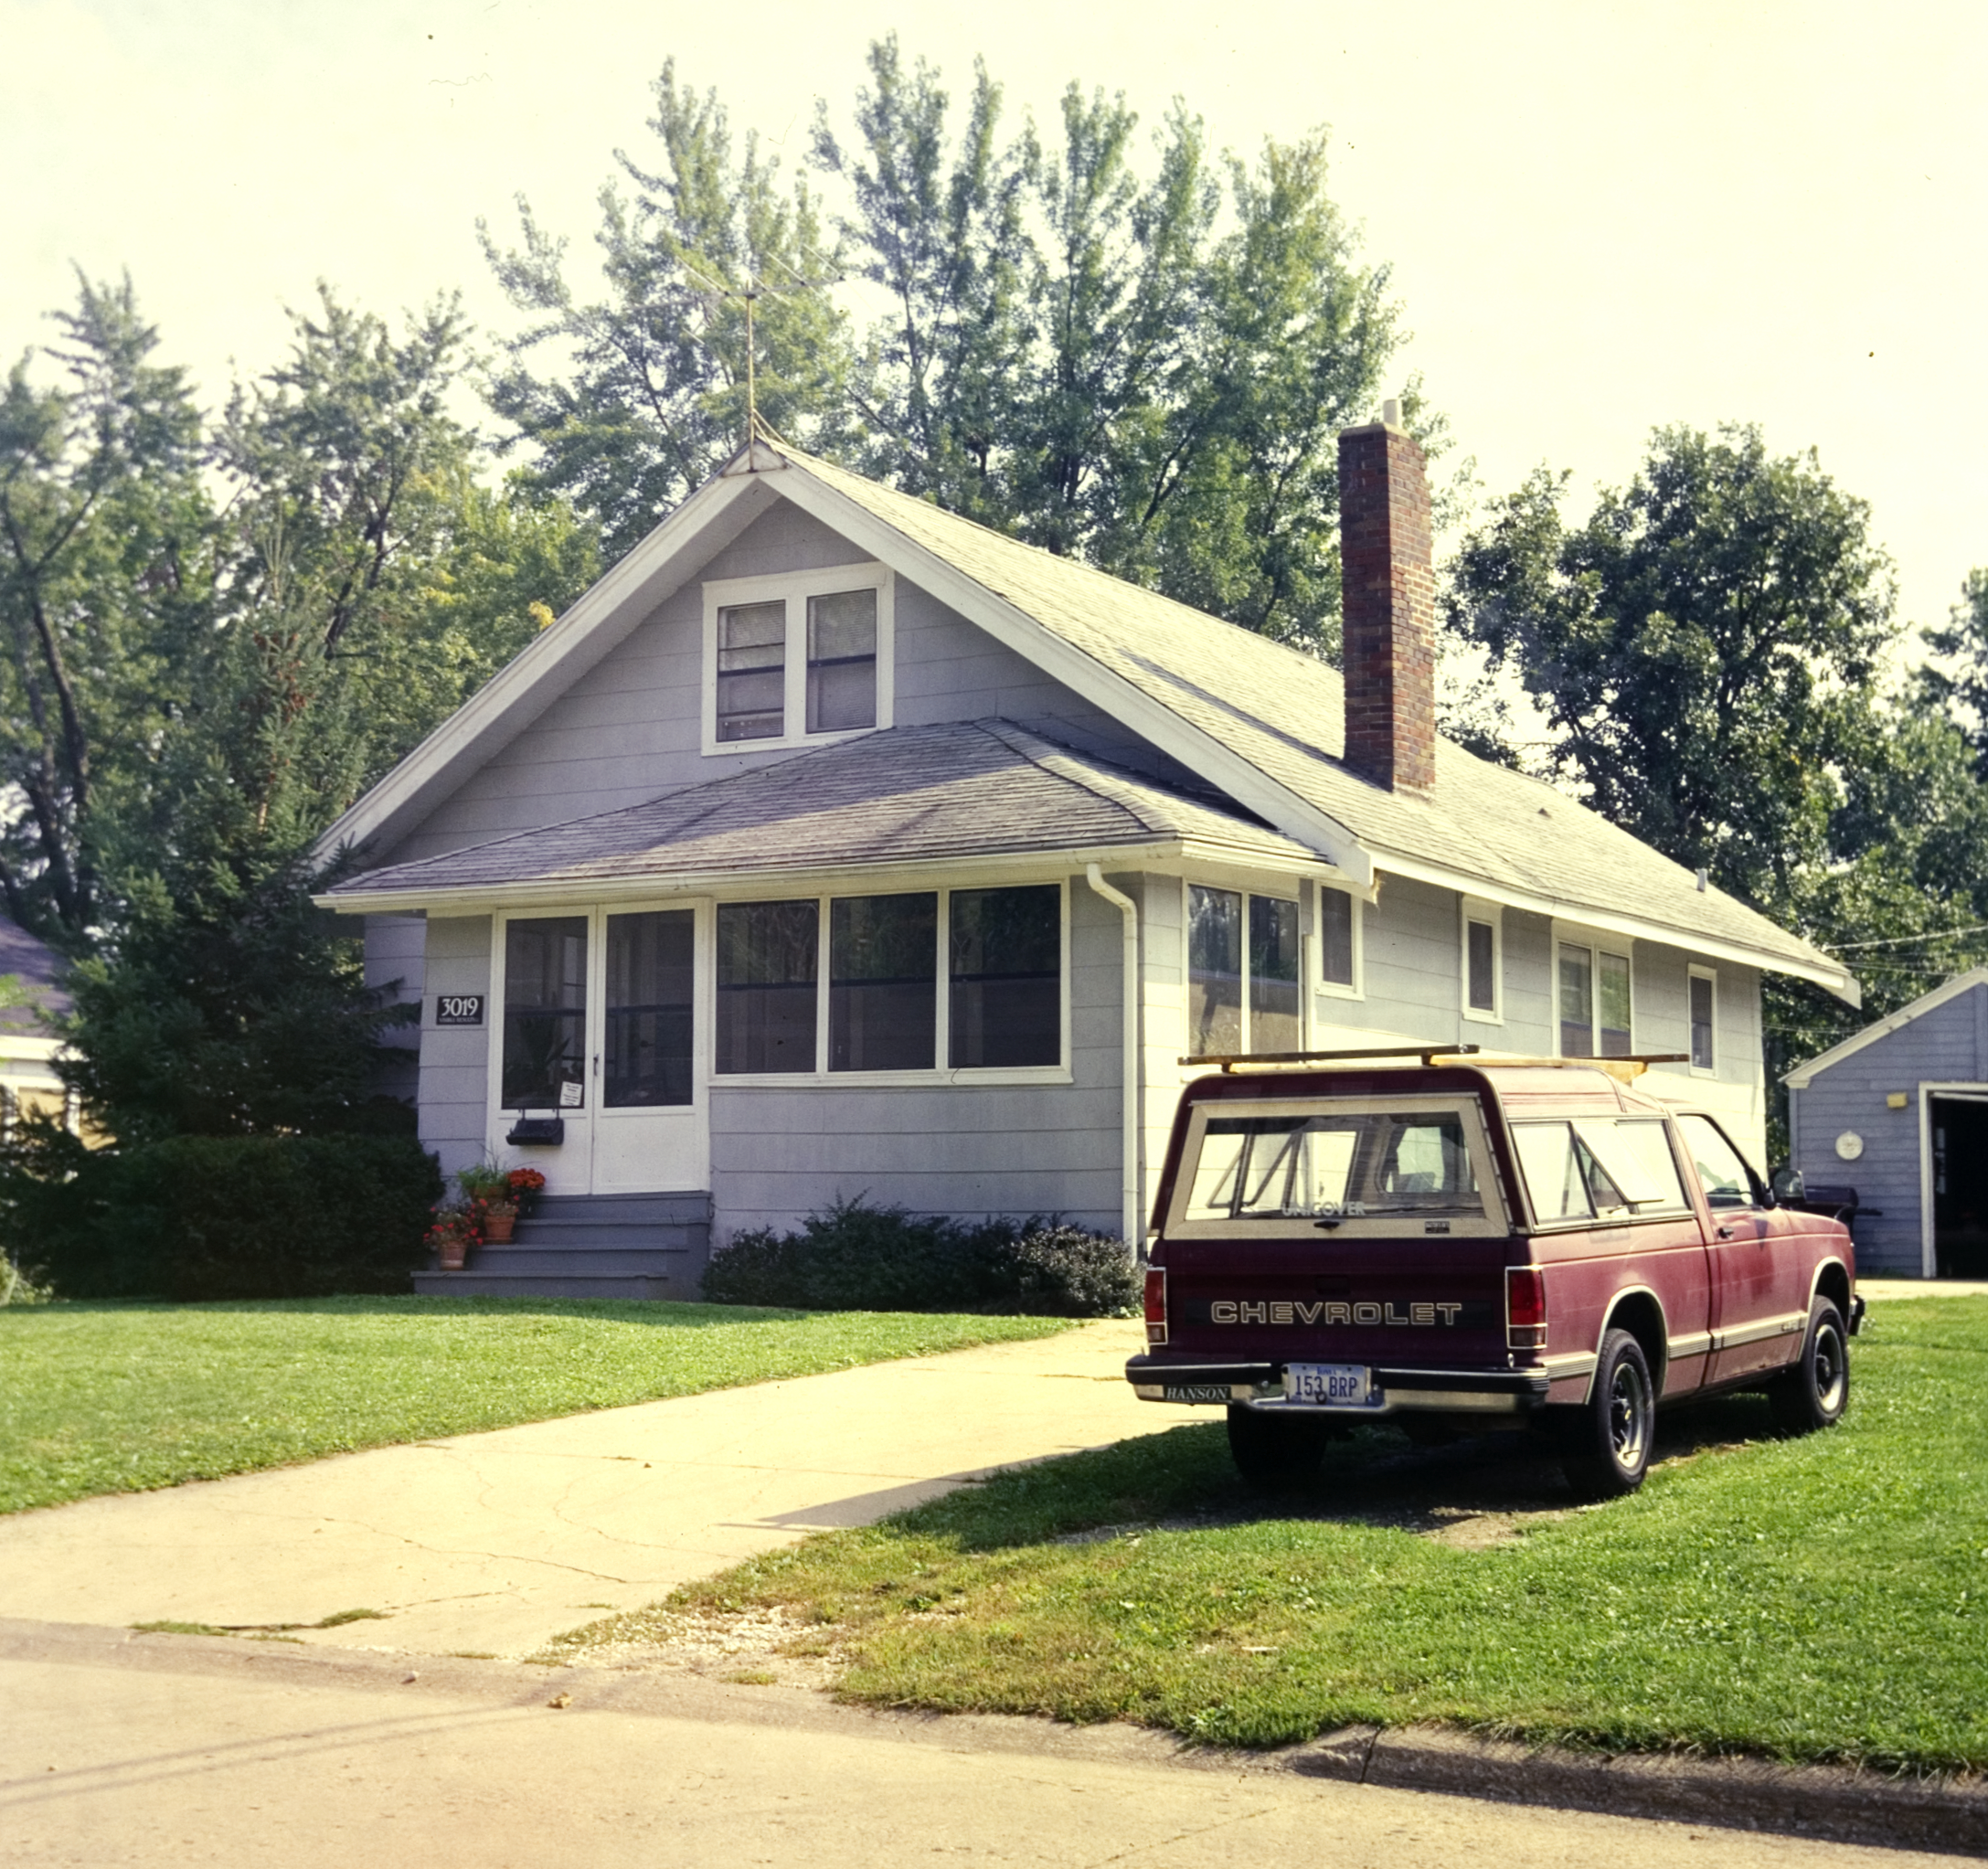
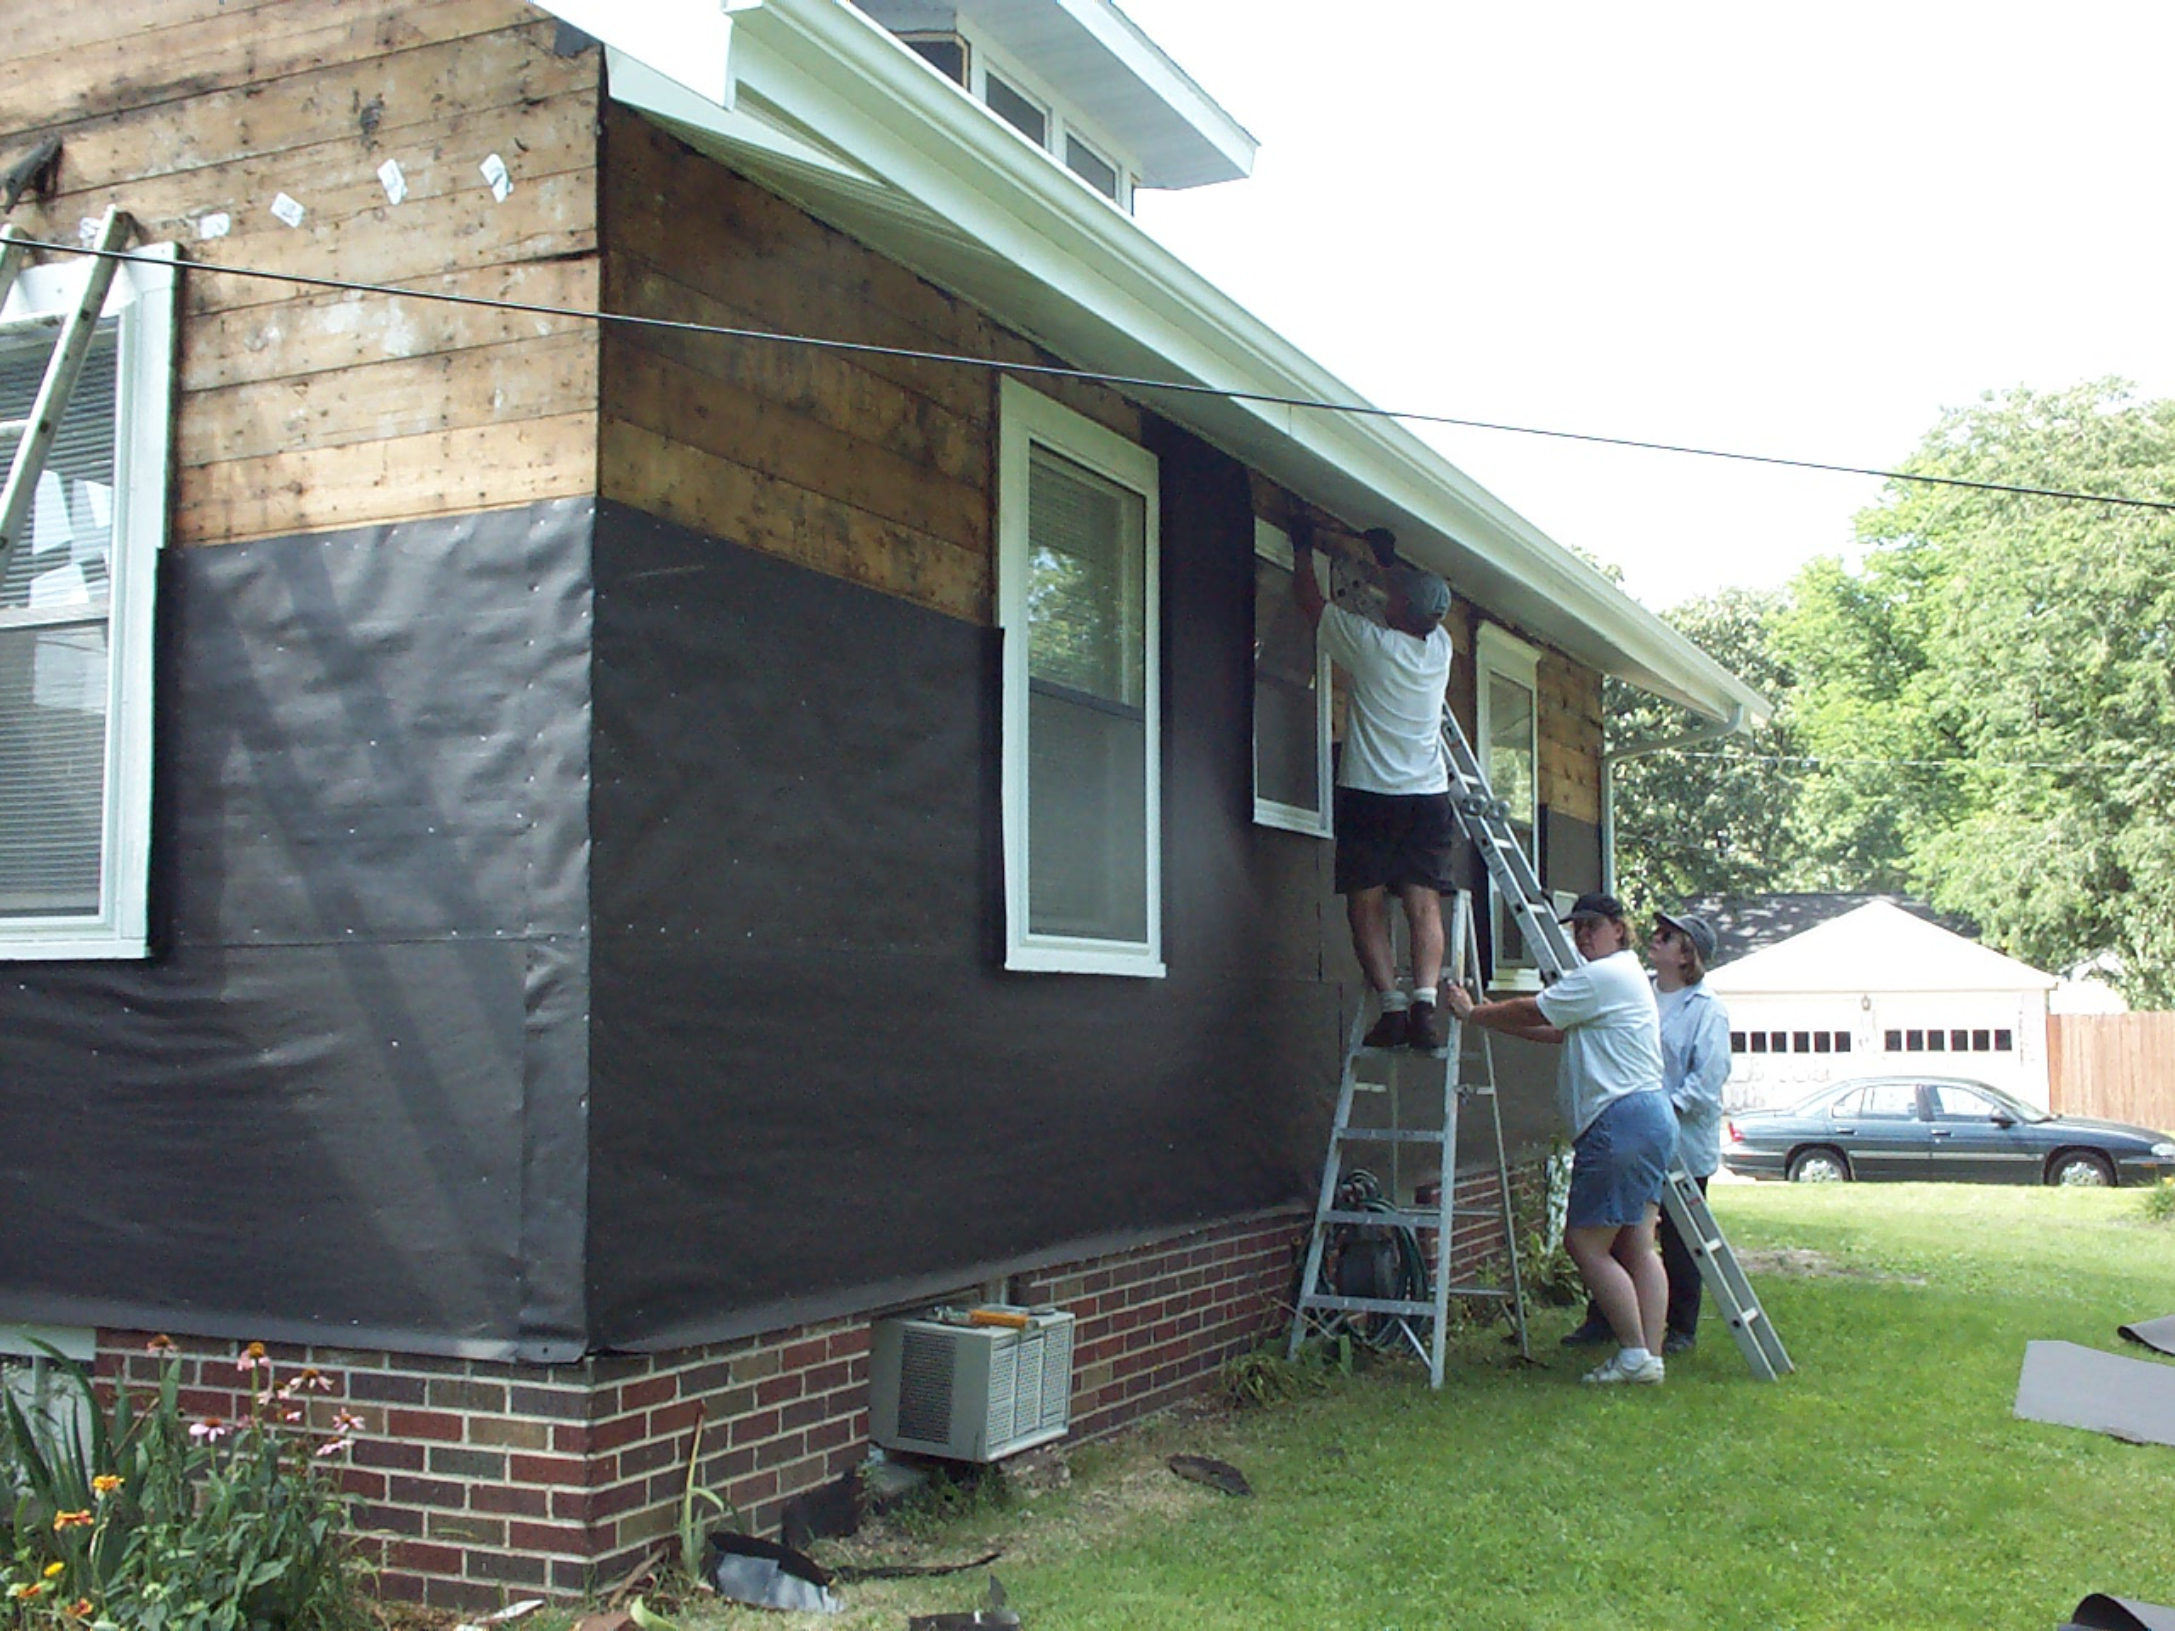
The house was sided with old fashioned brittle asbestos siding. While asbestos is dangerous in a powdered or fibrous form, these siding tiles were not and were a very sturdy siding material. However they were old and broken and the tiles were becoming unsightly. Butch and I decided to re-side the house in 1999. We did some checking around for prices and decided to do the work ourselves to save money. We mostly worked on vacation time and weekends through the whole process. Thus began the longest, and hardest, project I ever worked on!
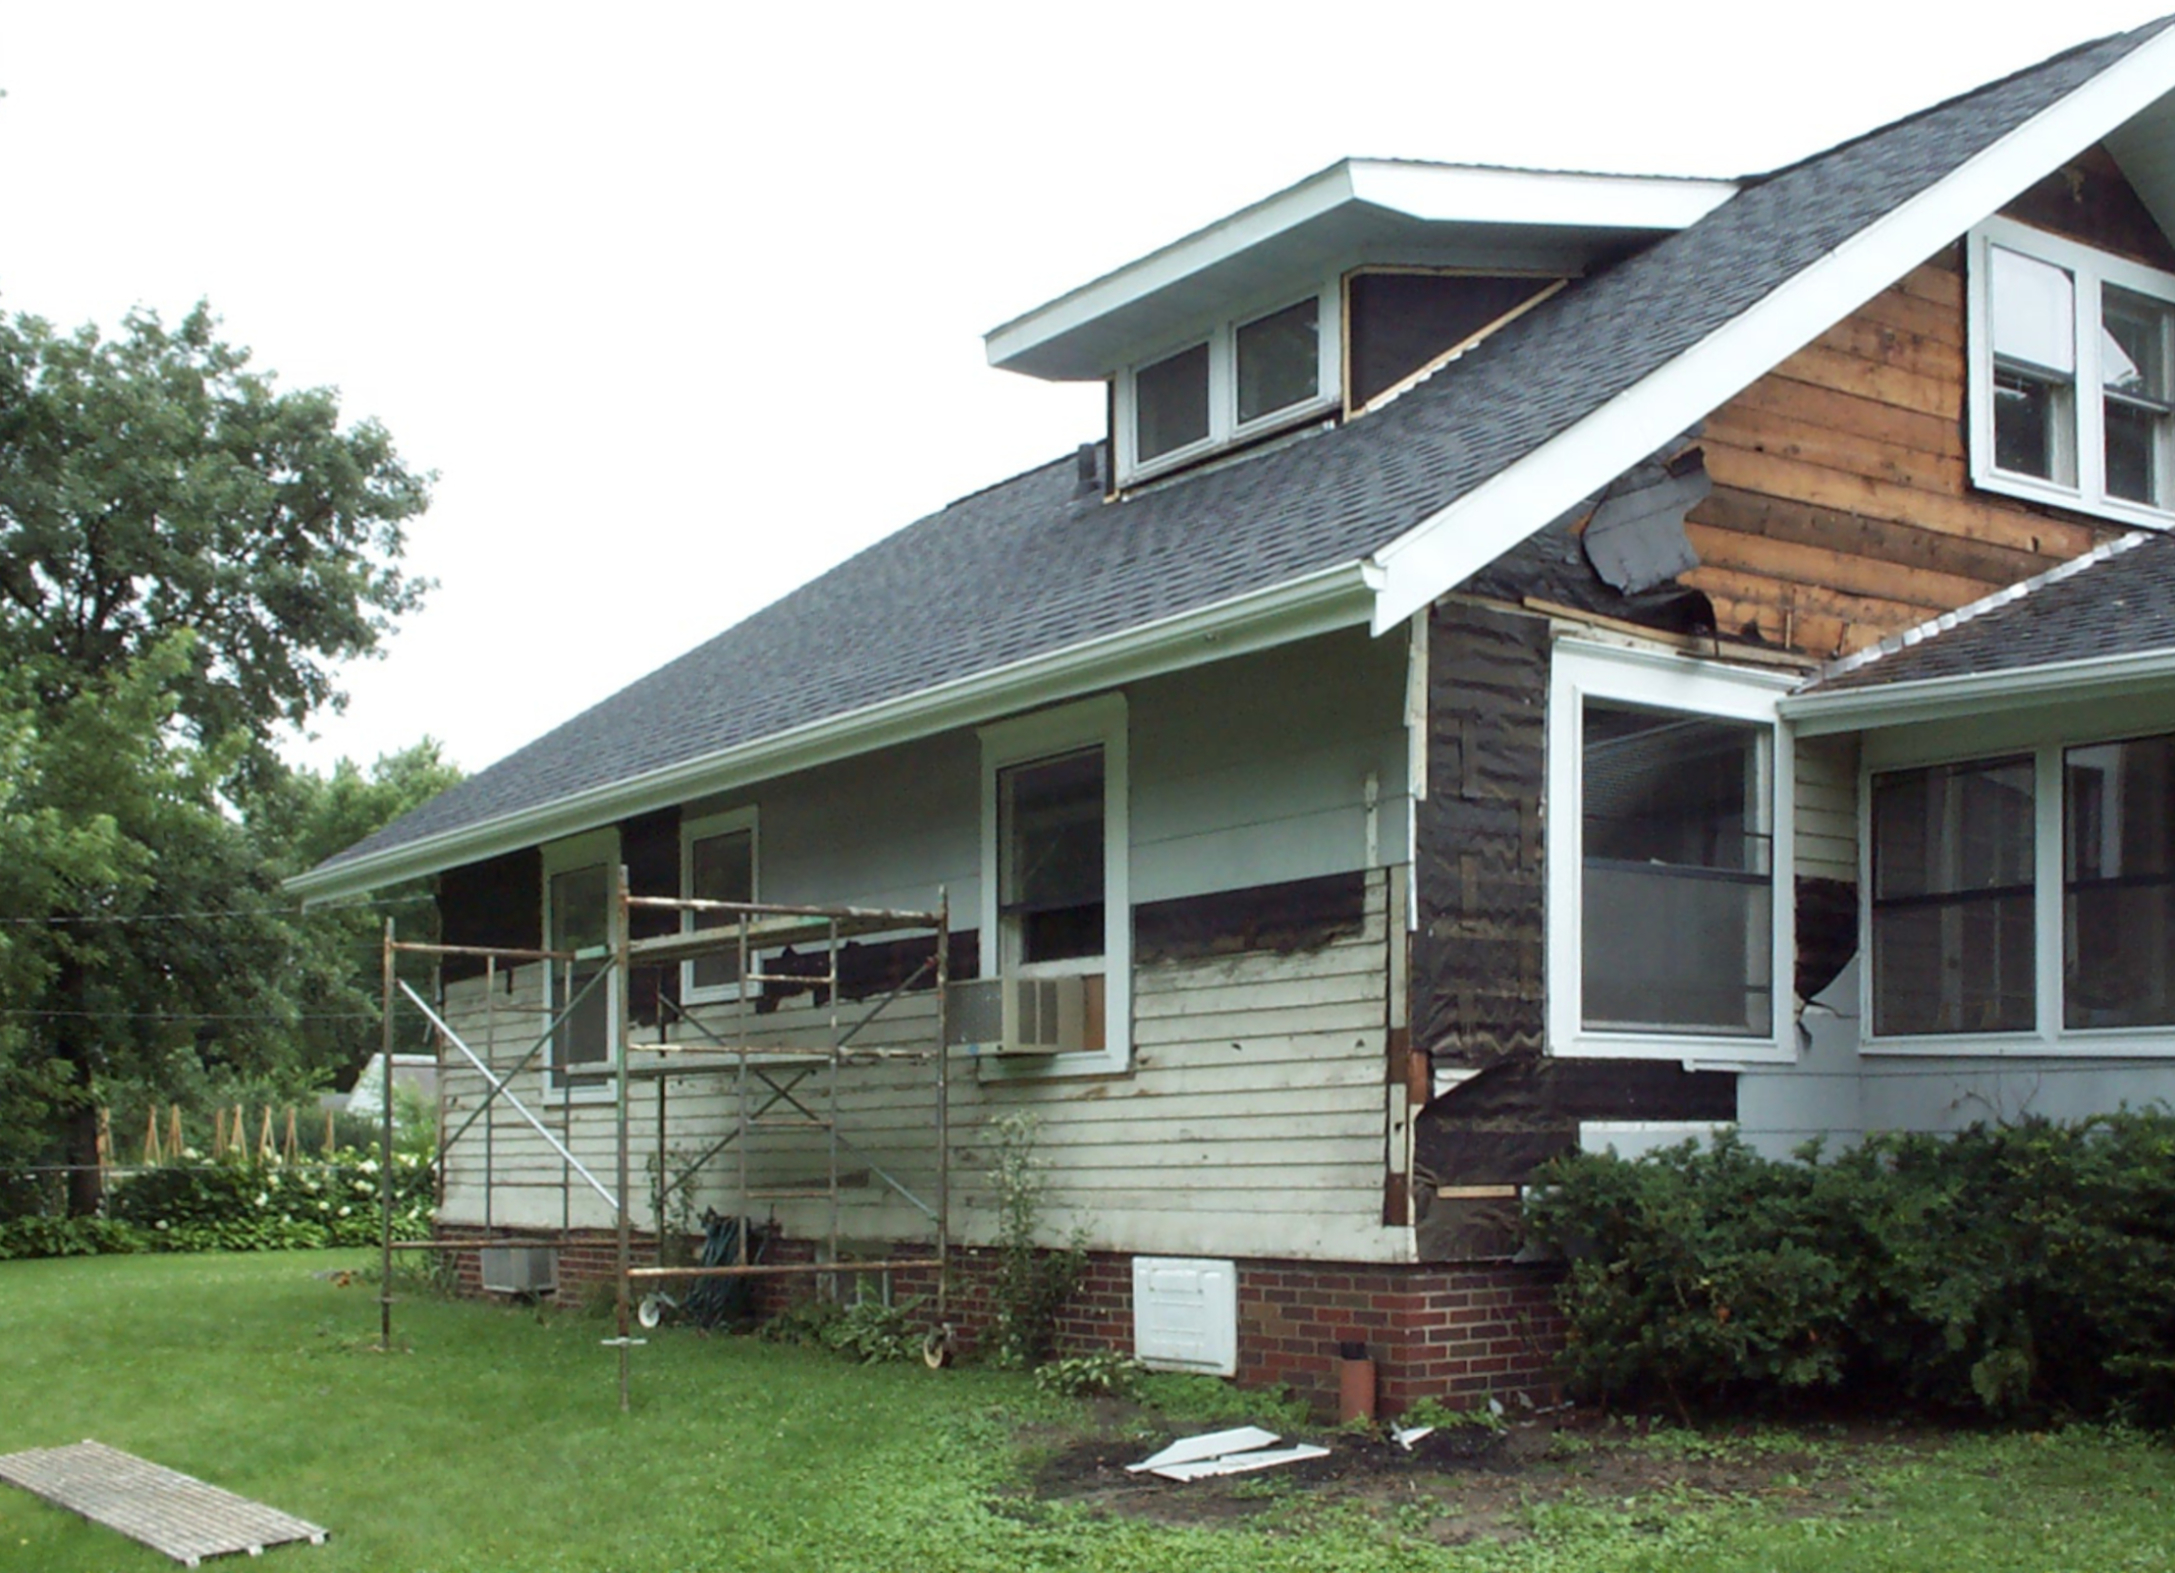
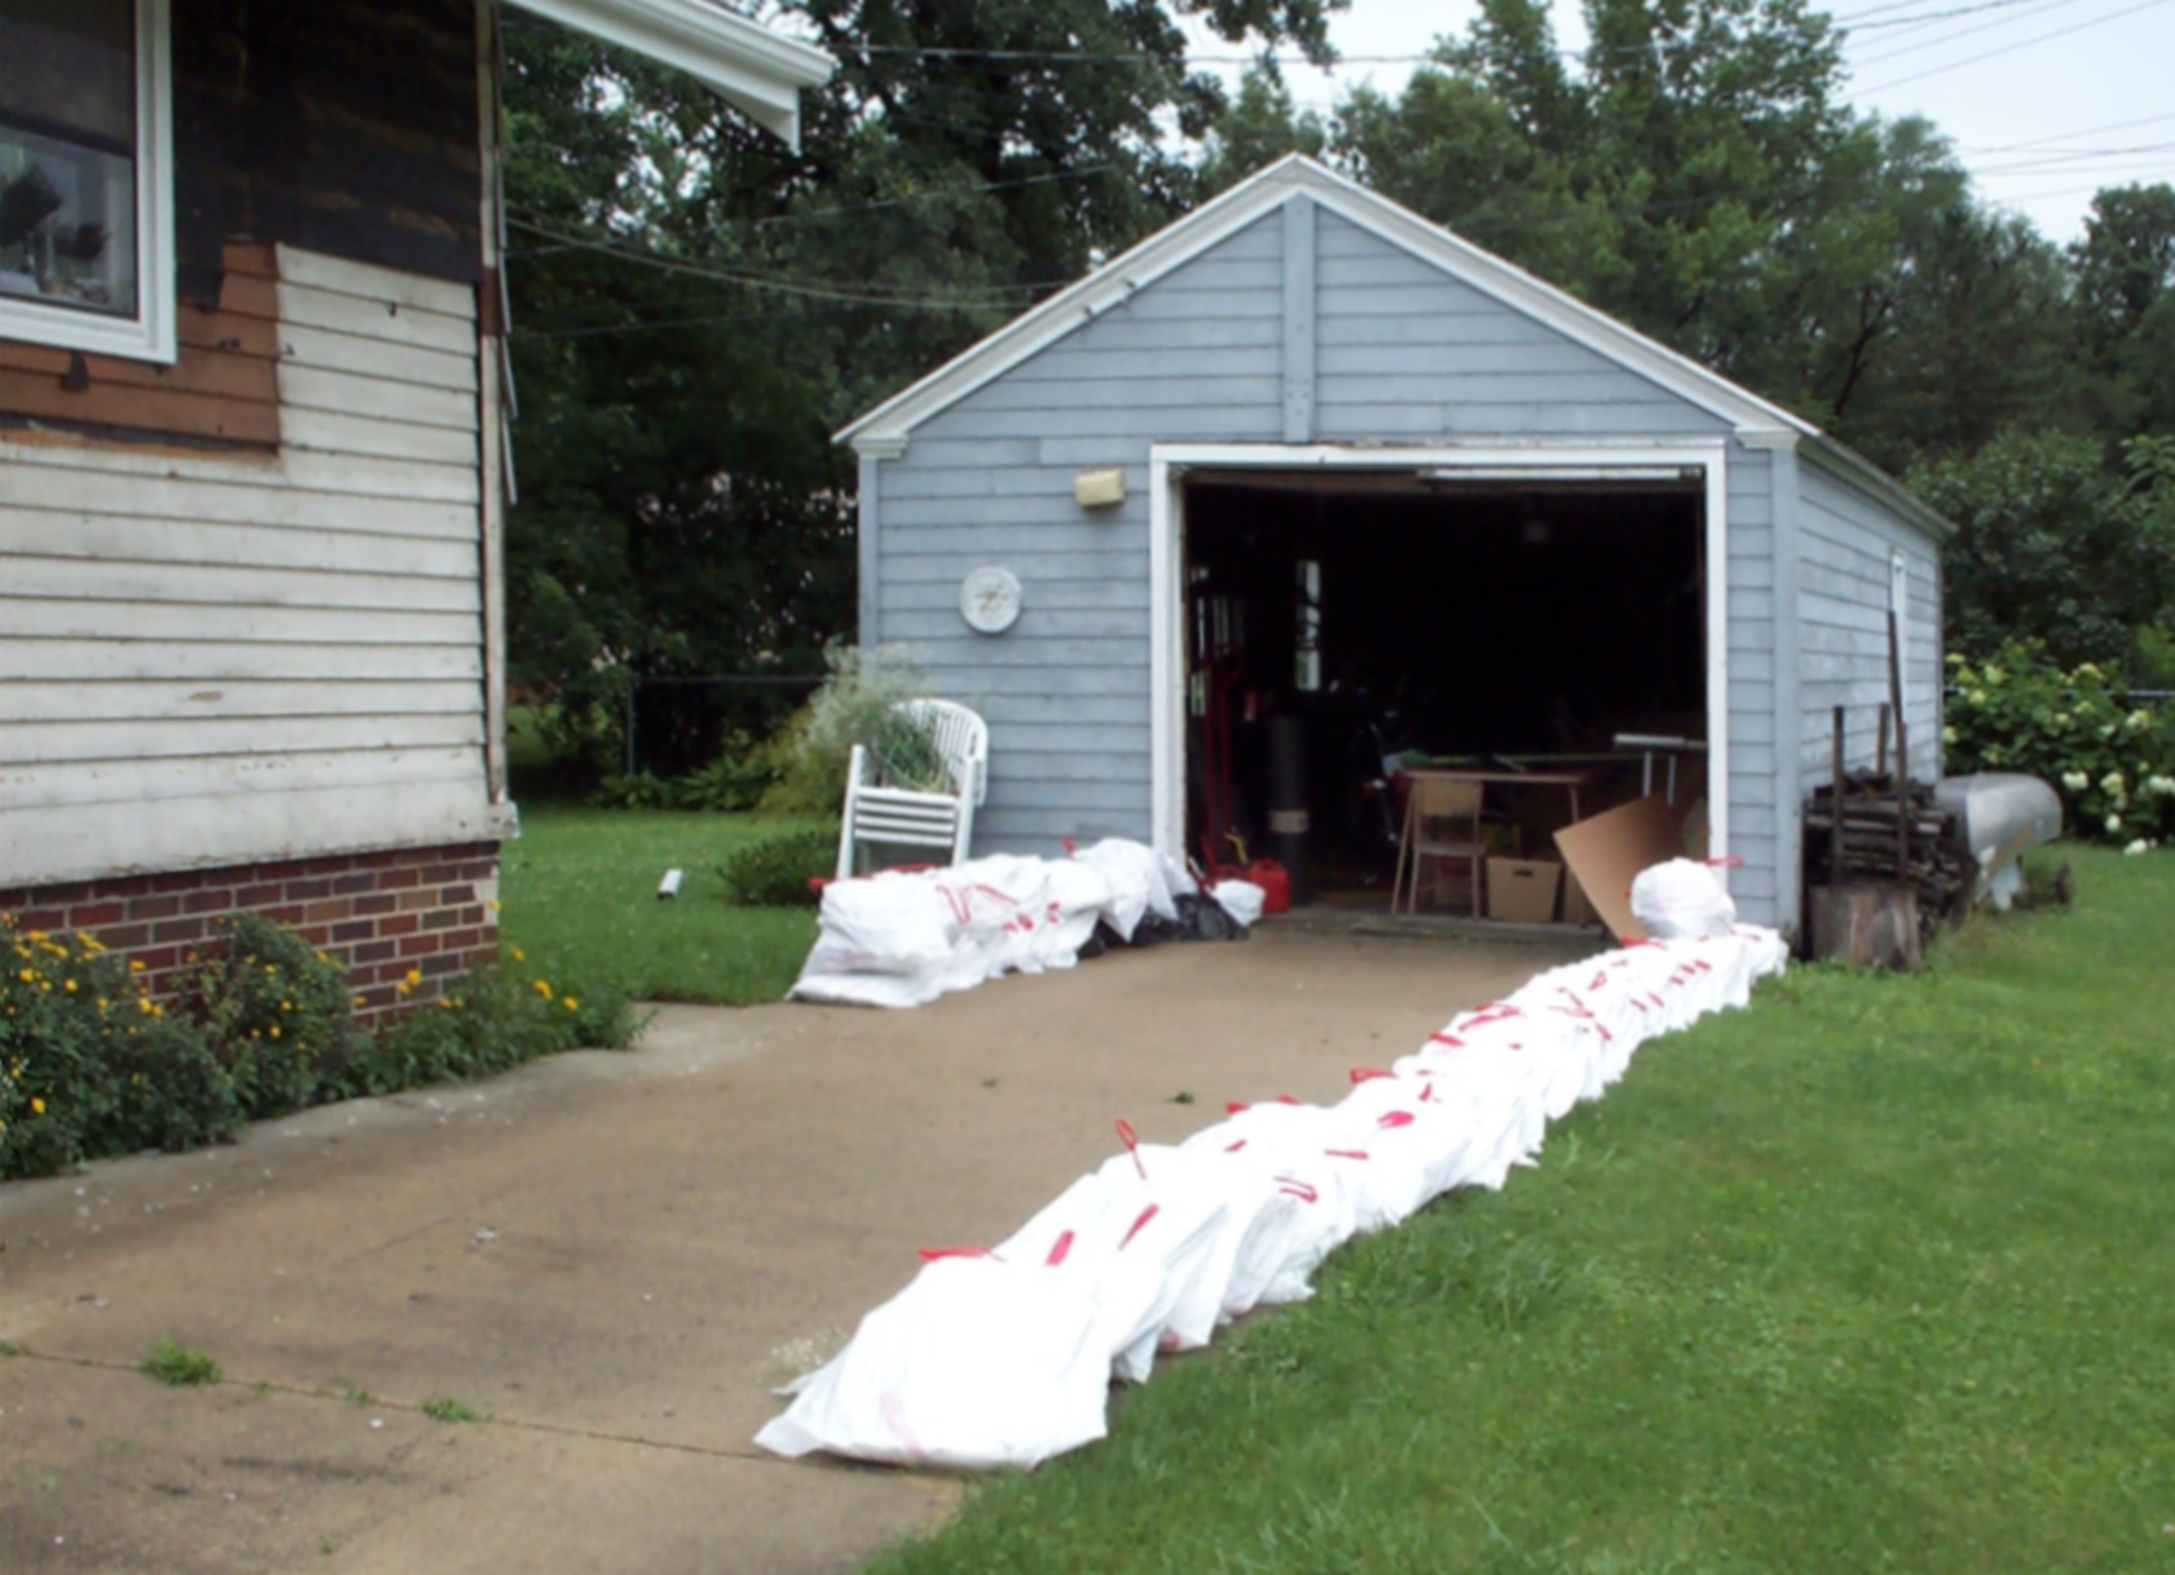
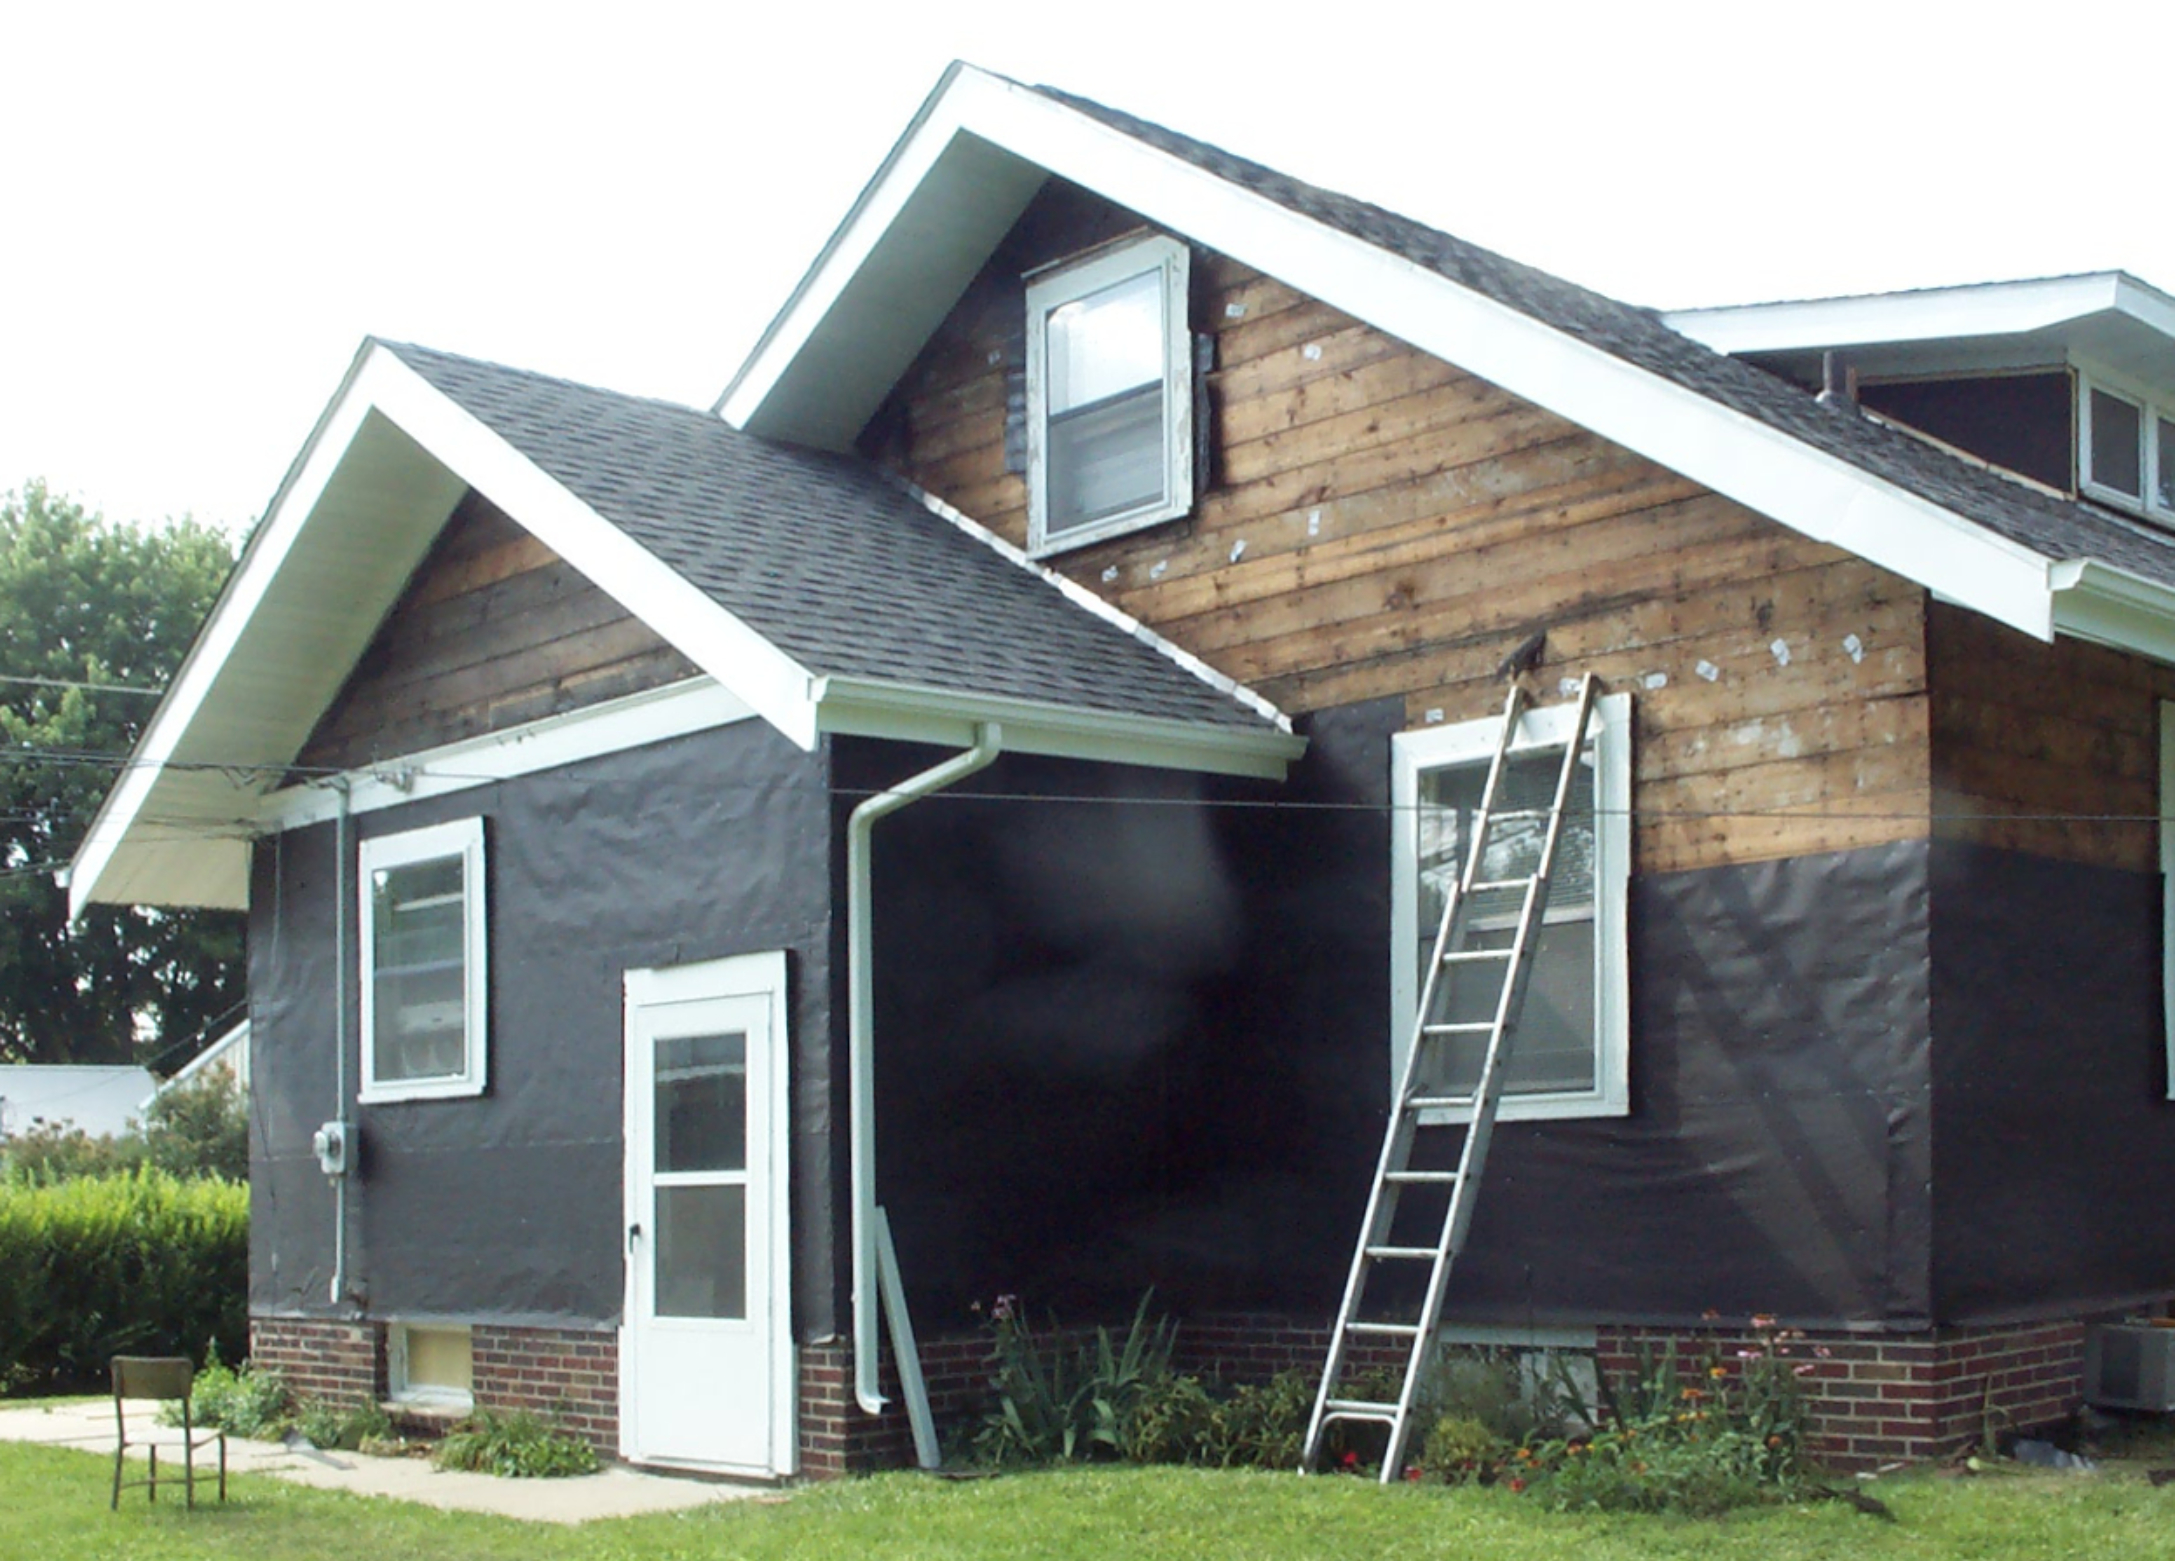
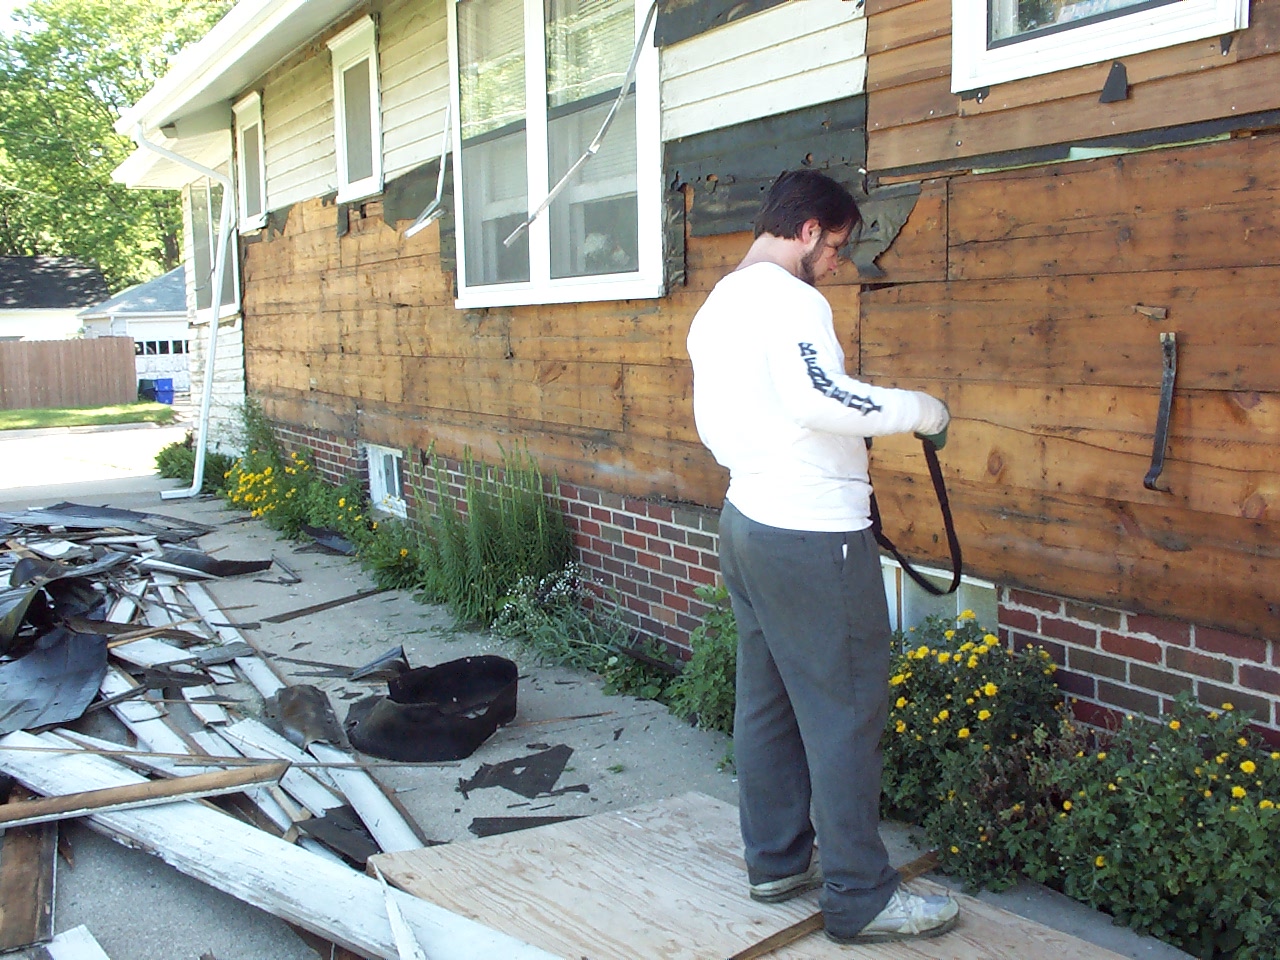
We rented scaffolding and began the work. This scaffolding was the best decision we made. It was worth every penny and made our work much safer. The first step was removing the old siding which was back breaking work. There are special rules for handling and disposing of asbestos. We had to get a special permit, then as we took the tiles off we had to do it with the least amount of breakage possible. That meant prying out the nails one by one (usually Butch), stacking the tiles, and handing them down to someone on the ground (usually me). Small stacks had to be packed in two heavy grade plastic bags and sealed with the tie strings. The bags were very heavy and when we had a truck load, had to be taken to the city dump for disposal. The dump had a special area for these materials and an additional dumping fee for each load. By the time we were finished with this phase, Butch and the gal in the booth at the dump, Annette, were on a friendly first name basis. Once the asbestos siding, tar paper, and old wooden siding were removed we could see the thick horizontal wood cladding the house which was rather beautiful in is own way.
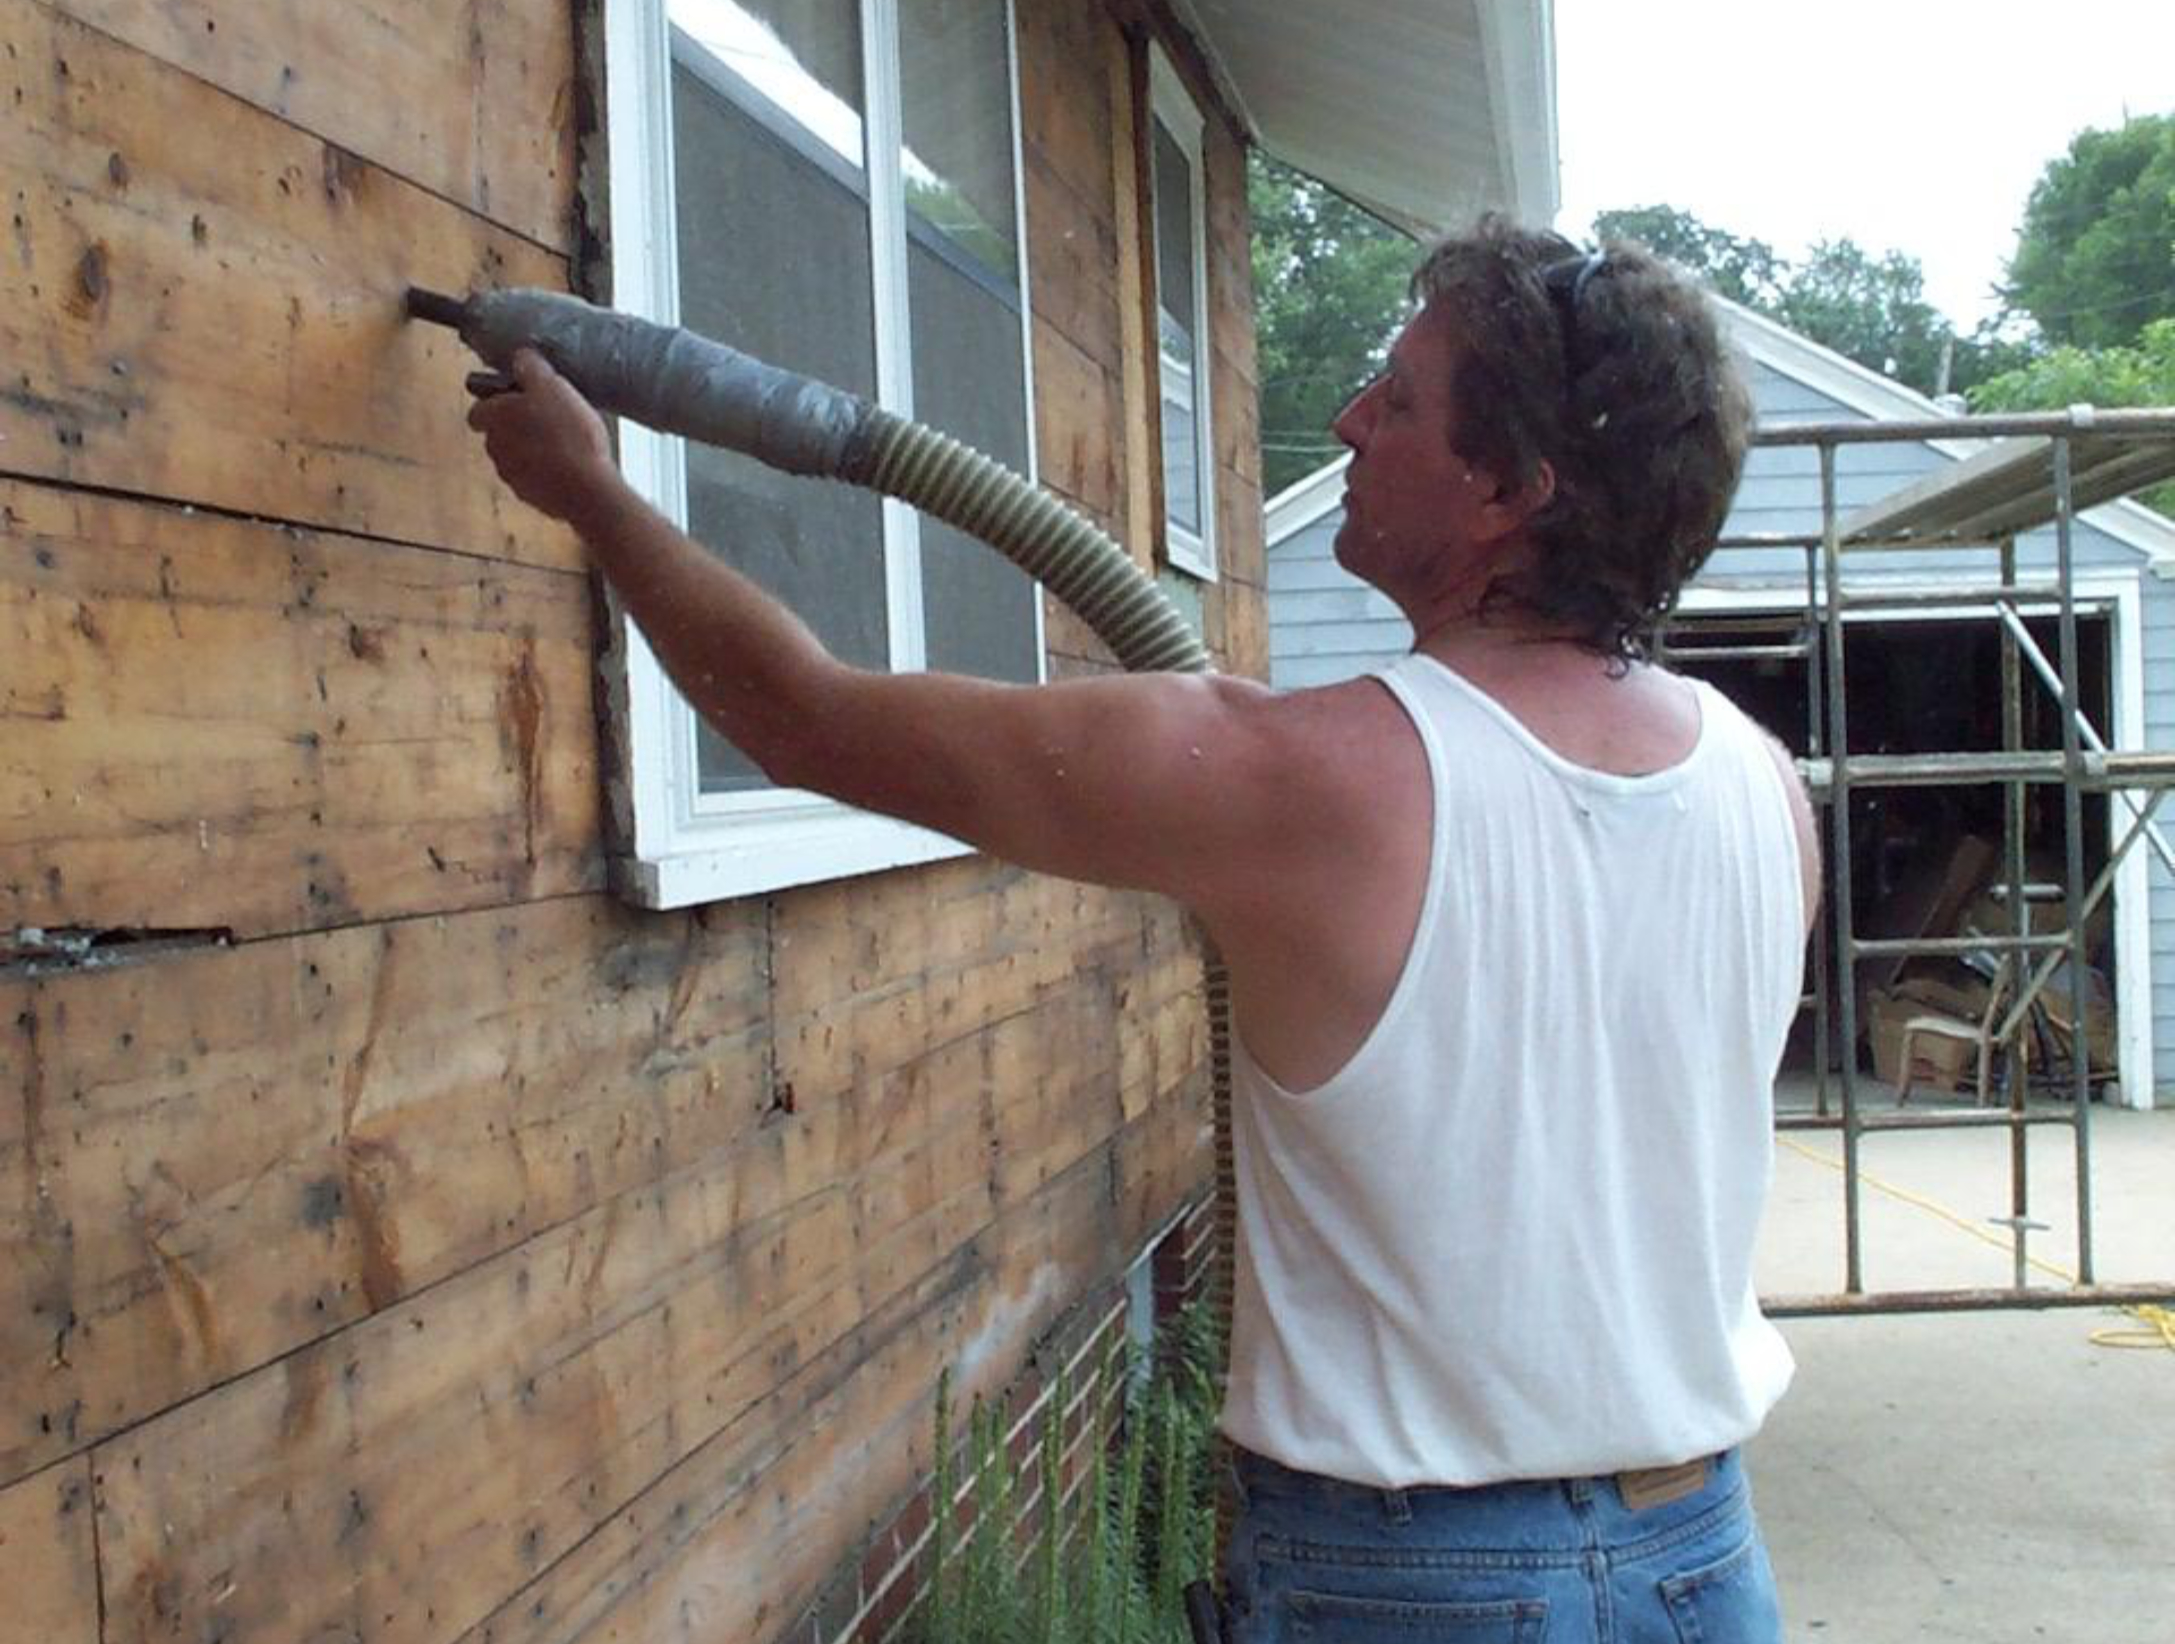
Since the house was bare, we decided to hire an insulation company to insulate the walls and attic of the house with blown in insulation. That was another great decision because along with a new furnace installed later, we were able to both heat and cool our house more economically. When that was finished, we wrapped the entire house in tar paper. This was very satisfying and nowhere near as hard as the tear off. By adding the tar paper in neat even strips over all sides it started to look better and was more consistent. This was a very good thing because the tar paper stayed visible for a very long time.
The next step was very time consuming because we decided to replace all of the white trim on the house with vinyl boards. Originally the house was built with wooden trim around all of the doors and windows and at the top of the first story as it met the roof. That meant another round of tear off and a lot of detail work to cut and apply the vinyl boards. Butch designed the trim to accent the look of a bungalow style which required wide trim boards with narrower pieces above and below to add character. All of the trim on the whole house had to be completed before any of the actual siding could be installed. This part took us the rest of the way through the fall of 1999 and into 2000. Many of the pictures from this phase were lost in a computer disc failure so are not documented. We worked so hard and were helped by many folks over the course of this project. Our nephew Seth, our friends Lynne and Doug, and my sister Linda and brother-in-law Dan were big contributors who volunteered all sorts of time.
The summer of 2000 was when we did the big push to put up the siding on the whole house and garage. Butch and I chose a 4 1/2” reveal tan siding for the first story and a 2” reveal in the same color for the second story. The two of us had to work as a team, measuring, cutting, and nailing each piece of siding onto the house which meant that sometimes I had to climb on the scaffolding to help. I am very uneasy with heights so this was especially challenging for me. My sister Linda, and brother-in-law Dan Knudsen came to spend a weekend and put up all of the siding on the highest peaks of the house and on the dormers. For those, a person had to crawl around on the roof and maneuver into tight spaces which, by this time, was pretty much beyond the two of us. I’m sure we were never able to thank them enough for going above and beyond like they did but we were so grateful. By then we were REALLY tired of the whole project since virtually all of our time away from our jobs during the warm part of the year was devoted to this work.
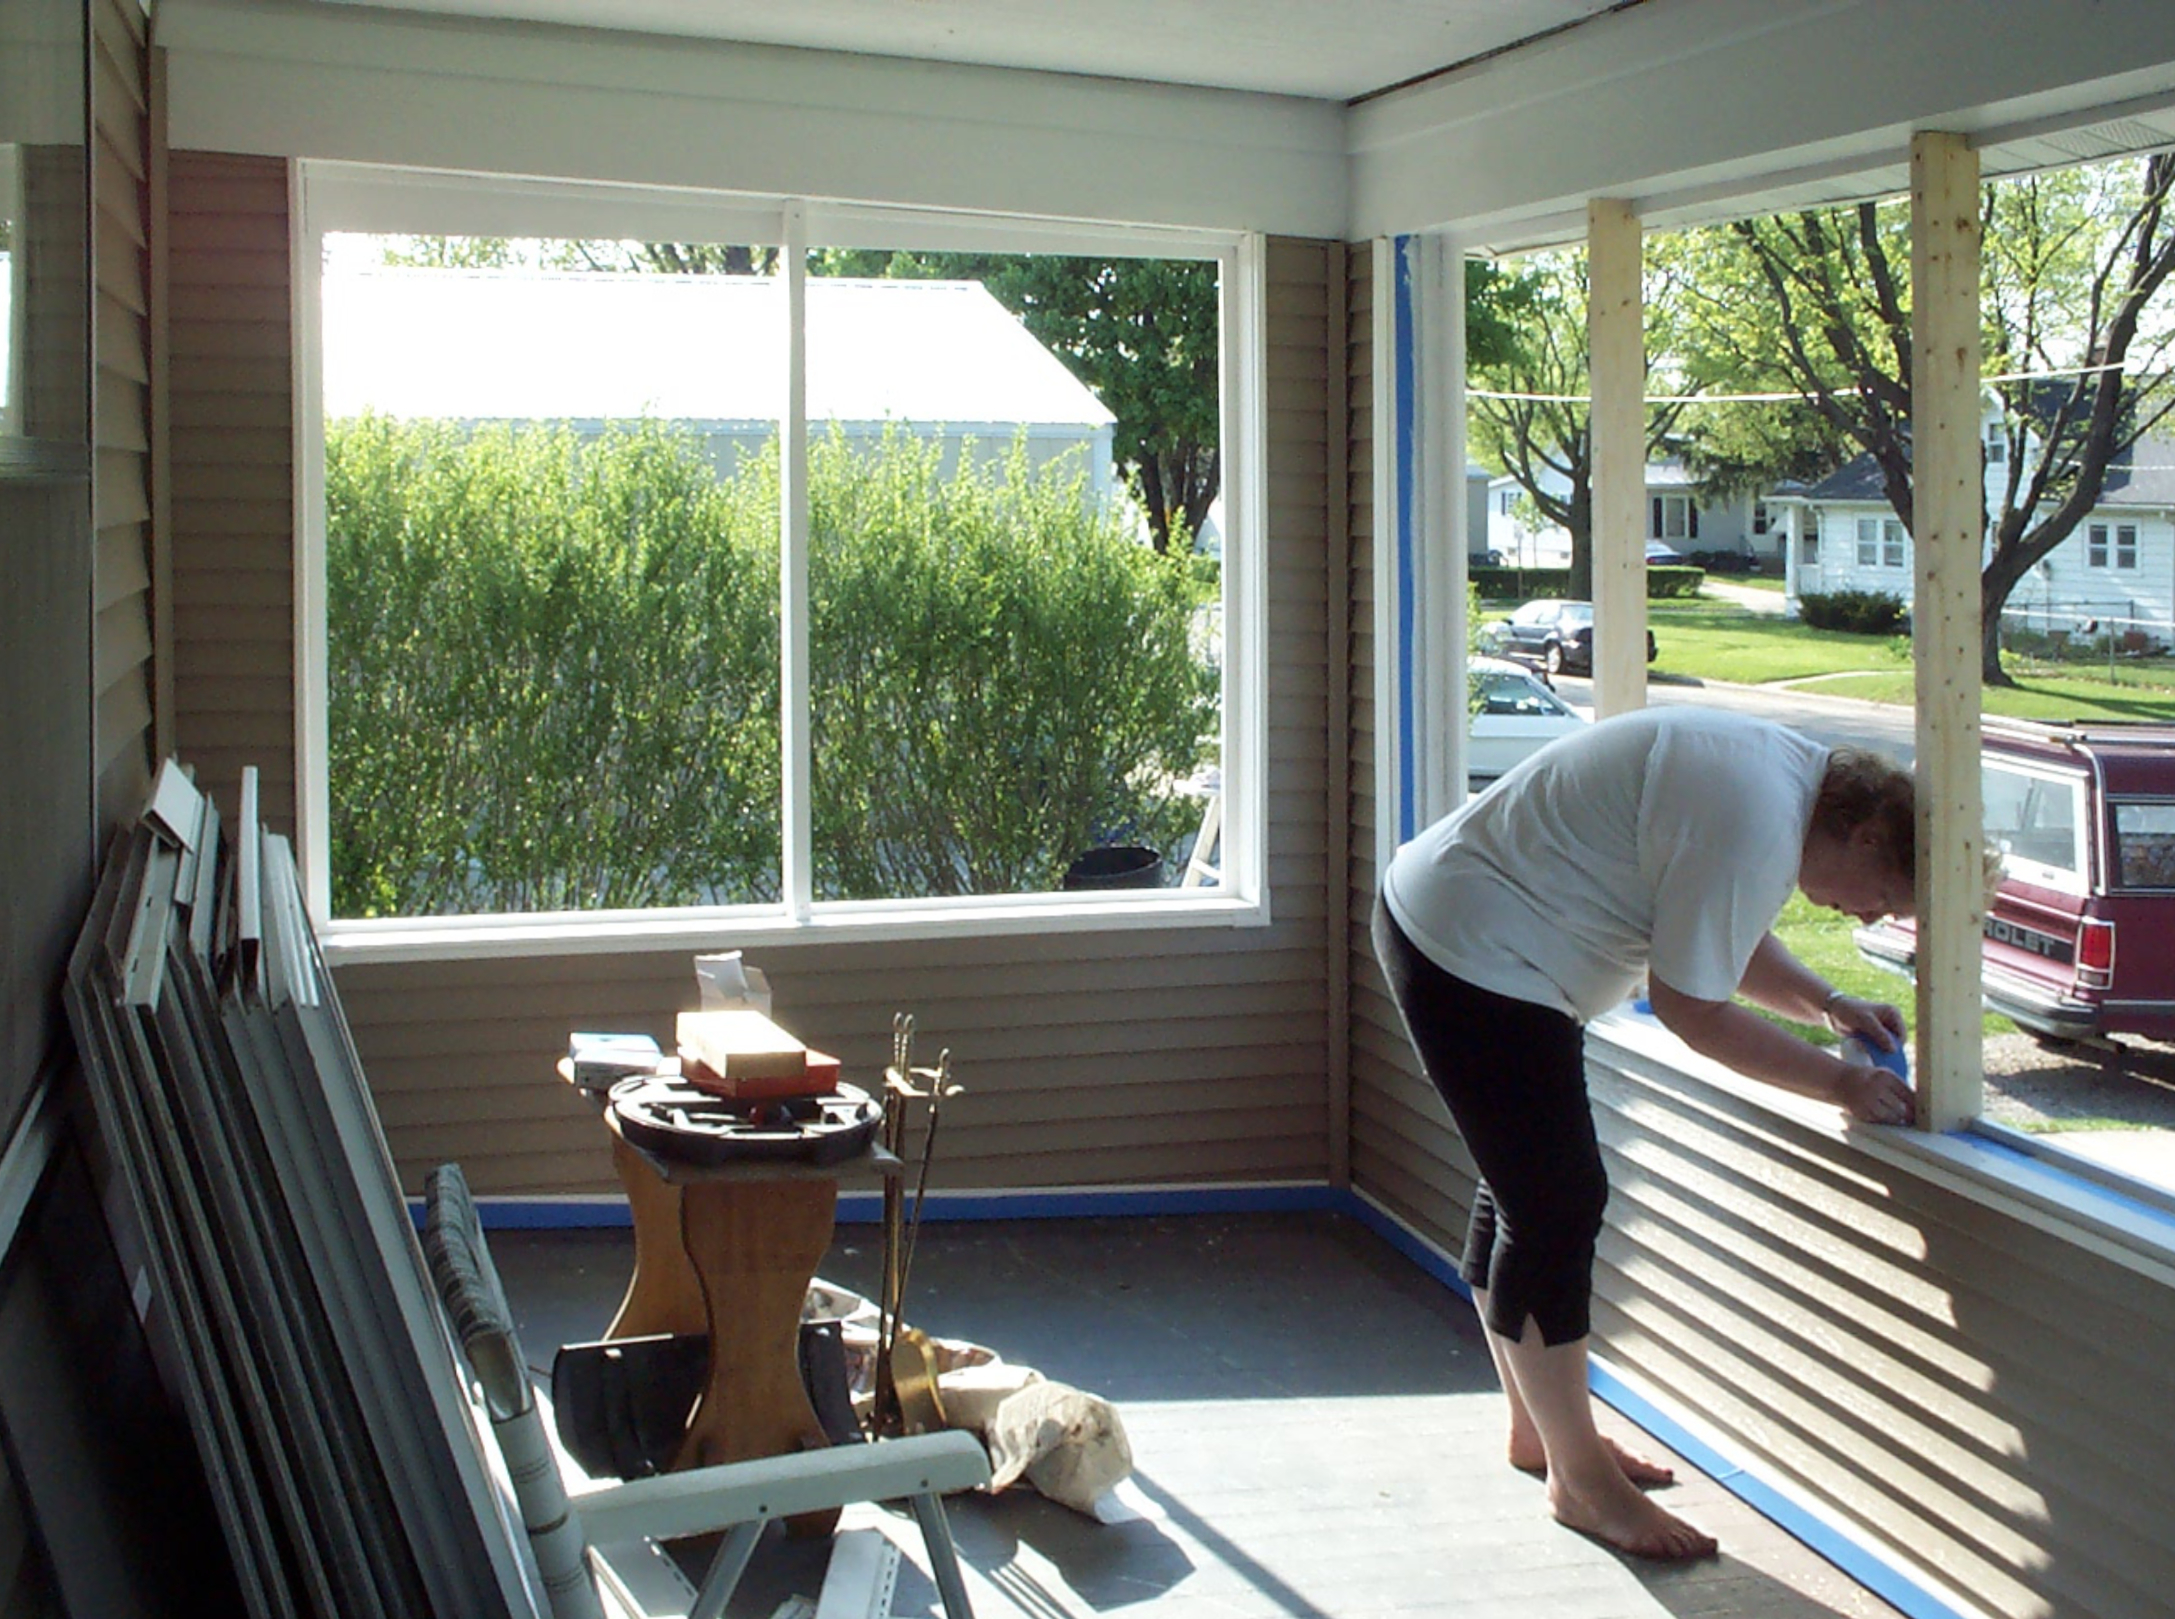
By the early summer of 2001 we were putting the finishing touches on the job. We put siding up on the inside of the porch and changed the double door on the front of the porch to a single. We also added a stylish half wall to the right of the front steps to accent the entrance. We painted the steps and the porch floor a dark maroon color then spruced up and reinstalled the porch windows.
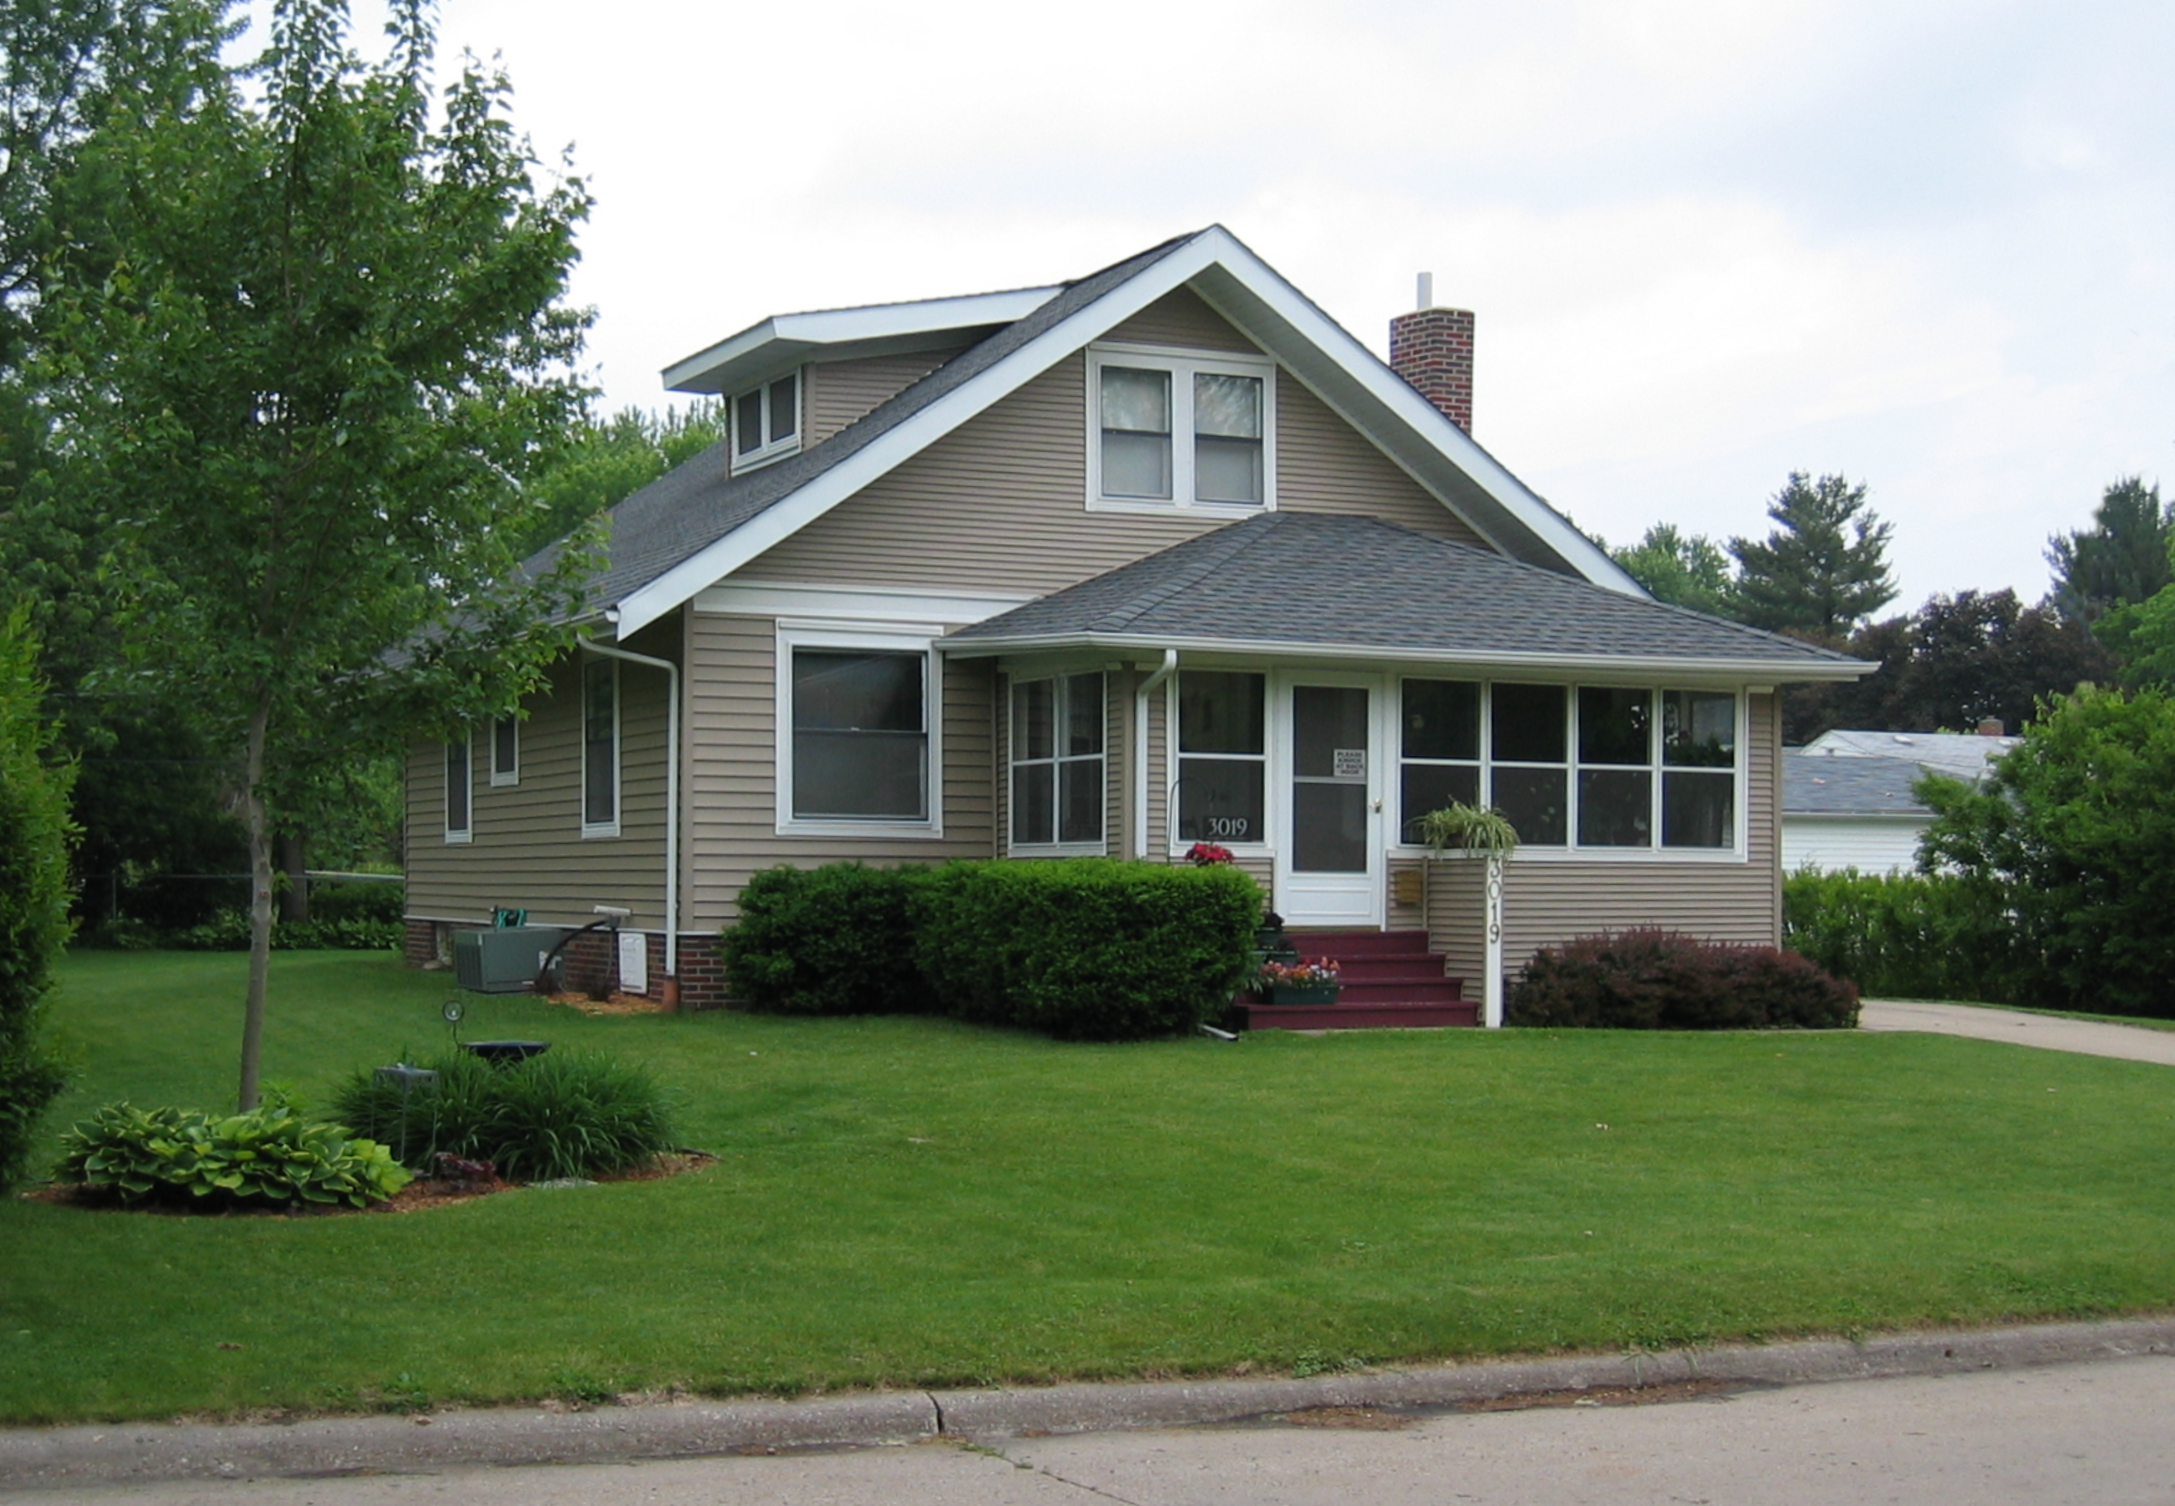
We loved the way the house turned out and in the end were very proud of the work we had done. By doing it ourselves, I am sure we saved thousands of dollars and ended up with a higher quality of workmanship and care than we might have if we had hired someone else. But we never dreamed it would take so long to finish and it was very hard work. Butch swears that his knees were ruined by standing on ladders and climbing on scaffolding across more than two years. Not to mention dedicating so much of our free time to this project. The thought of doing something like this again is certainly not in the cards. And that is the longest project I have ever worked on!
This post is part of the StoryWorth project that I am participating in.
At the ButchieBoy main page click the “StoryWorth” category to see the rest of the entries.
You both did an amazing job on this project. Kudos to you both for what you accomplished. Dan was the major helper from our family but I know I claimed a Christmas present that was a Saws All as mine, leaving Dan in the cold. What a bad wife!
I love power tools.